|
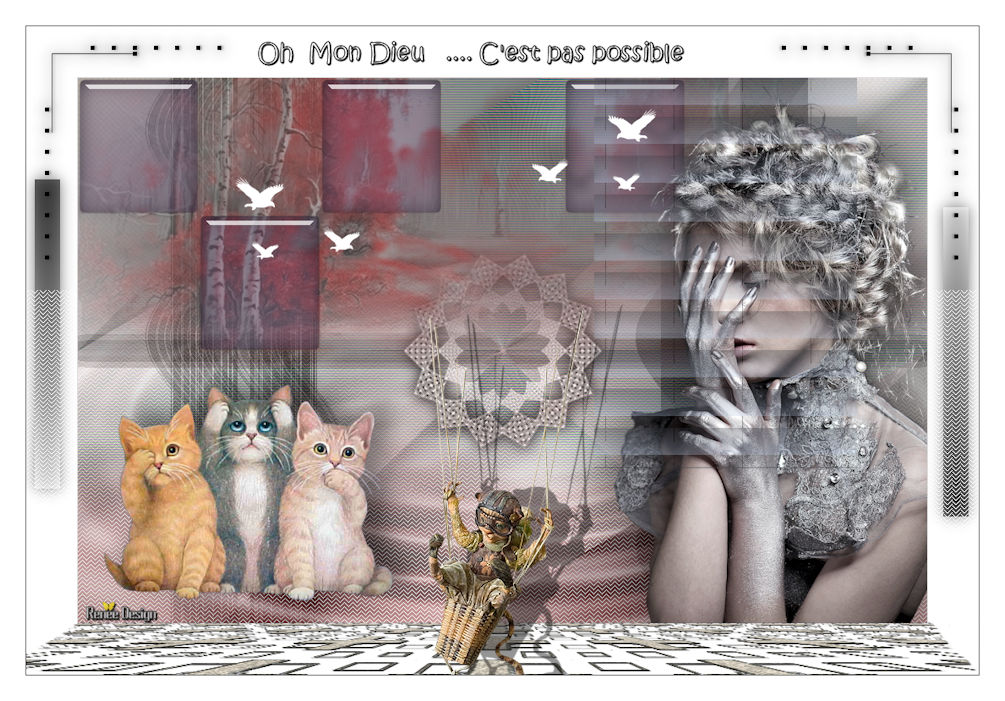
Let's start the lesson.
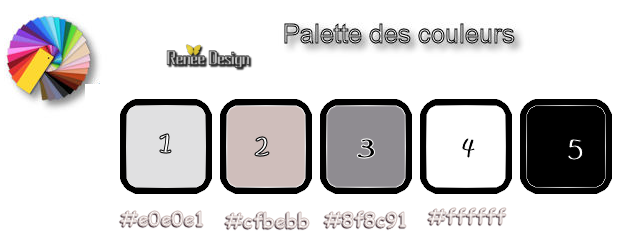
Used Colors
Preparation
- Color Palette:Set your Foreground color to#cfbebb -Set your Background color to #ffffff
-
Prepare a foreground/background radial gradient configured like this.

1.
File - New - Open a new transparent image of 1005 x 645 Pixels
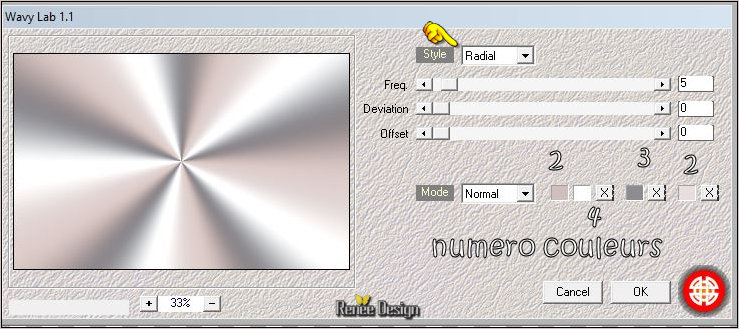
2.
Effects -Plugins – Medhi – Wavy Lab 1.1 (The three numbers correspond to the color palette )
3.
Effects- Distortion Effects- Twirl
55
4.
Adjust-Blur- Gaussian Blur: Radius 45
5.
Layers-Duplicate
6. Effects –Plugins -Unlimited – Tramage -
Heightline..with these settings 90/60/47
7.
Layers-Properties-Set the Blend Mode to " Soft Light " -Set the Opacity of this layer to 67%
8. Layers- Merge- Merge Down
9. Layers-Duplicate
10. Effects
–Plugins – Simple – Horizontal grain
11. Effects- Edge Effects- Enhance More
12.
Layers-Properties-Set the Blend Mode to "Multiply"
13. Layers- Merge- Merge Visible
14. Layers-Duplicate
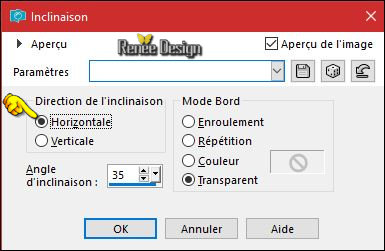
15. Effects
–Geometric- Effects –Skew use the settings below
16. Effects – 3D Effects – Drop Shadow with these settings 1/1/32/55 black
17. Layers-Duplicate
18. Image - Mirror - Mirror Horizontal (Image - Mirror in older versions of PSP)
19.
Layers-Properties-Set the Blend Mode to " Soft Light "
20.
Layers- Merge- Merge- Down
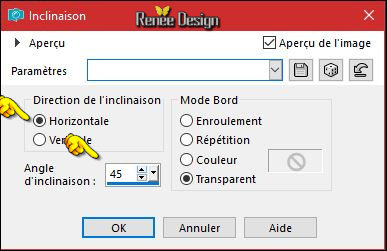
21. Effects –Geometric- Effects –Skew use the settings below
22. Effects – 3D Effects – Drop Shadow with the same settings
23. Layers- New Raster Layer
24.
Selections –load/save selection –load selection from disc and select my selection:
‘’OH_pas_possible_1’’
25. Activate Flood Fill Tool  and fill the selection with the gradient and fill the selection with the gradient
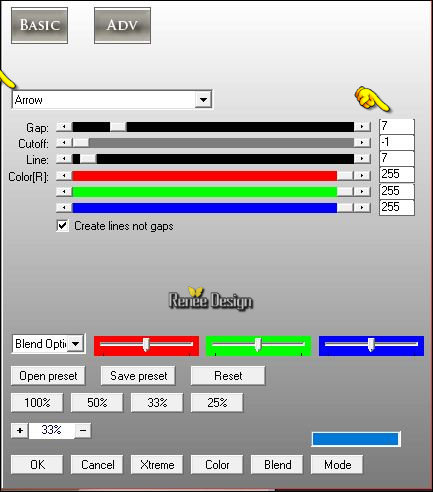
26. Effects
–Plugins –AP[Lines] Silverling use the settings below
27.Effects- Edge Effects -Enhance
Selections- Deslect All
28. Effects – 3D Effects – Drop Shadow with these settings 0/0/17/25 black
29. Effects
–Plugins – Simple – 4 way Average
- Activate the bottom layer in the layer palette =(merged)
30.
Adjust-Blur- Gaussian Blur: Radius 85
Stay on this layer
31.
Selections –load/save selection –load selection from disc and select my selection:
‘’OH_pas_possible_2’’
32.
Selections- Promote Selection to Layer
- Layers- Arrange- Bring to Top
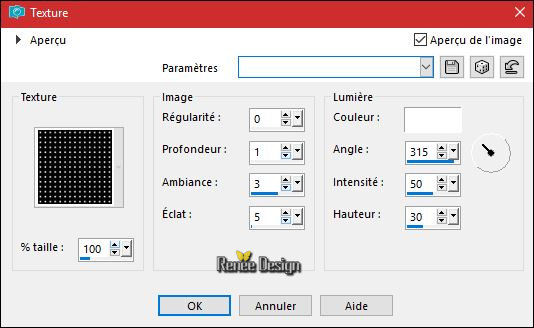
33. Effects
– Texture Effects -Texture "Motif Grid"use the settings below(Corel_15_006)
Selections- Deslect All
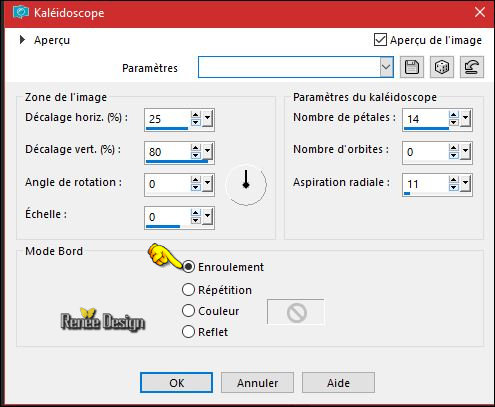
34. Effects
–Reflection Effects- Kaleidoscope use the settings below
35. Effects – 3D Effects – Drop Shadow with these settings 1/1/100/18 black
36. Layers-Duplicate
- Images –
Resize to 65 % (resize all layers not checked)
37.
Layers-Properties-Set the Blend Mode to " Screen"
- Color Palette:Set your foreground color to
#8f8c91
38. Layers- New Raster Layer
39.
Selections –load/save selection –load selection from disc and select my selection:
‘’OH_pas_possible_3’’
40. Activate Flood Fill Tool / settings of your paint pot to 50%
(do not forget to reset the settings of your paint pot to 100%)
– Activate Flood Fill Tool and fill the selection with the foreground color
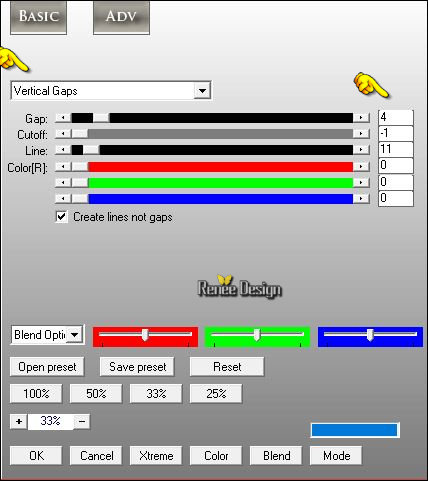
41. Effects
–Plugins – AP [Line] Silverling use the settings below
Selections- Deslect All
42.
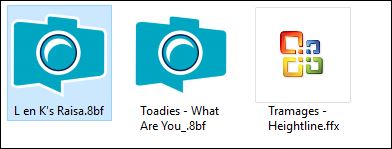
Effects –Plugins– Toadies – What are you 24/0
43. Effects
–Plugins - L &K ‘ Raisa 55/0
44. Effects
– Edge Effects-Enhance More
45. Layers-Duplicate
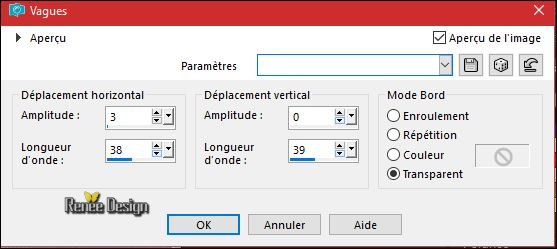
46. Effects
– Distortion Effects-Wave use the settings below
47.
Layers- Merge- Merge-Down
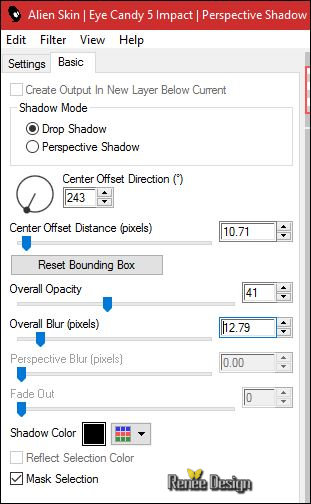
48. Effects
–Plugins – EyeCandy 5 Impact – Perspective
Shadow use the settings below
49.
Layers-Properties-Set the Blend Mode to " Difference" –Lower the Opacity of this Layer to 65%
50. Open your tube ‘’arbres.png ‘’
- Edit - Copy- Activate your work -Edit - Paste as a new layer
- Effects- Image Effects-Offset with these settings: H = 0 and V = 170
51. Open the Image ‘’ Image_1_Oh_p_possible’’
- Edit - Copy- Activate your work -Edit - Paste as a new layer
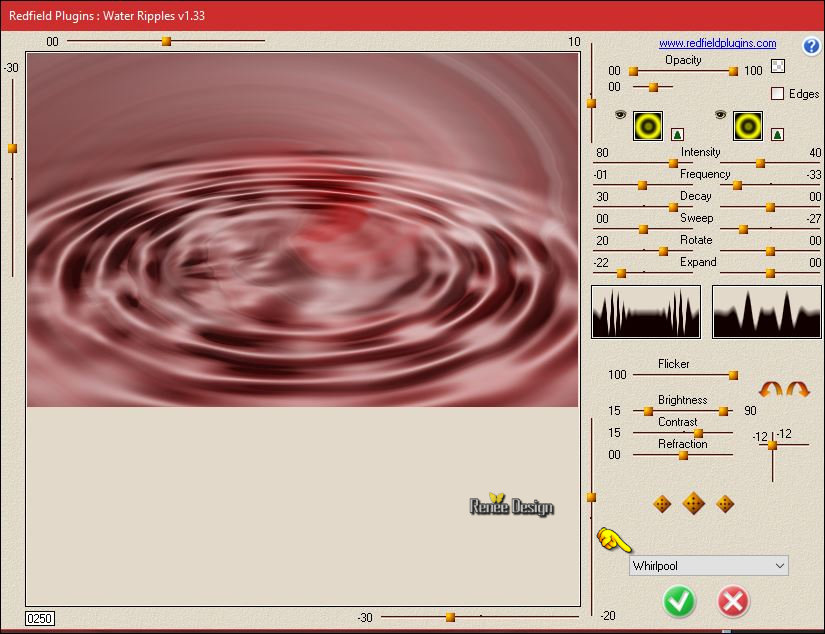
52.
Effects-Plugins – Redfield – Water Ripples use the settings below
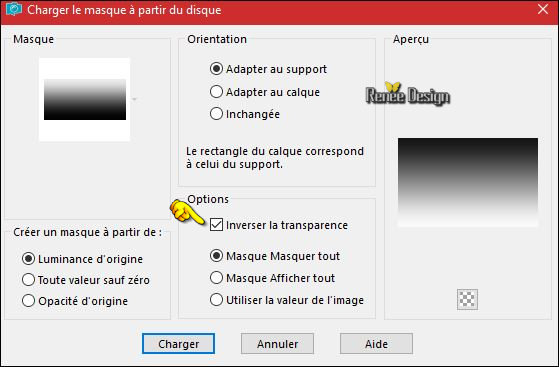
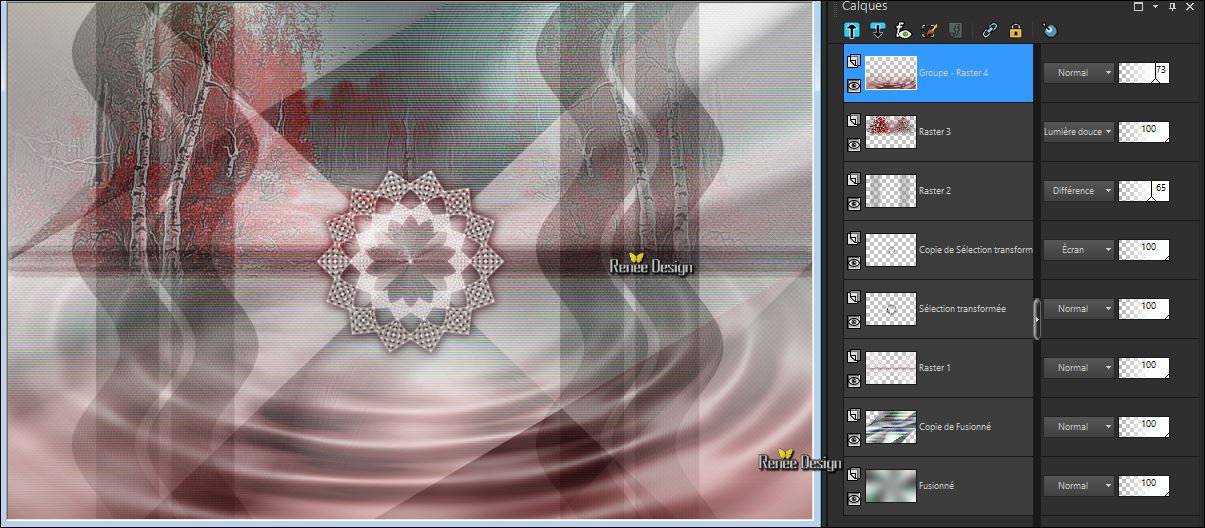
53.
Layers-Load/Save Mask-Load mask from Disk and select ‘’
!!!!.mask.ket-fademedio’’
- Layers-Duplicate 3 times
- Layers- Merge- Merge- Group
54.
Lower the Opacity of this Layer to 73%
You should have this result
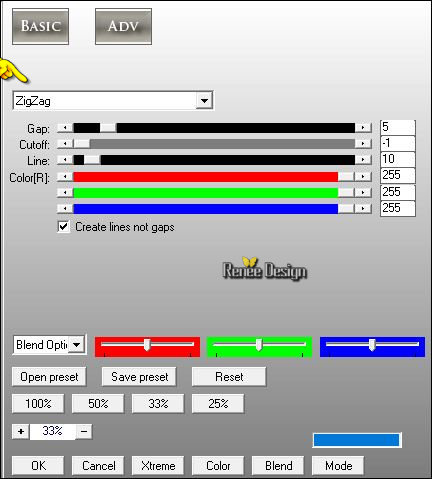
55. Effects
–Plugins - AP[ Lines ]Silverling use the settings below
-
Layer palette – Make Raster 3 active (tube arbres )
56.
Selections –load/save selection –load selection from disc and select my selection:
‘’OH_pas_possible_4’’
57.
Selections-Promote Selection to Layer
58. To replace the top of the layers palette
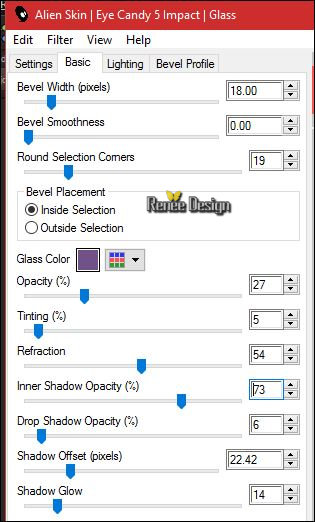
59. Effects
–Plugins – EyeCandy 5 Impact – Glass use the settings below -Color
#715288
Selections- Deslect All
60. Open your tube ‘’ Renee_Tube_loxy.pspimage’’
- Image
Resize to 55 %
- Edit - Copy- Activate your work -Edit - Paste as a new layer
- Activate your Move Tool (M)-move to the bottom right
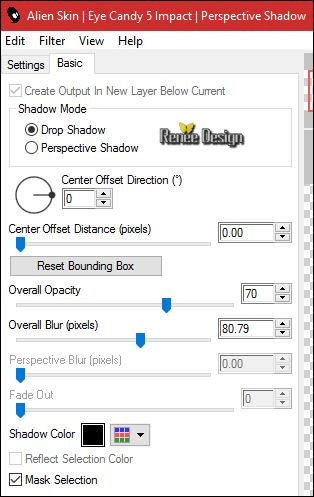
61. Effects
–Plugins– Alien skin Eyecandy 5 Impact –perspective
shadow use the settings below
62. Layers- New Raster Layer
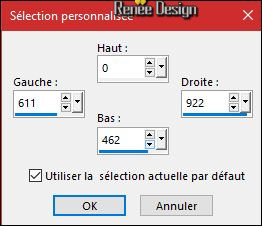
63.
Activate Selection Tool -Custom Selection (S) -Rectangle with these settings 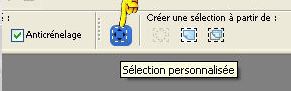
64. Effects
–Plugins – Vanderlee Unplugged X – Jalusi - Color
#c1d3ef
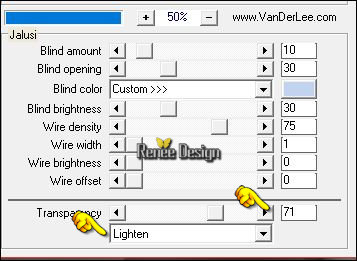
Selections- Deslect All
65.
Open the tube ‘’
AED_HEARSEESPEAKNOEVIL-KITTIES_2003loj.pspimage’’
- Edit - Copy- Activate your work -Edit - Paste as a new layer
- Activate your Move Tool (M)-move to the bottom left
66. Effects – 3D Effects – Drop Shadow with these settings -11/20/38/35 black
67. Open your tube ‘’oiseaux ‘’
- Edit - Copy- Activate your work -Edit - Paste as a new layer
- Activate your Move Tool (M) place it in the right place (see finished image)
68. Layers- Merge-Merge- Visible
69. Image - Add borders-Symmetric checked 1 pixel #e0e0e1
70. Image - Add borders-Symmetric checked 60 Pixels#ffffff
71. Open your tube ‘’sol.png’’
- Edit - Copy- Activate your work -Edit - Paste as a new layer
- Move Tool / place your tube to the bottom of your image
72 .
Open your tube ‘’Lize-SN-011.pspimage’’ -Activate the layer "Raster 2 " of the tube
- Edit - Copy- Activate your work -Edit - Paste as a new layer
-Move Tool / place your tube to the bottom of your image (see finished image)
73. Effects- 3 D Effects- Drop Shadow with these settings: - 4/ 45/ 42 /1
black
74. Activate your Text Tool- Font-Kristen ITC -(or take a font of your choice ) Write your text -Or take my text
75. Open the tube ‘’effet_cadre’’
- Edit - Copy- Activate your work -Edit - Paste as a new layer
-Move Tool / place your tube to the top of your image (see finished image)
76. Image - Add borders-Symmetric checked 1 Pixel black
77. Image - Add borders-Symmetric checked 30 #ffffff
78. Image-Resize to 1005 Pixels width.
Save as JPG
I hope you enjoyed this lesson
Renée
This lesson was written by Renée 04/03/2017
Edited and Update
2017
*
Any resemblance with an existing lesson is a coincidence
* Do not forget to thank the people who work with us and for us I have appointed the tubeurs and translators
Thanks Renée
*
| 

 Translations


 If a plugin supplied appears with this icon it must necessarily be imported into Unlimited *

 All rights reserved