|
Let's start the lesson
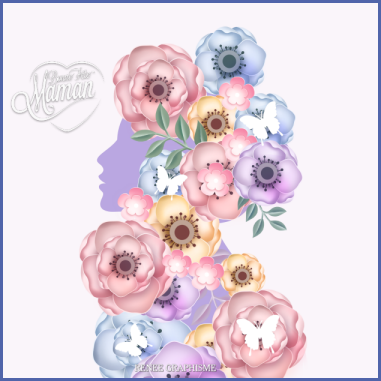
Happy Mother’s Day
2021

1. File: Open an image of 1100 x 650 pixels in White-Promote Background Layer=Raster 1
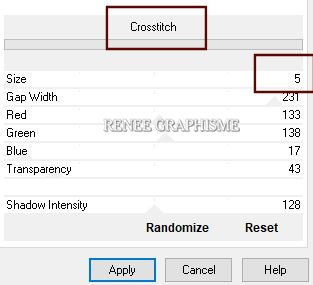
2. Effects –Plugins -
Unlimited 2.0- &<Bkg Designer sf10 I> - Crosstitch with the following settings
3. Layers- New Raster Layer
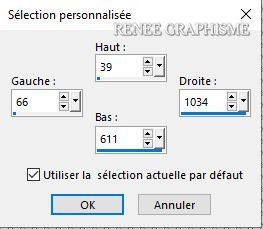
4. Activate Selection Tool -Custom Selection (S) -Rectangle with the following settings

- Preparation
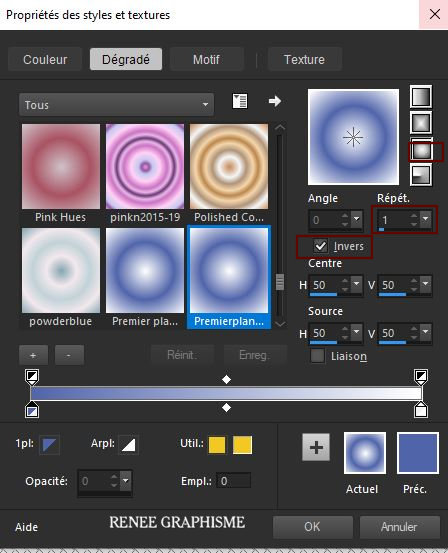
- Material Properties:
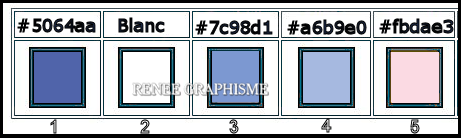
Set your foreground color to color #5064aa=1 – Set your background color to color #ffffff = White
- Prepare a foreground sunburst gradient configured like this
5.Activate your Flood Fill Tool
 –
Fill the layer with the gradient –
Fill the layer with the gradient
6. Adjust- Blur- Gaussian Blur : Radius 40%
 Selections-Deselect All Selections-Deselect All
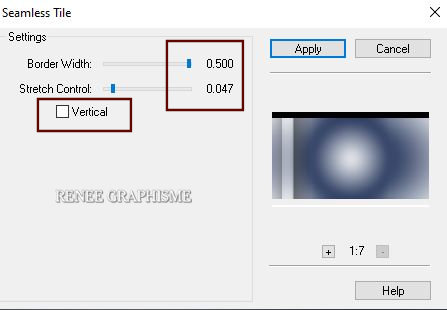
7. Effects-Plugins – FM Tile Tools – Seamless Tile with the following settings
8. Layers- Duplicate
- Image - Mirror - Mirror Horizontal (Image - Mirror in older versions of PSP)
-Layers-Properties- Lower the Opacity to 30%
- Layers- Merge- Merge Down
9. Effects – Edge Effects- Enhance
10. Selections- select All-Selections Float-Selections Defloat
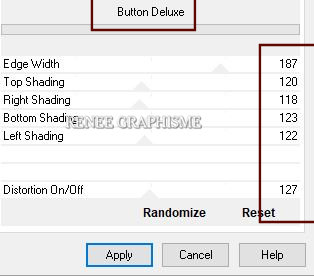
11. Effects-Plugins-
Unlimited 2.0 - Filter Factory Gallery B – Button Deluxe with the following settings
12. Effects-Plugins-
Unlimited 2.0 - Simple – Half Wrap
13. Effects – Edge Effects – Enhance More
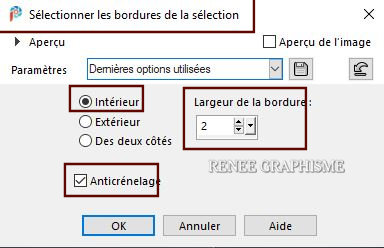
14. Selections-Modify-Select Selection Borders with the following settings
15.Material Properties: Set your foreground color to color #ffffff=White
Activate your Flood Fill Tool – fill the selection with the foreground color= White
Selections- Deselect All
16. Layers- New Raster Layer
17.
Selections –load/save selection –load selection from disc and select my selection: ‘’Mom-1’’
18. Material Properties: Set your foreground color to color #7c98d1=3
Activate your Flood Fill Tool
–
fill the selection with the foreground color=3
Selections- Deselect All
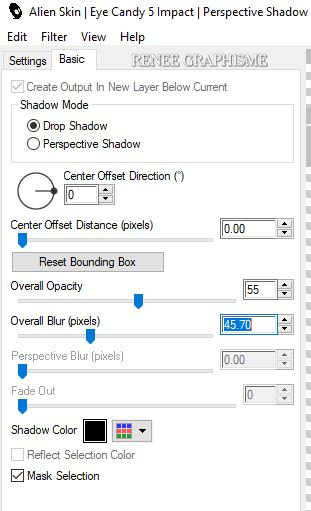
19. Effects –Plugins – Alien Skin EyeCandy 5 - Impact – Perspective
Shadow with the following settings
20.
Layers- New Raster Layer
21.
Selections –load/save selection –load selection from disc and select my selection: ‘’Mom-2’’
22.Material Properties: Set your foreground color to color #a6b9e0=4
Activate your Flood Fill Tool
–
fill the selection with the foreground color=4
Selections-Deselect All
23. Effects –Plugins – Alien Skin – EyeCandy 5 Impact – Perspective
Shadow –with the same settings
24.
Layers- New Raster Layer
25.
Selections –load/save selection –load selection from disc and select my selection: ‘’Mom-3’’
26. Material Properties: Set your foreground color to color #5064aa=1
Activate your Flood Fill Tool
–
fill the selection with the foreground color=1
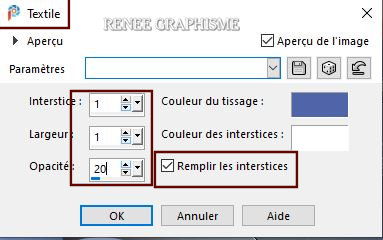
27. Effects – Texture Effects – Weave with the following settings /Color #5064aa=1 and White
Selections-Deselect All
28. Effects – Plugins – Alien Skin – EyeCandy 5 Impact – Perspective
Shadow –with the same settings
29 .Layers- New Raster Layer
30.
Selections –load/save selection –load selection from disc and select my selection: ‘’Mom-4’’
31.Material Properties: Set your foreground color to color #ffffff=White
Activate your Flood Fill Tool
–
fill the selection with the foreground color=White
Selections- Deselect All
32. Effects-3D-Effects - Drop Shadow with these settings: 1/1/100/0 Black
33. Layers-Duplicate
34. Layers-Merge- Merge Down
35.
Layers- New Raster Layer
36.
Selections –load/save selection –load selection from disc and select my selection: ‘’Mom-5’’
37.Material Properties: Set your foreground color to color #fbdae3=5
Activate your Flood Fill Tool
–
fill the selection with the foreground color =5
Selections-Deselect All
38. Effects-3D-Effects - Drop Shadow with the same settings
39. We are going to decorate
Open the Tube " Tubes Mothers Day psp images" -Paste as a new layer on your work
Place the decorative elements individually according to your taste
40. Layers- Merge- Merge Visible
41. Edit - Copy!!
42. Open the tube
‘’cadre-mother’s Day’’
- Activate the Magic Wand -Click in the middle of the frame
- Selections- Modify
- Expand by 2 Pixels
43. Layers- New Raster Layer
44. Edit - Paste into Selection (Image is still in your PSP memory)
45. Layers- Arrange- Move Down
Selections -Deselect All
46. Paste the author's watermark on your work and your own watermark
Layers- Merge- Merge All (flatten)
Save as JPG

I hope you enjoyed this lesson
Renée
This lesson was written by Renée 08- 05 -2021
Edited and Update
2021
*
Any resemblance with an existing lesson is a coincidence
*
Do not forget to thank the people who work with us and for us I have appointed the tubeurs and translators
Thanks
*
|


 Translations