|
Let's start the lesson
Réflexion en observant mon
miroir - Reflection while observing my mirror

MIROIR
REFLEXION/Reflection Mirror
- Material Properties: Set the foreground color to color number 1. Set the background color to color number 2

- Replace your foreground with a foreground/background linear gradient configured like this:
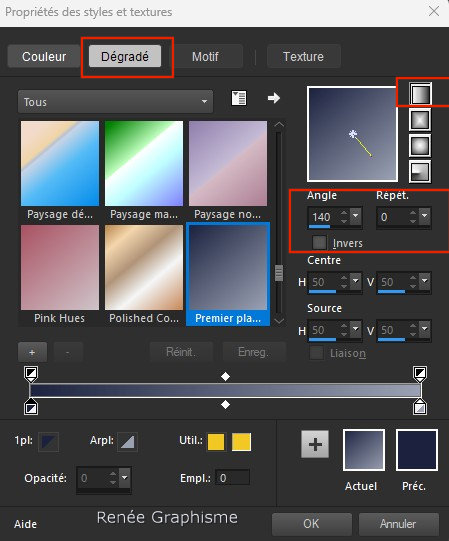
1. File - Open a new transparent image in this size : 1050 x 650 Pixels
2. Activate Flood Fill Tool
 -
Flood fill the layer with the gradient. -
Flood fill the layer with the gradient.
3. Effects - Plugins - Filters in Unlimited 2.0 - Toadies - Banding
Suppress Noise... at 81
4. Selections –load/save selection –load selection from disc and select my selection: ’’Miroir-1’’
5. Selections - Promote selection to layer

6. Effects - Plugins - Filters in Unlimited 2.0 - [AFS IMPORT] -
sqborder2 using the default settings
7. Effects - Plugins - Filters in Unlimited 2.0. – Tramages - Tow The
Line... using the default settings
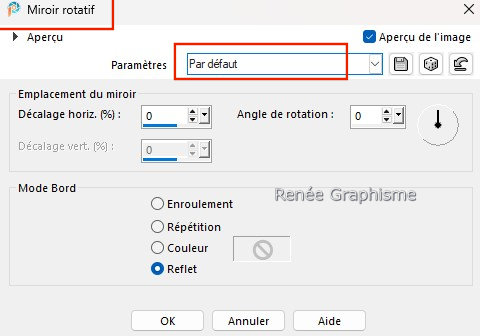
8. Effects - Reflection Effects - Rotating Mirror - Default
9. Layers - Load/save mask - Load mask from disk ‘’20/20’’
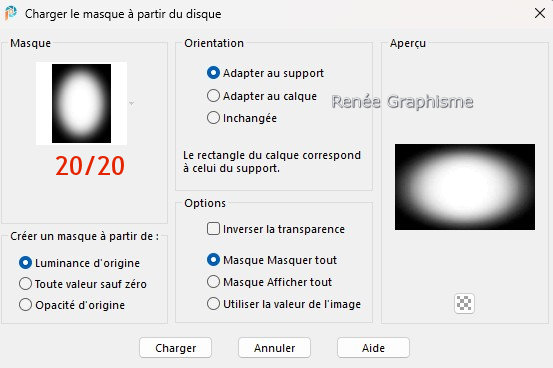
- Layers - Merge - Merge Group
10. Effects - Edge Effects - Enhance
11. Layers - Properties - Set the blend mode to "Hard Light"
12. Layers - New raster layer
13. Selections –load/save selection –load selection from disc and select my selection: ’’Miroir-2’’
14. Effects - 3D Effects - Cutout with these settings – Color number 3
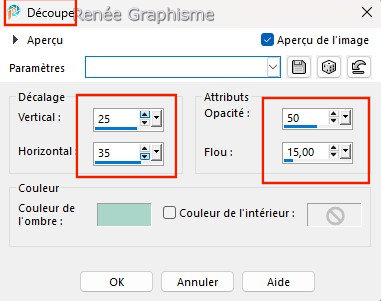
15. Effects - Texture Effects - Weave use the settings below - Black
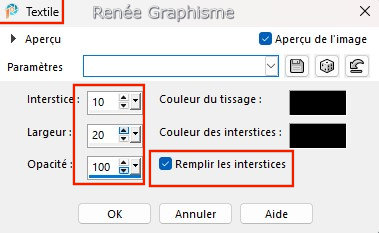
16. Layers - New raster layer raster
17. Activate the tube ‘’Miroir-Bulle’’ - Edit - Copy - Activate your work - Edit - Paste into selection
18. Layers - Arrange - Move down
19. Layers - New raster layer
20. Activate the tube ‘’Miroir-Image-1’’ - Edit - Copy - Activate your work - Edit - Paste into selection
21. Layers - Arrange - Move down

- Activate the top of the layer palette
22. Layers - New raster layer
23. Selections – load/save selection – load selection from disc and select my selection: ’’Miroir-3’’
24. Activate the tube ‘’Miroir-Fond’’ - Edit - Copy - Activate your work - Edit - Paste into selection
25. Effects - Plugins – Medhi – Sorting Tiles use the settings below
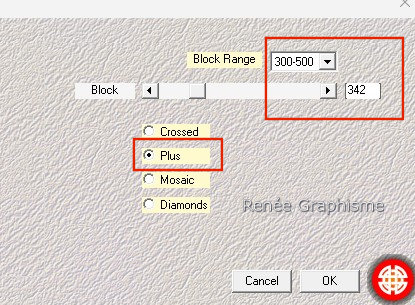
26. Effects - Plugins - Filters in Unlimited 2.0 – VM Stylize - Zoom
Blur with these settings : 53 / 127
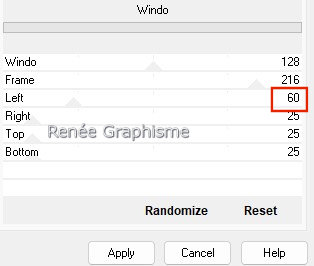
27. Effects - Plugins - Filters in Unlimited 2.0 – Mock – Windo with these settings
28. Layers - Properties - Set the blend mode to " Screen "
29. Layers - Duplicate
30. Layers - Properties - Set the blend mode to "Overlay" and reduce the opacity of this layer to 77%
31. Effects - Plugins – AAA Frame – Foto Frame use the settings below
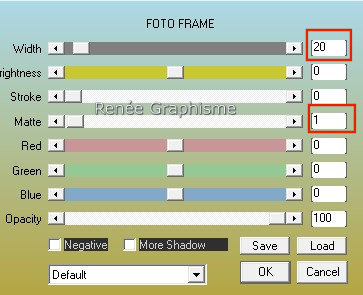
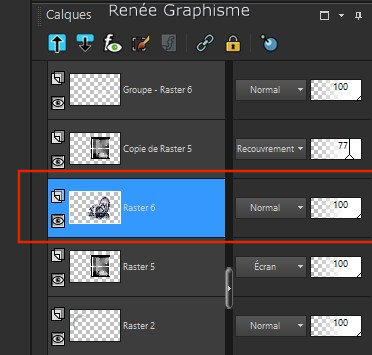
- Repeat this effect on the layer below (Raster 5)

32. Layers - New raster layer
- Material Properties: Set the foreground color to color White
33. Activate Flood Fill Tool
 -
Flood fill the layer with color White -
Flood fill the layer with color White
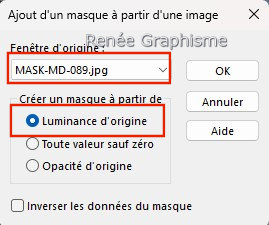
34. Layers - New mask layer - From image and select mask : ‘Mask-MD-089’’
- Layers - Duplicate
- Layers - Merge - Merge Group
35. Layers - Duplicate
36. Image - Mirror - Mirror Vertical ( Image - Flip in older versions of PSP)
- Layers - Merge - Merge Down
37. Layers - Duplicate
38.
Layers - Duplicate
- Layers - Merge - Merge Down
39. Effects - Plugins - Filters in Unlimited 2.0 - It@lian Editors
Effect – Mosaico with these settings: 7/8/127
40. Layers - Duplicate
41. Layers - Merge - Merge Down
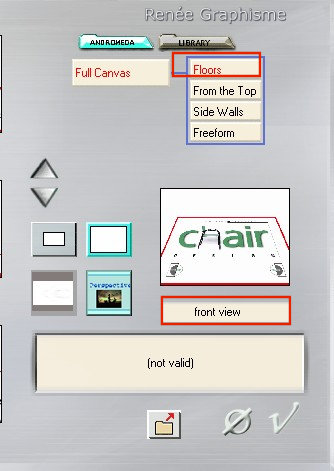
42. Effects - Plugins – Andromeda – Perspective - Floors - Front View
43. Effects – 3D Effects - Drop Shadow with these settings : 2 / -2 / 55 /19 Black
44. Image - Free Rotate 90° to the right
45. Pick Tool: (K) on your keyboard - Enter these parameters on the toolbar
 -
129 / - 133 -
129 / - 133
Press the (M) button to close the tool.
- Layers - Properties - Set the blend mode to "Hard Light"
- Activate Raster 1 in the layer palette
46. Selections - Select All
47. Image - Crop to selection
48. Activate Copy of Group Promoted Selection (Raster 6 )
Layers - Arrange - Move Down ( above the layer - Group to Promoted Selection) as shown in the example below
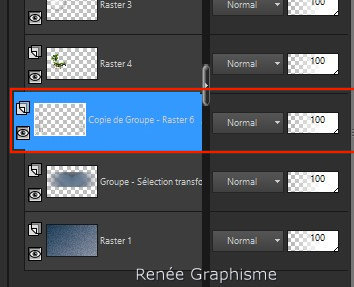
49. Layers - Duplicate
50. Image - Mirror - Mirror Horizontal (Image - Mirror in older versions of PSP)
- Layers - Merge - Merge Down
51. Layers-Properties - Set the blend mode to "Hard Light "
- Activate the top of the layer palette
52. Activate the tube ‘’
Miroir-Profond-Image2.’’
- Image - Resize 50
%
-Edit - Copy - Edit - Paste as new layer
53. Pick Tool: (K) on your keyboard - Enter these parameters on the toolbar
 346 / 83
-Press the (M) button to close the tool.
54. Layers - Arrange - Move down 2 times

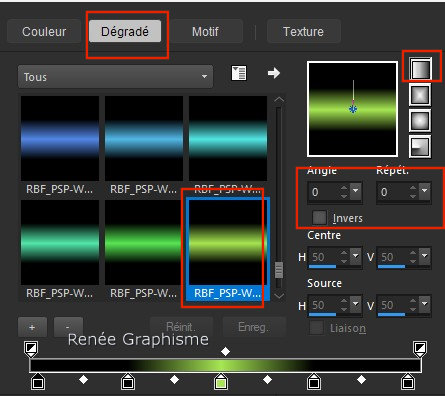
- Color Palette: Set your foreground color to gradient and select : ‘’RBF_PSP-Works_grd_3_028’’
-
Replace your foreground color with a foreground linear gradient configured like this:

- Activate Raster 1 in the layer palette
55. Layers - New raster layer
56. Selections –load/save selection –load selection from disc and select my selection: ’’Miroir-4’’
57. Activate Flood Fill Tool
 -
Flood fill the selection with the gradient -
Flood fill the selection with the gradient
58. Effects - Plugins - L & K's – Pia at 15
59. Effects - Plugins – Mura’s Meister – Perspective Tiling using the default settings

60. Layers Properties - Set the blend mode to "Dissolve"
- Activate the top of the layer palette
61. Open the tube ‘’Texte-Miroir’’ - Edit - Copy - Activate your work - Edit - Paste as new layer
- Place at the top of the work
(Or write your own text. Font is included.)
62. Image - Add Borders - Symmetric checked: 1 Pixel – Color number 1
Image - Add Borders - Symmetric checked: 1 Pixel – Color White
Image - Add Borders - Symmetric checked: 1 Pixel – Color number 1
Image - Add Borders - Symmetric checked: 22 Pixels – Color White
Image - Add Borders - Symmetric checked: 1 Pixel – Color number 1
Image - Add Borders - Symmetric checked: 1 Pixel – Color White
63. Selections - Select All
64. Image - Add Borders - Symmetric checked: 35 Pixels – Color White
65. Effects – 3D-Effects - Drop Shadow with these settings : 4/4/65/25 Black
Repeat shadow - 4 /- 4

66. Open the tube
‘’Miroir-Profond-Image1.’’
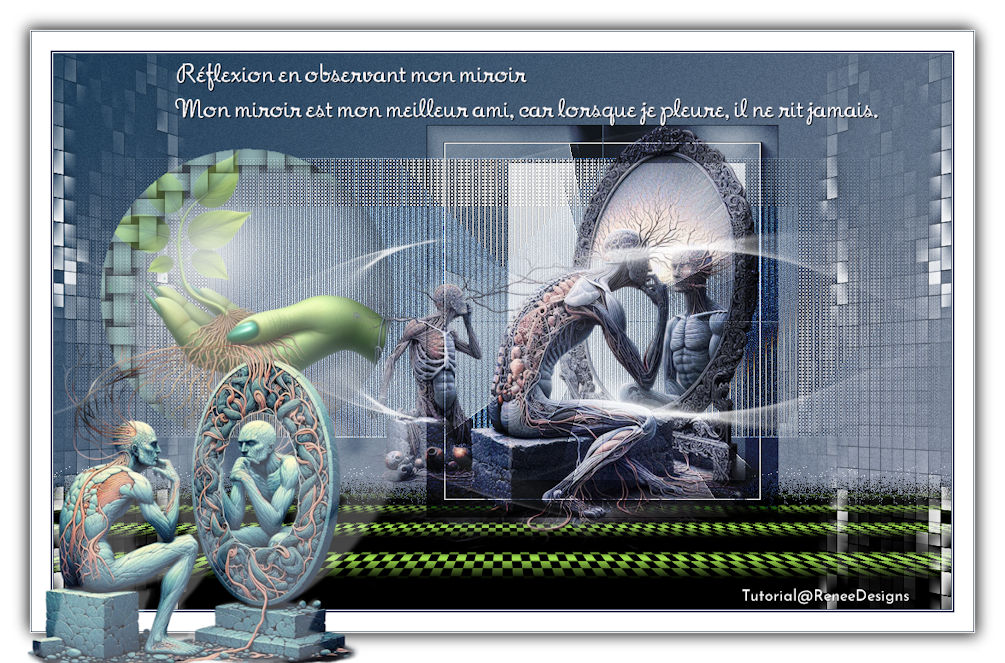
- Activate the layer ‘’tuto-miroir’’ of the tube – Edit - Copy - Edit - Paste as new layer
- Place at bottom left (see finished image )
67. Effects - Plugins - Alien Skin EyeCandy 5 – Impact – Perspective
Shadow- Tab- Settings - User Settings and select my file - Preset :’’Miroir-Perspective shadow’’
68. Add the author's watermark and your own watermark.
69. Layers - Merge - Merge All (flatten)
70. Image - Resize to 1005 pixels Width - Resize all layers checked !
Save as JPG
I hope you enjoyed this lesson
Renée
This lesson was written by Renée 21/07/2025
Edited and Update
2025
***
Any resemblance with an existing lesson is a coincidence
* Do not forget to thank the people who work with us and for us .
I have appointed the tubeurs and translators
Thanks
*
|
 Translations




 346 / 83