|
Let's start the lesson.
-
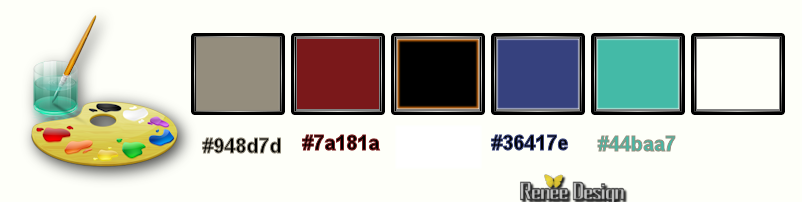
Color Palette- Set your foreground color to #ffffff - Set your background color to#44baa7
1.
Open the background image ‘’Fond-Metropolis’’- Window - Duplicate (or shift+D) - Close the original and proceed on the copy -Promote Background Layer =
Raster 1
2.
Activate image ‘’Metropolis_image1’’
-
Edit - Copy -Activate your working area, Edit - Paste as a new layer
Do not move, it is in the right place
3.
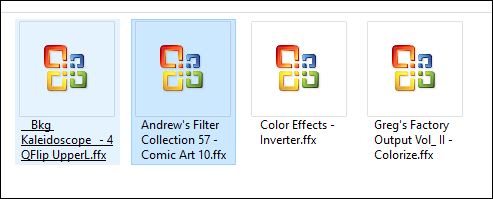
Effects –Plugins- Unlimited 2.0 - &<Bkg Kaleidoscope>- 4
QFlip UpperL
4.
Effects –3D Effects – Drop Shadow use settings below
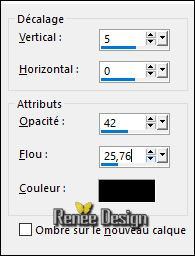
5.
Layers- Duplicate
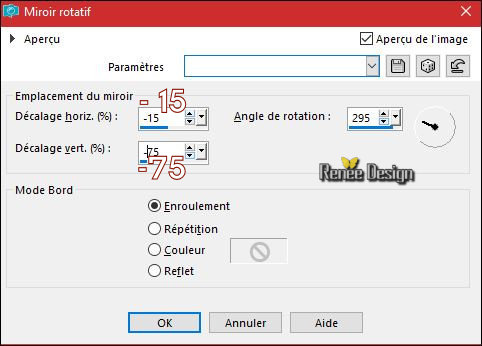
6.Effects-Reflection Effects- Rotating Mirror with these settings
7.
Effects –Plugins- Unlimited ICNETFILTERS - Color Effects-
Inverter
-
Layers- Merge- Merge Down
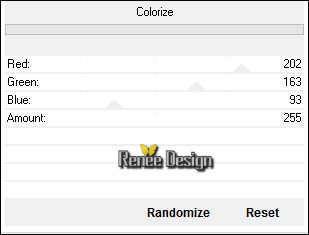
8. Effects –Plugins- Unlimited - Greg's Factory Output Vol.
II-
Colorize
9.
Effects –3D Effects – Drop Shadow with the same settings
10.
Layers- New Raster Layer
11.
Selections –load/save selection –load selection from disc and select my selection: ‘’Metropolis1 »
12.
Activate Flood Fill Tool and fill the selection with the background color (2
clicks)
13.
Selections- Modify- Contract with 5 pixels
Stay on this layer !!
14.
Activate Flood Fill Tool and fill the selection with the foreground color #ffffff (2
clicks)
Selections- Deselect All
15.
Effects- Edge Effects- Enhance
-
Repeat: Effects- Edge Effects- Enhance
-
Open the Mask ‘’Metroplis_Masque’’ in your PSP and minimize it
16.
Layers- New Raster Layer
17.
Activate Flood Fill Tool and fill the layer with the foreground color #ffffff
18.
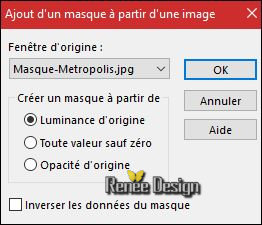
Layers - New Mask Layer - From Image and choose Mask :
‘’Metroplis_Masque’’
-
Layers- Merge- Merge- Group
19.
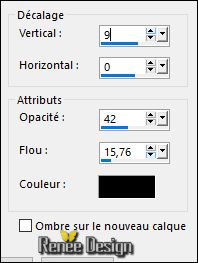
Effects –3D Effects – Drop Shadow with these settings :
20.
Layers- Arrange- Move Down
-
To replace the top of the layers palette
21.
Layers- New Raster Layer
22.
Selections –load/save selection –load selection from disc and select my selection: ‘’Metropolis2 »
-
Color Palette- Set your foreground color to #7a181a
- Set your background color to #000000
23.
Activate Flood Fill Tool and fill the selection with the foreground color
Selections- Deselect All
24.
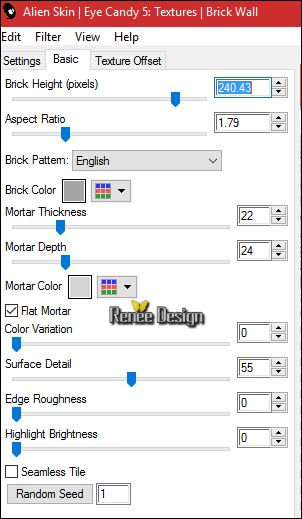
Effects –Plugins - EyeCandy 5 Textures – Brick Wall-tab Settings/User settings choose my Preset ‘’ Metropolis-Brick Wall’’
25. Layers-Properties-Set the Blend Mode to "Hard Light"
26. Open the tube ‘’ Metropolis_Image2.png’’
- Edit - Copy -Activate your working area, Edit - Paste as a new layer
27. Effects – Image Effects -Offset with these settings H = - 37 and V = - 10
-
Layers-Properties-Set the Blend Mode to "Overlay "
28. Open the tube ‘’ Metropolis_Image3.png’’
-Edit - Copy -Activate your working area, Edit - Paste as a new layer
29. Effects – Image Effects -Offset with these settings H = - 219 and V = - 77
30.
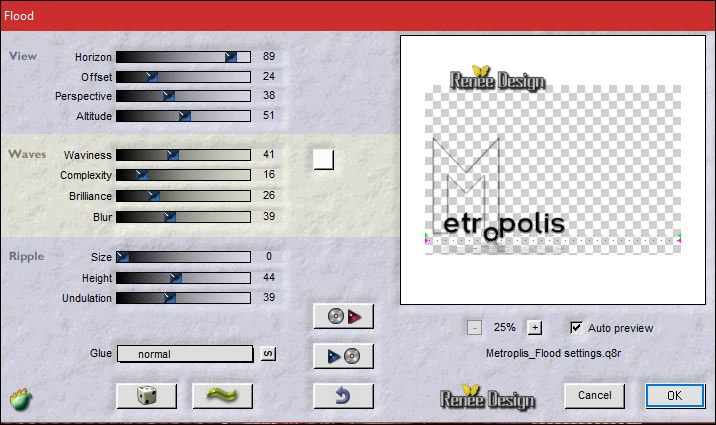
Effects –Plugins - Flaming Pear Flood/color
#fafbfa
-Click on the Red Arrow 
-and select my file-preset  can be used in any folder of your choice by clicking it can be used in any folder of your choice by clicking it
Open it will be ok in your filter / Or manual settings as shown in the example below
- In the layers palette: Activate the layer-Raster 3
31. Open the tube ‘’ Tube_visage-Metroplis_ReneeTube’’
- Edit - Copy -Activate your working area, Edit - Paste as a new layer
32. Effects – Image Effects -Offset with these settings H = 256 and V = - 8
- To replace the top of the layers palette
- Color Palette- Set your background color to #ffffff
33. Layers- New Raster Layer
34. Selections –load/save selection –load selection from disc and select my selection: ‘’ Metropolis_3’’
35.
Activate Flood Fill Tool and fill the selection with the background color #ffffff (click in the middle of selection )
Selections- Deselect All
36. Layers- Duplicate
37. Image
Resize to 55%-Resize all layers not checked
38. Effects – Image Effects -Offset with these settings H = 163 and V = 250
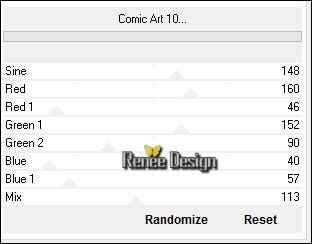
39.
Effects –Plugins- Unlimited - Andrew's Filter Collection 57- Comic Art
10..use settings below .
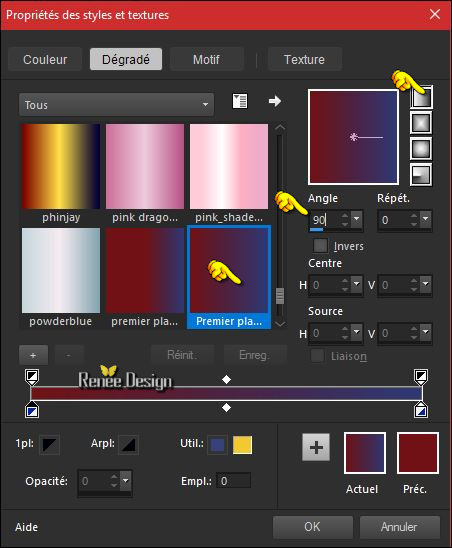
- Color Palette- Set your foreground color to #7a181a - Set your background color to #36417e
40.
Properties Forground; Set your Foregroundcolor to foreground-background linear gradient configured like this
41. Layers- New Raster Layer
42. Selections –load/save selection –load selection from disc and select my selection: ‘’ Metropolis_4’’
43. Activate Flood Fill Tool and fill the selection with the gradient
Selections- Deselect All
44. Effects –3D Effects – Drop Shadow with these settings : 0/0/100/32 black
45. Layers- Duplicate
46. Effects – Image Effects- Seamless Tiling use settings below (side by side))

47. Layers-Properties-Set the Blend Mode to " Screen"
48. Effects
–Plugins – FM Tile Tools – Blend Emboss using the default settings
- In the layers palette: make Raster 1 active
49. Selections –load/save selection –load selection from disc and select my selection: ‘’ Metropolis_5’’
50.
Selections- Promote selection to layer
51. Layers- Arrange- Bring to Top
52.
Adjust- Add /Remove Noise - add Noise with these settings

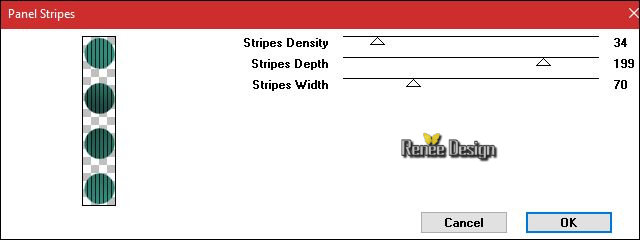
53. Effects
–Plugins– Graphic plus – Panel Stripes
54.
Selections- Modify-Contract with 8 pixels
55. Effects
– Plugins – Graphic plus Cross shadow use settings below
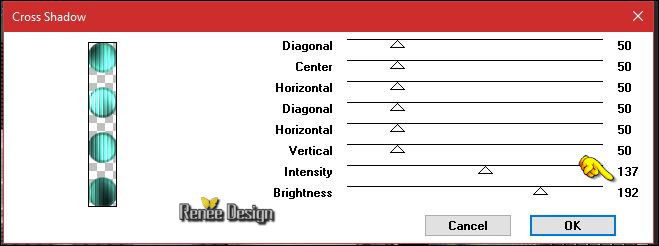
- Repeat this filter "Cross shadow" with the same settings
Selections- Deselect All
56. Layers- New Raster Layer
57. Selections –load/save selection –load selection from disc and select my selection: ‘’ Metropolis_6’’
58. Activate Flood Fill Tool and fill the selection with the gradient
Selections- Deselect All
59. Layers- Arrange- Move Down
- To replace the top of the layers palette
(Promoted selection )
60. Layers-Properties-Set the Blend Mode to " Luminance -Legacy "
- Color Palette- Set your foreground color to #44baa7 - Set your background color to #ffffff
61. Layers- New Raster Layer
62. Effects
–Plugins - Muras’s Meister – Clouds
-Open the Mask " Narah_mask_0405 in your PSP and minimize it
63. Layers - New Mask Layer - From Image and choose Mask :
‘Narah_mask_0405’’
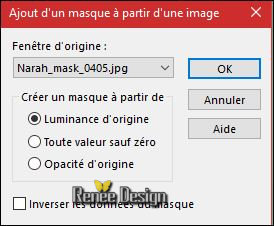
- Layers- Merge- Merge- Group
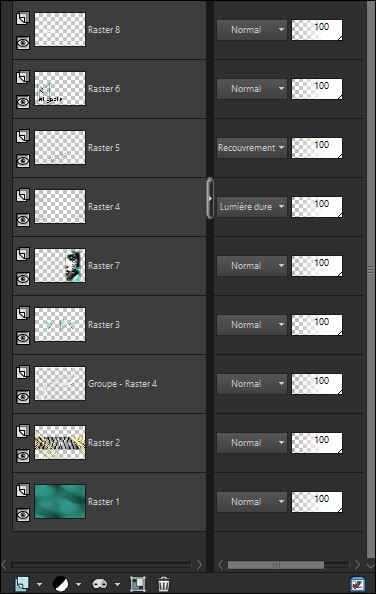
64. In the layer palette -Layers- Arrange- Move 4x Down -under Raster 9
65. Layers- Merge - Merge Visible
66. Layers- New Raster Layer
67. Selections –load/save selection –load selection from disc and select my selection: ‘’ Metropolis_7’’
68. Activate Flood Fill Tool and fill the selection with the background color #ffffff ( 2 or 3 clicks- zoom in if necessary)
Selections- Deselect All
69. Open the tube ‘’Metropolis_image4 »
- Edit - Copy -Activate your working area, Edit - Paste as a new layer
70. Image - Add borders-Symmetric checked: 1 pixel #7a181a
71. Image - Add borders-Symmetric checked: 10 pixels #948d7d
72. Image - Add borders-Symmetric checked: 40 pixel #7a181a
73. Activate your Magic Wand and select the Border of 40 pixels
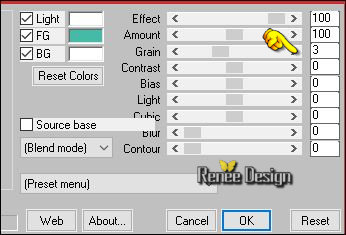
74. Effects
–Plugins - AAA Frame Foto Frame with these settings
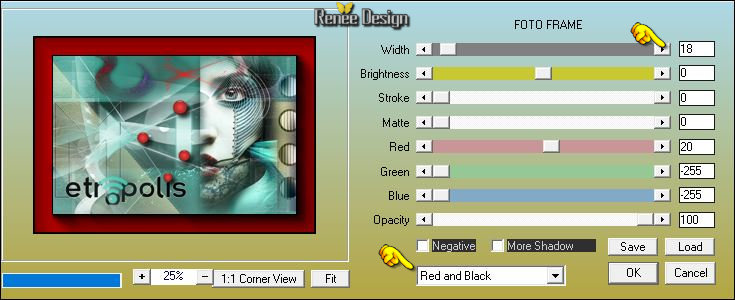
75.
Selections- Promote selection to layer
Selections- Deselect All
76. Effects
– Image Effects – Page Curl with these settings -Color
#7a181a
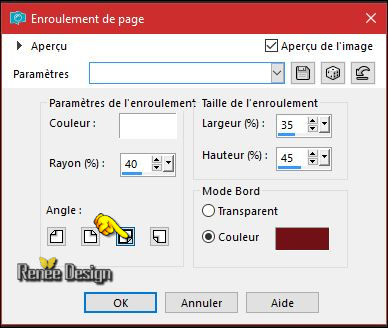
77. Repeat: Effects
– Image Effects – Page Curl with these settings 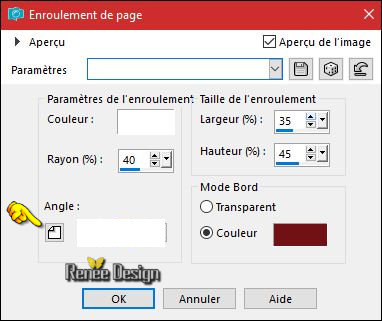
78. Effects- Edge Effects- Enhance More
79. Image - Add borders-Symmetric checked: 1 pixels #ffffff
80. Image - Add borders-Symmetric checked: 40 pixels #44baa7
81. Activate your Magic Wand and select the Border of 40 pixels
82. Effects
–Plugins - AAA Frame - Foto Frame with the same settings
Selections- Deselect All
83. Open the tube "Text" >>Edit - Copy -Activate your working area, Edit - Paste as a new layer and move
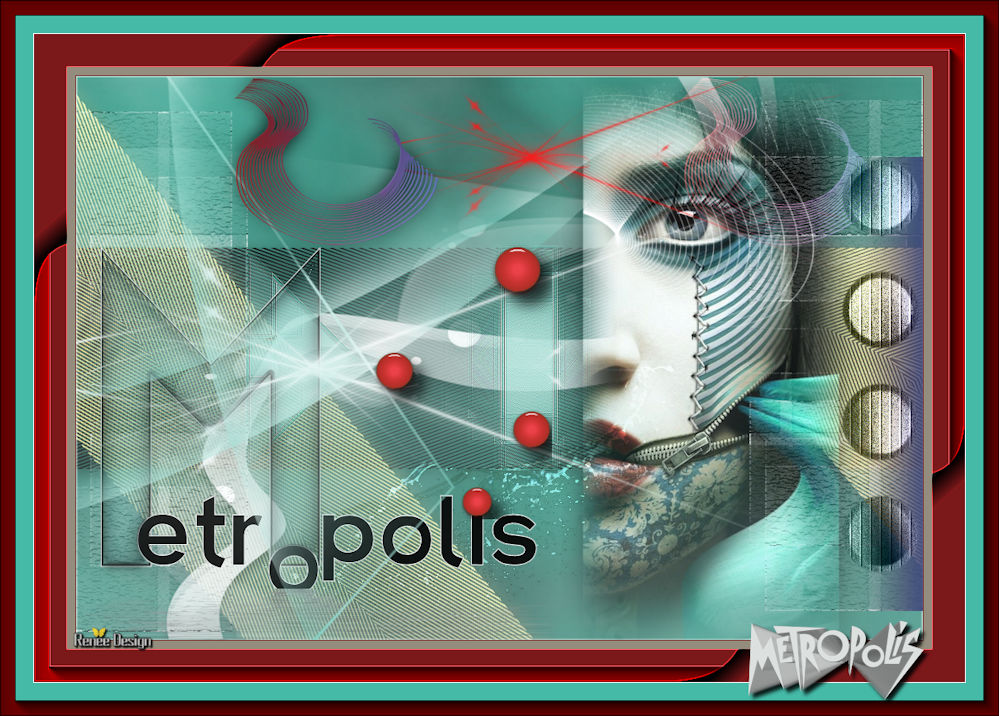
84. Layers- Merge- Merge All (Flatten)
85. Image
Resize to 999 Pixels width .
Save as JPG
I hope you enjoyed this lesson
Renée
This lesson was written by Renée
12/10/2016
Edited and Update
2016
*
Any resemblance with an existing lesson is a coincidence
* Do not forget to thank the people who work with us and for us I have appointed the tubeurs and translators
Thanks Renée *
*
| 
 Translations


 If a plugin supplied appears with this icon it must necessarily be imported into Unlimited *

 All rights reserved