|
Let's start the lesson.
La
vue ….The sight …...
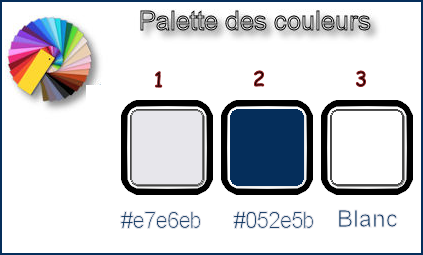
- Preparation/ Material Properties: Set your foreground color to #e7e6eb= no 1 --Set your background color to #052e5b= no
2

1.
Open your Backgroundimage ‘’ fond_la_vue’’ / Window - Duplicate (or shift+D) - Close the original and proceed on the copy -Promote Background Layer =Raster 1
2. Effects –Plugins - Unlimited - VM Toolbox - Instant
Tile..with these settings: 77/
31
3. Layers- Duplicate
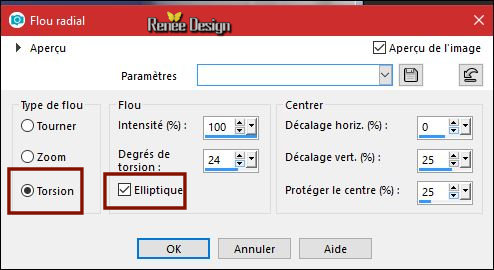
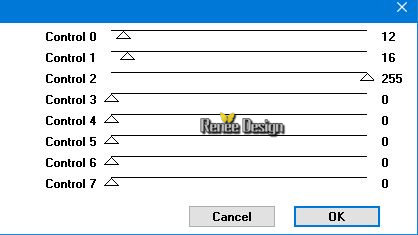
4. Adjust- Blur-Radial Blur use the settings below

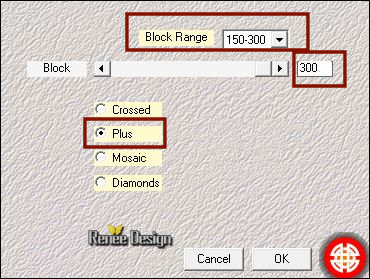
5. Effects –Plugins – Medhi – Sorting Tiles with these settings

6.
Effects- Image Effects- Seamless Tiling with these settings
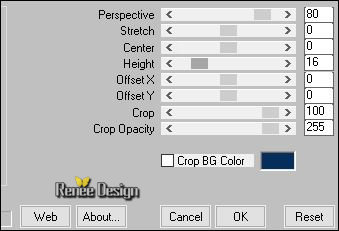
7. Effects –Plugins – Mura’s Meister – Perpective
Tilling use the settings below

8.
Selections –load/save selection –load selection from disc and select my selection: ‘’ Ma_vue_1’’
DELETE
(3 clicks)
Selections- Deselect All
9. Layers- New Raster Layer
10. Activate the Flood Fill Tool and fill the selection with the foreground color #e7e6eb
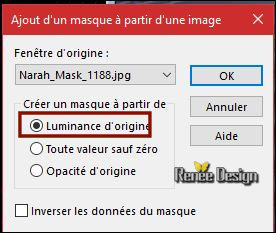
11. Layers- New Mask Layer from Image and select Mask:
‘’Narah-Mask -1188.jpg

-
Layers- Merge- Merge Group
12. Effects- 3 D Effects-Drop Shadow with these settings: 1/1/100/1 color black
13. Image - Mirror - Mirror vertical ( Image - Flip in older versions of PSP)
-
Layers-Properties-Set the Blend Mode to " Screen "
14. Layers- New Raster Layer
15.
Selections –load/save selection –load selection from disc and select my selection: ‘’ Ma_vue_2’’
16. Activate the Flood Fill Tool and fill the selection with the foreground color #e7e6eb (3
clicks)
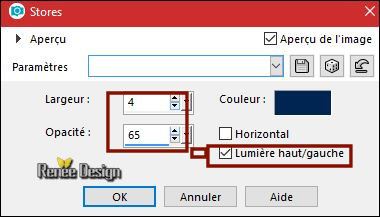
17. Effects
–Texture Effects – Blinds with these settings - Background color #052e5b

Selections- Deselect All
18. Effects- Edge Effects- Enhance
- Effects -
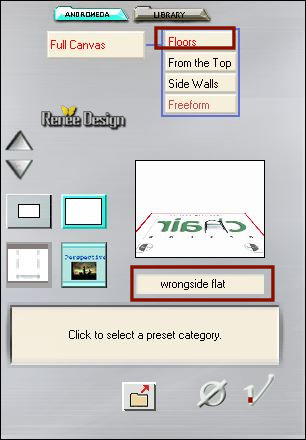
Plugins - Andromeda Perspective-Floors-Wrongside flat

- Repeat this filter with the same settings
19. Effects
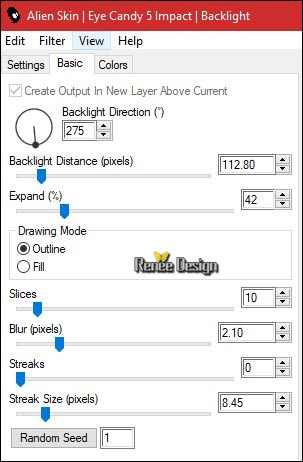
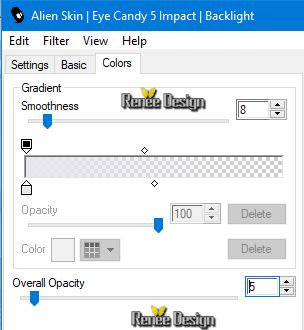
–Plugins – EyeCandy 5 Impact – Blacklight-
tab -Settings/User settings and choose my Preset ‘’ Ma_vue_blacklight’’- Color
#e7e6eb
Or manual settings as shown in the example below
 
20.
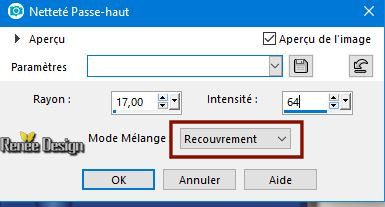
Adjust- Sharpness- High Pass Sharpen with these settings

-
Layers-Properties-Set the Blend Mode to " Overlay "
21. Open the tube ‘’ Renee_TUBES_Oeil’’
- Edit - Copy- Activate your work -Edit - Paste as a new layer
- Objects- Align- Center in Canvas
- Objects- Align-Bottom
22. Layers- Arrange- Move Down
23. Layers-Duplicate
24. Adjust- Blur- Gaussian Blur: Radius 18
25. Layers- Arrange- Move Down
- To replace the top of the layer-palette
26. Open the tube ‘’ Ma_vue_effet _1’’
- Edit - Copy- Activate your work -Edit - Paste as a new layer
26. Objects
- Align -Top
- Layer palette – Make Raster 1 active
27. Effects
-Plugins- Unlimited - Filter Factory Gallery A- Triangular Mosaic
Filter with these settings : 118-255
- To replace the top of the layer-palette
28. Open the tube ‘’ Renee_Ma vue_Image1’’
- Edit - Copy- Activate your work -Edit - Paste as a new layer
29. Effects- Image Effects- Offset with these settings: H = - 335 and V = - 104
30. Open the tube ‘’ Renee_Ma vue_Image2.png’’
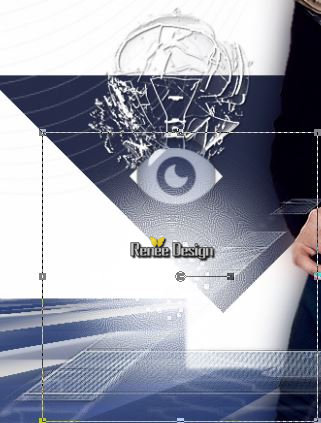
- Edit - Copy- Activate your work -Edit - Paste as a new layer
- Move Tool (M) move it the right place as shown in the example below

-
Layers-Properties-Set the Blend Mode to" Screen "
31. Effects
–Plugins - Unlimited – Tramage – Two the line using the defaut settings
32. Layers- Duplicate
33. Layers- Merge- Merge Down
34. Layers- Arrange- Move Down
- To replace the top of the layer-palette
- Color Palette: Set your foreground color to #ffffff
35. Layers- New Raster Layer
36.
Selections –load/save selection –load selection from disc and select my selection: ‘’ Ma_vue_3’’
37. Activate the Flood Fill Tool fill the selection with the foreground color #ffffff
Selections- Deselect All
38. Effects
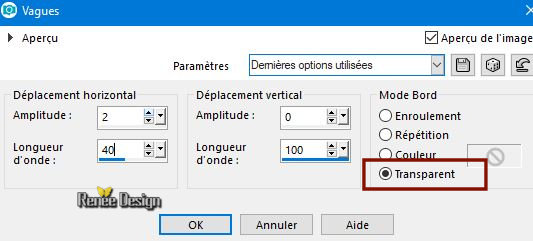
– Distortion Effects –Wave use the settings below

39. Effects
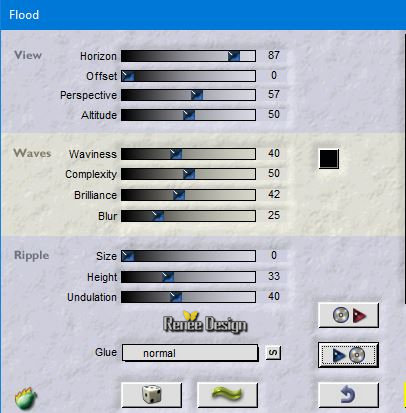
– Plugins – Flaming Pear – Flood- clicking on the red arrow and search your file:Preset ‘’Ma
_vue_Flood settings.q8r’’(can be used in any folder of your choice by clicking it.)
Or manual settings as shown in the example below

40. Open the tube ‘’ Renee_ma_vue_oeil_bleu’’
- Image
-Resize to 50%
- Edit - Copy- Activate your work -Edit - Paste as a new layer
- Move Tool (M) move it the right place as shown in the example below
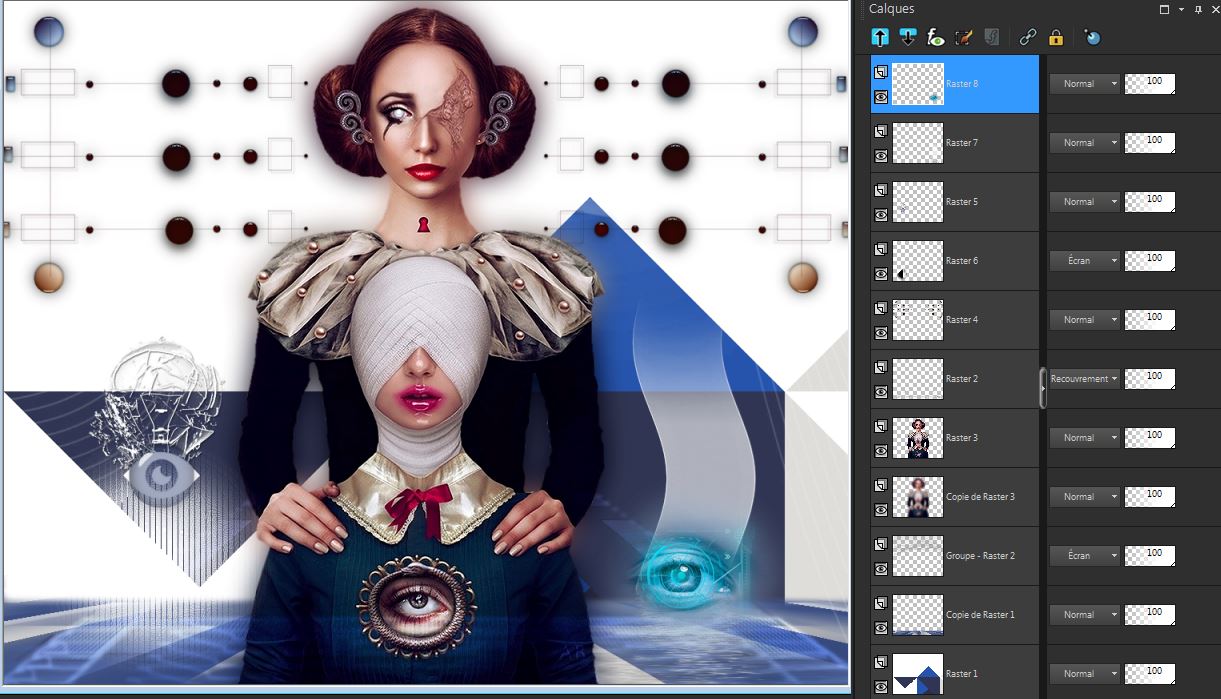
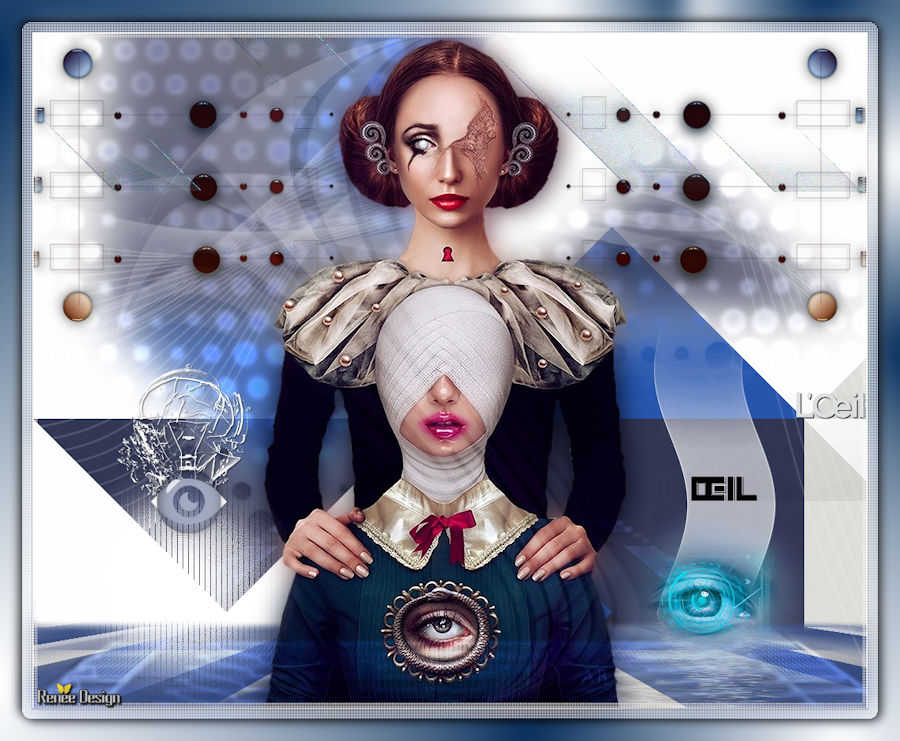
- Your work and Layer Palette look like this now-You should have this result

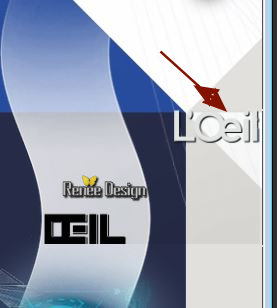
41.Open the tube ‘’ Ma_vue_ecriture_oeil’’
- Edit - Copy- Activate your work -Edit - Paste as a new layer
- Move Tool (M) move it the right place as shown in the example below

- Layer Palette – Make Raster 1 active
42.
Selections- Select All
43. Image- Crop to Selection
Selections- Deselect All
-To replace the top of the layer-palette
44. Layers- New Raster Layer
45.
Selections –load/save selection –load selection from disc and select my selection: ‘’ Ma_vue_4’’
46. Activate the Flood Fill Tool fill the selection with
- 2 clicks
with the foreground color #ffffff and 1 click with the background color #052e5b
Selections- Deselect All
47. Layers- New Raster Layer
48.
Selections –load/save selection –load selection from disc and select my selection: ‘’ Ma_vue_5’’
49. Activate the Flood Fill Tool fill the selection with- 1 click with the foreground color #ffffff and 1 click with the background color #052e5b
Selections- Deselect All
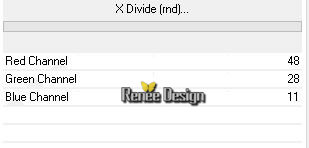
50. Effects
–Plugins -Unlimited - Andrew's Filters 4 - X Divide (rnd)..use the settings below .

51.
Adjust- Sharpness- Sharpen
52. Layers- New Raster Layer
53. Activate the Flood Fill Tool fill the selection with the foreground color #ffffff
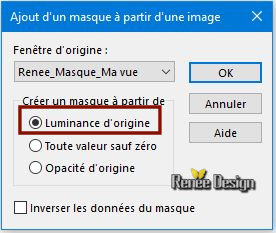
54. Layers- New Mask Layer from Image and select Mask:‘’Renee_Masque _Ma vue’’

- Layers- Merge- Merge Group
55. Effects
– Geometric Effects – Circle – transparent
56.
Layers-Properties-Set the Blend Mode to " Soft Light "
- Layer palette – Make Raster 1 active
57. Layers -Duplicate (only for those who use the filter Forge 4)
58. Effects
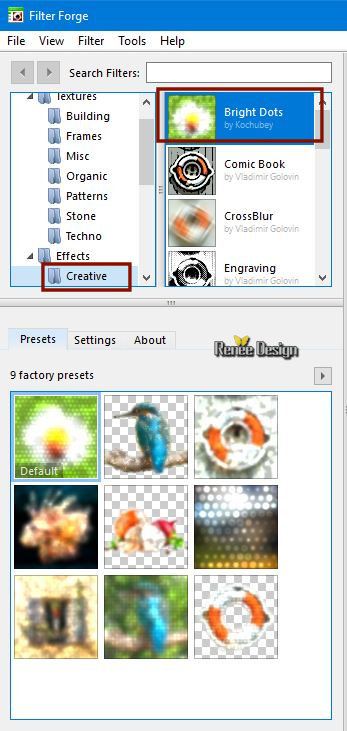
– Plugins – Filter Forge 4/ Creative / Bright Dots
(
Do you have problems with this filter- Image is into the zipfile and paste as a new layer on your working area) (instead of duplicate)

59. Effects
-Plugins – Transparency - Elimimate white
6O. Image - Mirror - Mirror Horizontal (Image - Mirror in older versions of PSP)
- Image - Mirror - Mirror vertical ( Image - Flip in older versions of PSP)
61. Image - Add borders-Symmetric checked 1 pixel #ffffff
62. Image - Add borders-Symmetric checked 1 pixel #052e5b =BG-Color
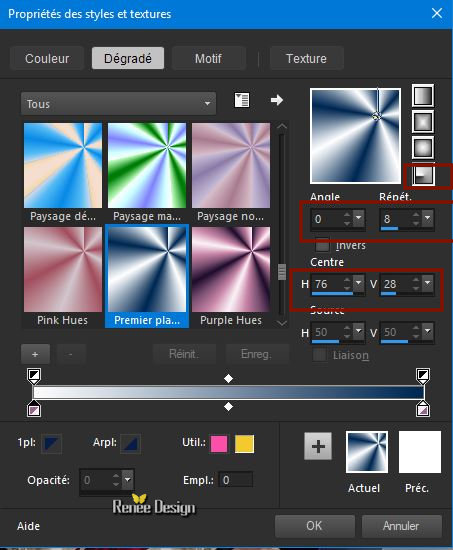
- Prepare a foreground/background-radial gradient configured like this

63. Selections- Select All
64. Image - Add borders-Symmetric checked 40 pixels #ffffff
65.
Selections- Invert
66. Activate the Flood Fill Tool and fill the selection with the gradient
67. Adjust- Blur- Gaussian Blur: Radius 18
68.
Selections- Invert
69.
Selections- Modify-Expand with 12 Pixels
70. Effects
-Plugins - AFS [IMPORT] –sqborder 2 use the settings below

71. Effects- 3 D Effects-Drop Shadow with these settings: 3/5/65/18 color black
- Repeat Drop Shadow negative -3-5
Selections- Deselect All
72. Image- Resize to 79% Resize all layers.
Save as JPG
I hope you enjoyed this lesson
Renée
This lesson was written by Renée 12 Februar 2018
Edited and Update
2018
*
Any resemblance with an existing lesson is a coincidence
* Do not forget to thank the people who work with us and for us I have appointed the tubeurs and translators
Thanks
*
| 
 Translations




 If a plugin supplied appears with this icon it must necessarily be imported into Unlimited *
