Let's begin
1. Open a transparent image of 995 x 645 pixels
2. Color palette - change the foreground to the linear
gradient "#bkg66" and the background color to white

3.
Fill the layer with white
4. Layers - new raster layer
sign with the letter M as here with brush tools -
airbrush
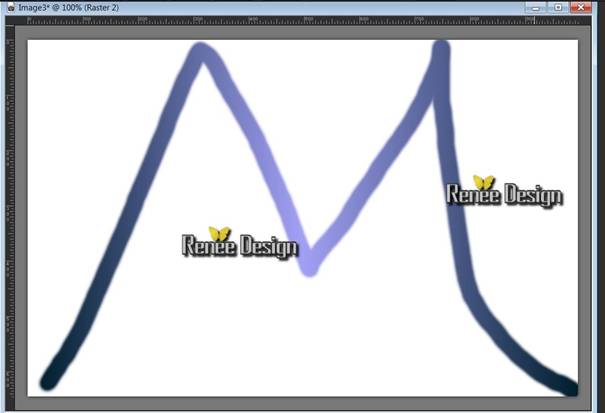

(If you have problems there is a pspimage in the
materials folder - paste as a new layer)
5. Layers - Duplicate layer / Image Mirror / Image
Flip
- Merge the layer with the layer below
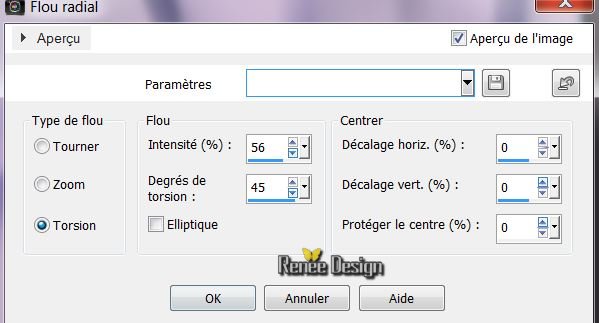
6. Adjust - blur - radial blur
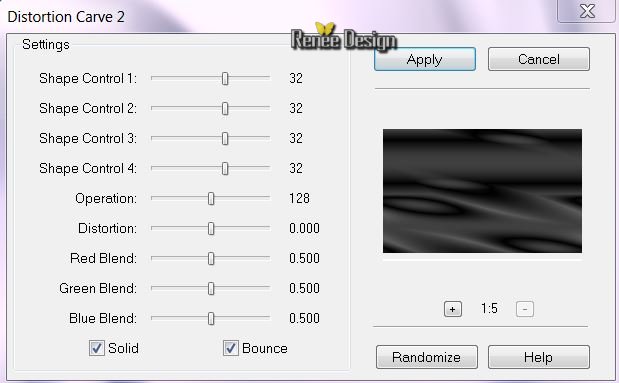
7. Effects - FM Tile tools /
Distortion Carve 2
8. Effects - reflection effect /
rotating mirror

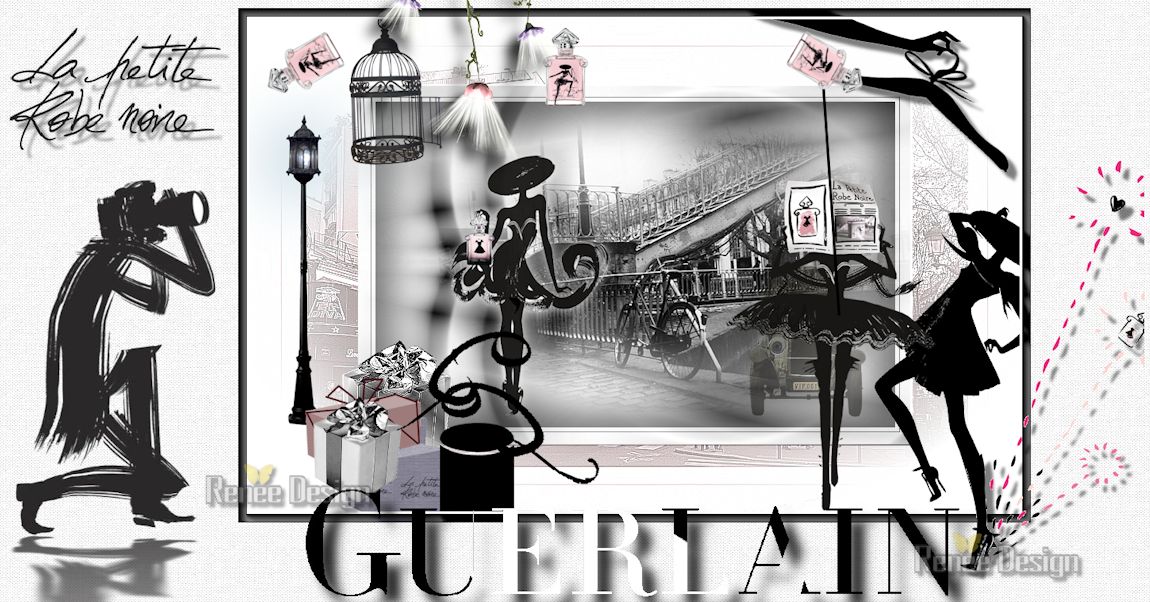
9. Open tube "renee_la petite robe
noir_photodemaria_thunbold" - paste as a new layer -
place against the right edge
10. Effects - User defined filter - preset "sharpen
more" - is in the materials file
11. Open tube "nicole_voiture" - Image - resize 65%/ all
layers not checked - paste as a new layer
Move to the lower right - lower the opacity to 46
12. Effects - User defined filter - preset - sharpen
more
13. Open tube "renee_la petite robe noire_1" - paste as
a new layer - move this tube where the text is
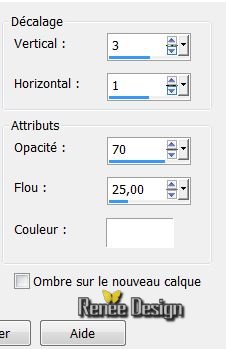
14. Effects - 3D effects - drop shadow
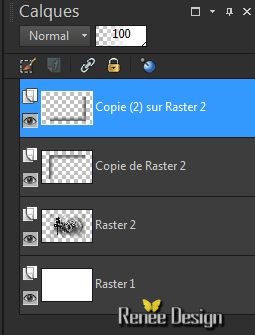
15. Close raster 1 / click to activate another layer -
Layers - merge visible layers / open raster 1
16. Go back on the merged layer - Image resize 70%/ all
layers unchecked
17. Layers - Add a new layer
18. Selection tool - Custom selection
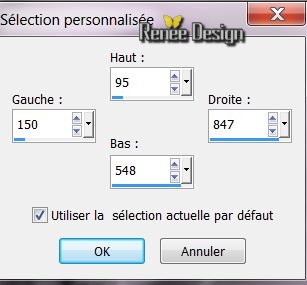
19. Effects - 3-D effect - Cutout /
black
20. Selections - select none
21. Layers duplicate - Image mirror / Image flip
You have this in your layers palettes
Layers - Merge layer down
22. Activate raster 2 / Selection tool - Custom
selection - (still in memory)
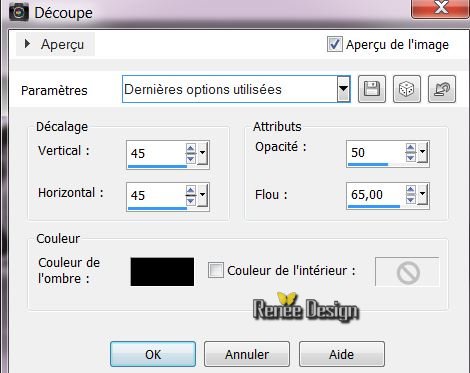
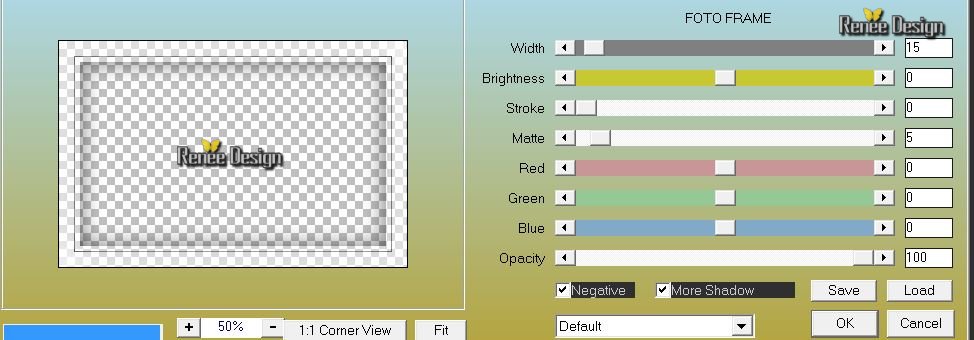
23. Effects - AAA-Frame/ Fotoframe (check Negative and
More shadow)
24. Selections - Invert
25. Layers - add a new layer
26. Open tube "renee_lapetiterobenoire_paris_rose" edit/
copy - edit/ paste into selection
27. Effects - Edge effects - enhance
28. Selections - deselect
29. Layers - Add a new layer
30. Selections - load the selection
"renee_lapetiterobenoire_1" / fill it with black
31. Selections - Deselect
32. Effects - 3 D effect - Drop shadow/ default
33. Open the tube "robe_noire_macha_mca" mirror image /
resize 70% and paste as a new layer
34. Open the tube
"tube_corinne_viciaire_parfum_guerlain_04_012" / resize
60% and paste as a new layer in place
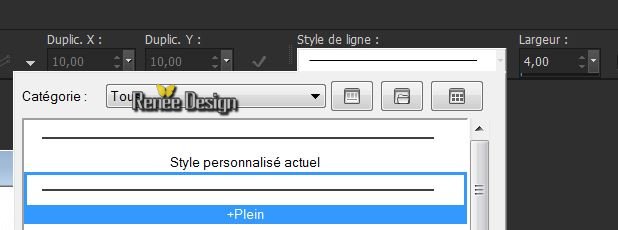
35. With the Pen Tool - Line Style "full"/ thickness 4
Draw a line from the hanger to the tube see finished
drawing
36. Open the tube "renee_la petite
robe noire_lampadaire" - paste as a new layer - place to
the left
*****************************************************************************************************
Save your work and set aside for the moment
We will create our boxes on another layer and save them
as pspimages
You can choose between using the Vizros filter or
predefined forms which are in the forms folder in the
materials folder
If you choose to use Visros here are the instructions
these models may be modified to your taste / here are my
models used for this tutorial
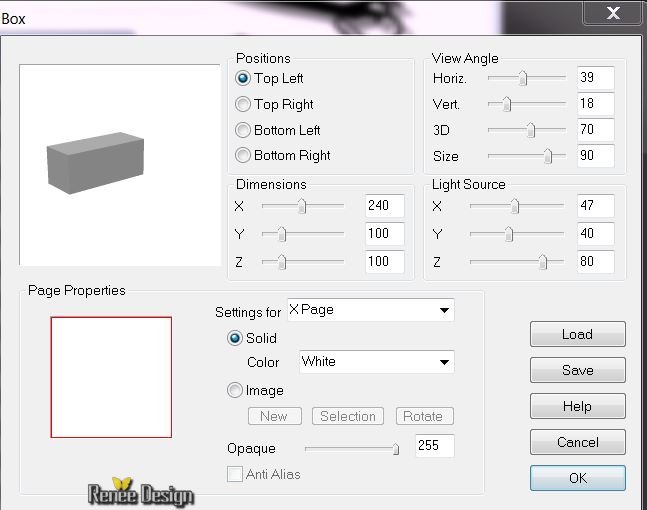
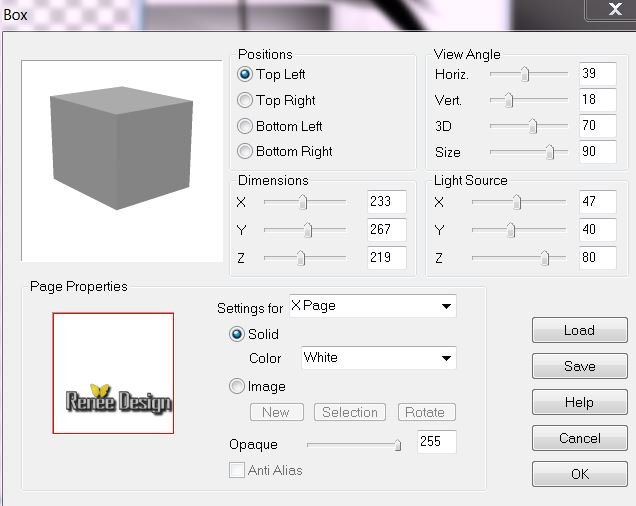
- Open a transparent image 500 x500 pixels
- * Open Vizros and select Box. You can adapt the
parameters depending on choice and according to the
desired shapes
Select the white part with your magic wand - delete
Adjust - Hue and Saturation - Colorize 0/40
Add a New layer
The second form
Select the white part with your magic wand - delete
Adjust - Hue and Saturation - Colorize 0/40
Add a New layer
The second form
Use these parameters
Selections - select none
Image - resize 60%
Adjust - Hue and Saturation - Colorize on 177/20
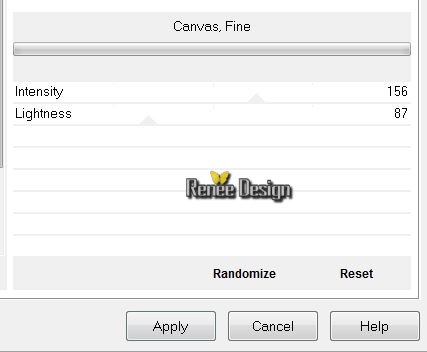
Effects - ICNet filters unlimited - paper texture - fine
canvas
Alter to suit your tastes
Have fun with it
If there are problems - Open the tube "renee_la petite
robe noire_ boite" from your file
*****************************************************************************************************************************************
Back to your main image - Select the top layer
36. Open the boxes you've made and place them according
to the finished image
37. Layers - merge down - so that you have only one
layer of boxes
38. Layers - Merge visible layers
39. With your pen tool - thickness of your choice -
solid line - draw a ribbon like this
40. Open the tube "renee_la petite
robe noire_cage" - paste as a new layer
41. Open the tube "renee_la petite robe
noire_parfum_guerlain" - select raster2 - copy - paste
as a new layer move above your image
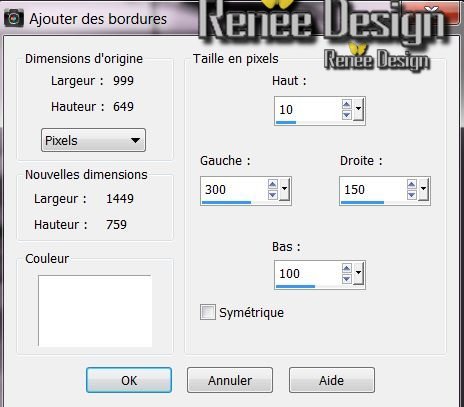
42. Image - add borders 2 pixels black
43. Image - add borders - asymmetrical white
44. Select the white part with the magic wand
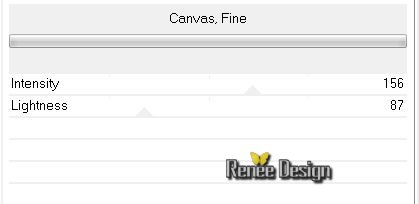
45. Effects - ICNet Filters Unlimited - Paper texture /
Canvas Fine
46. Selections - Invert
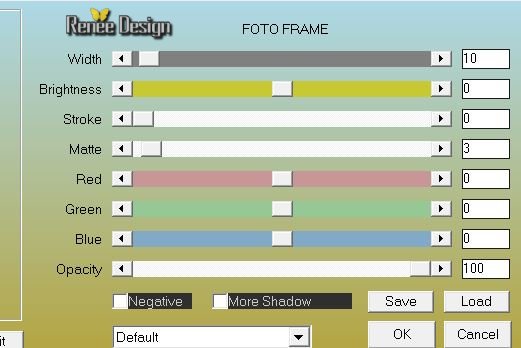
47. Effects - AAA Frames - Foto Frame (Negative and More
shadow unchecked)
48. Selections - deselect
49. Open the tube ''renee-la-petite-dress-noirephotographe''
paste the selected tube as a new layer / position to the
left
50. Effects - EyeCandy 5 Impact / Reflect in front
51. Open the tube ''renee-the-little-black-dress-projector''
sticking up well - place on top of the work
52. Open the tube ''renee-la-petite-dress-demipub'' edit
copy the selected part/ paste as new layer
53. Image Mirror - Effects - 3-D effect - Drop Shadow
default
move to a good place like this
54. Open and export the brush ''la_petite_robe_noire''
size 300 / with the foreground color black - place top
left
55. Effects - 3-D effect - Drop Shadow default
55. Image - add borders 10 pixels black
56. Image - add borders 3 pixels White
57. 3 white
58. Select the 10 pixels border with the wand
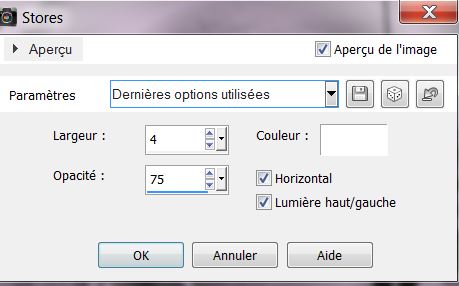
59. Effects - texture effect blinds
60. Effects - 3D effects - drop
shadow 10/10/5/50 black
61. selections - select none
62: Open the tube "titre" - paste as a new layer
63. Image - resize to 1150 pixels wide
*
Lesson over
Thanks Sally
This lesson was written by Renée 29/10/2013
Created the 15/11/2013
I hope you enjoyed this lesson
*
Any resemblance with an existing
lesson is merely a coincidence
|