|
Let's start the lesson.
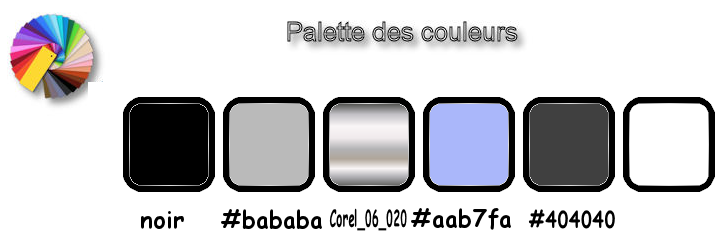
Used Colors
Preparation - Color Palette: Set your Foreground color to #000000 -Set your Background color to #bababa
1.
File / New-Open a transparent image: 1022 x 780 Pixels
2.
Selections –load/save selection –load selection from disc and select my selection:
‘’Juliette_1’’
3. Activate Flood Fill Tool  and fill the selection with the the foreground color #000000 and fill the selection with the the foreground color #000000
Selections- Deselect All
4.
Effects –Plugins - Unlimited – Photo Agin Kit – Cracker paper 189
/128
5. Adjust-Sharpness-Sharpen
6. Activate your Magic Wand use the settings below

-
Select the empty part
7.
Selections - Modify- Expand with 2 pixels
8. Layers- New Raster Layer
9.Activate Flood Fill Tool  and fill the selection with the the background color and fill the selection with the the background color
Selections- Deselect All
9.
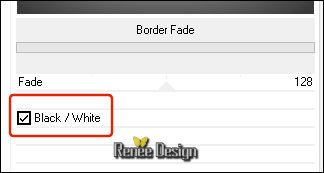
Effects –Plugins- Unlimited – Photo Agin Kit- Border
fade
10.
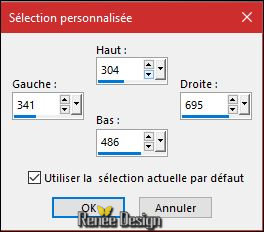
Activate Selection Tool -Custom Selection (S) -Rectangle with these settings
11. Selections-Promote Selection to Layer
12. Effects
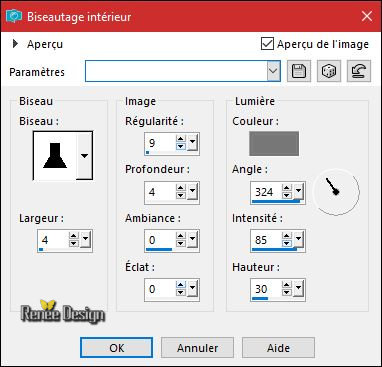
- 3D -Effects -Inner Bevel with these settings -Color
#7f7f7f
-
Keep Selected
13. Effects-
3 D -Effects - Inner Bevel with the same settings but change "Angle " to 140 -Color #7f7f7f
Selections- Deselect All
-Color-Palette: Set your Foregroundcolor to foreground-background linear gradient, with these settings
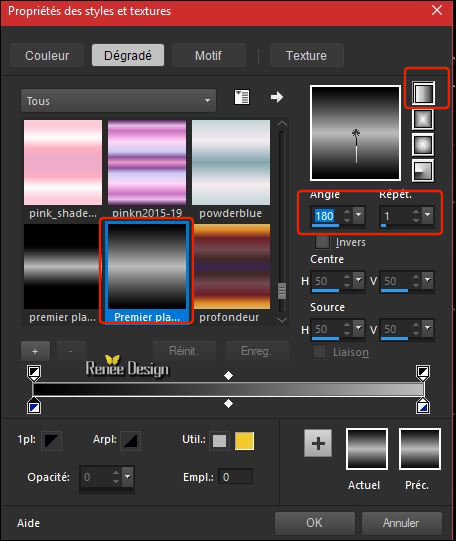
14. Layers- New Raster Layer
15.
Selections –load/save selection –load selection from disc and select my selection: ‘’Juliette_2’’
16.Activate Flood Fill Tool  -
Change the opacity of the color at 70% - Fill the selection with the gradient -
Change the opacity of the color at 70% - Fill the selection with the gradient
17.
Effects – Plugins – Graphic plus – Cross
Shadow use the settings below
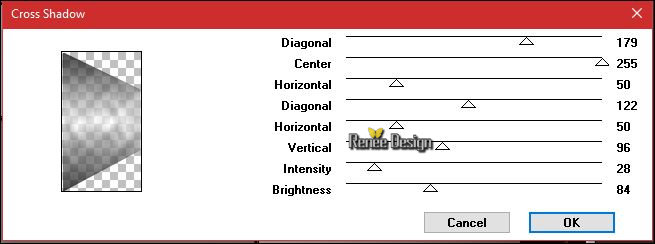
Selections- Deselect All
18.
Effects -Plugins – EyeCandy 5 Impact –Perspective
Shadow with these settings
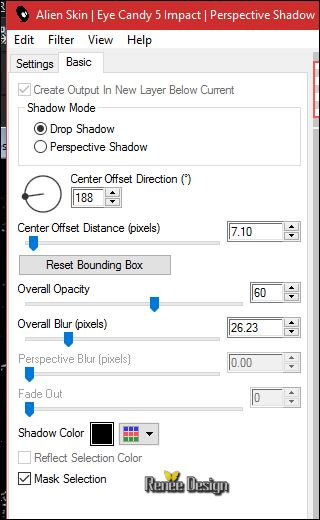
19. Layers- Duplicate
20. Image - Mirror - Mirror Horizontal (Image - Mirror in older versions of PSP)
21. Effects- Image Effects- Offset with these settings : H = 15 and V = 0
22. Activate the Pick Tool (K) Mode Scale -select my file-Preset ‘’
Juliette.PsPscript (Put the Preset in your presetfolder: Included into the zipfile)(Hit the M key of your Keyboard to remove the Nodes)

23. Layers- New Raster Layer
24.
Selections –load/save selection –load selection from disc and select my selection: ‘’Juliette_3’’
25.
Activate your tube ‘’Juliette_image 1’’
–
Edit - Copy- Activate your work -Edit - Paste Into Selection
26.
Effects –3D -Effects -Inner Bevel with these settings /color
#afafaf
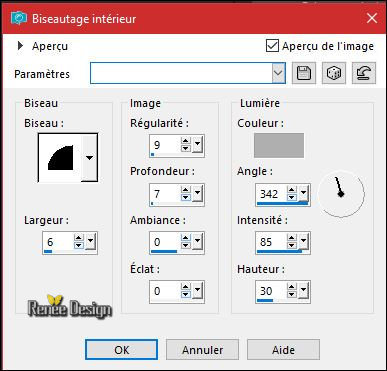
Selections- Deselect All
27.
Layers- Duplicate
28.
Image - Mirror - Mirror vertical ( Image - Flip in older versions of PSP)
29.
Effects- Image Effects- Offset with these settings: H = 0 and V = - 15
30.
Layers-Properties-Set the Blend Mode to " Soft Light "
31.
Effects- Edge Effects- Enhance
-
Color Palette:Set your Foreground color to #ffffff
32.
Layers- New Raster Layer
33.
Selections –load/save selection –load selection from disc and select my selection:
‘’Juliette_4’’
34.Activate Flood Fill Tool  –
Change the opacity of the color at 70% -Fill the selection with the foreground color #ffffff ( 2 clicks) –
Change the opacity of the color at 70% -Fill the selection with the foreground color #ffffff ( 2 clicks)
Selections- Deselect All
35.
Layers-Properties-Set the Blend Mode to " Screen"
-
Color-Palette: Set your Foregroundcolor to foreground-background linear gradient, with these settings
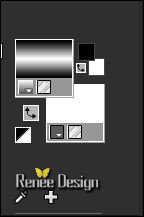
36.
Layers- New Raster Layer
37.
Selections –load/save selection –load selection from disc and select my selection:
‘’Juliette_5’’
38.
Activate Flood Fill Tool  -
Change the opacity of the color at 100%- Fill the selection with the gradient -
Change the opacity of the color at 100%- Fill the selection with the gradient
39. Adjust- Blur- Gaussian Blur: Radius: 15
40.
Effects –Plugins– L & K ‘s –
Paris use the settings below
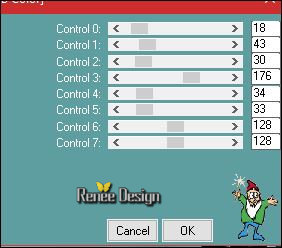
41.
Effects- Edge Effects- Enhance More
Selections- Deselect All
42.
Activate Selection Tool -Custom Selection (S) -Rectangle with these settings
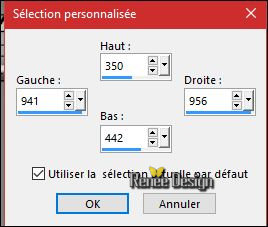
DELETE 
Selections- Deselect All
43.
Activate the tube ‘’ Renee_tube_Juliette’’
Edit - Copy- Activate your work -Edit - Paste as a new layer
44.
Effects- Image Effects- Offset with these settings: H = 22 and V = -
90
45.
Activate the tube ‘’Juliette-texte.png’’
-
Edit - Copy- Activate your work -Edit - Paste as a new layer
-
Activate Move Tool (M) move it the right place at the top of your image
46.
Layers- New Raster Layer
47.
Activate Flood Fill Tool  – Change the opacity of the color at 50%- Fill the Layer with the foreground color #ffffff – Change the opacity of the color at 50%- Fill the Layer with the foreground color #ffffff
48.
Layers- Load/Save Mask-Load Mask from Disk and select ‘’ Narah-mask-0524.jpg’’
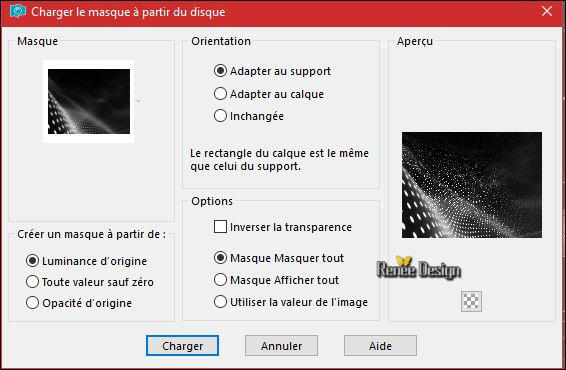
-
Layers- Merge- Merge Group
49.
Layers- Arrange- Move 2 x Down (underneath Raster
7)
-
Your work and Layer Palette look like this now
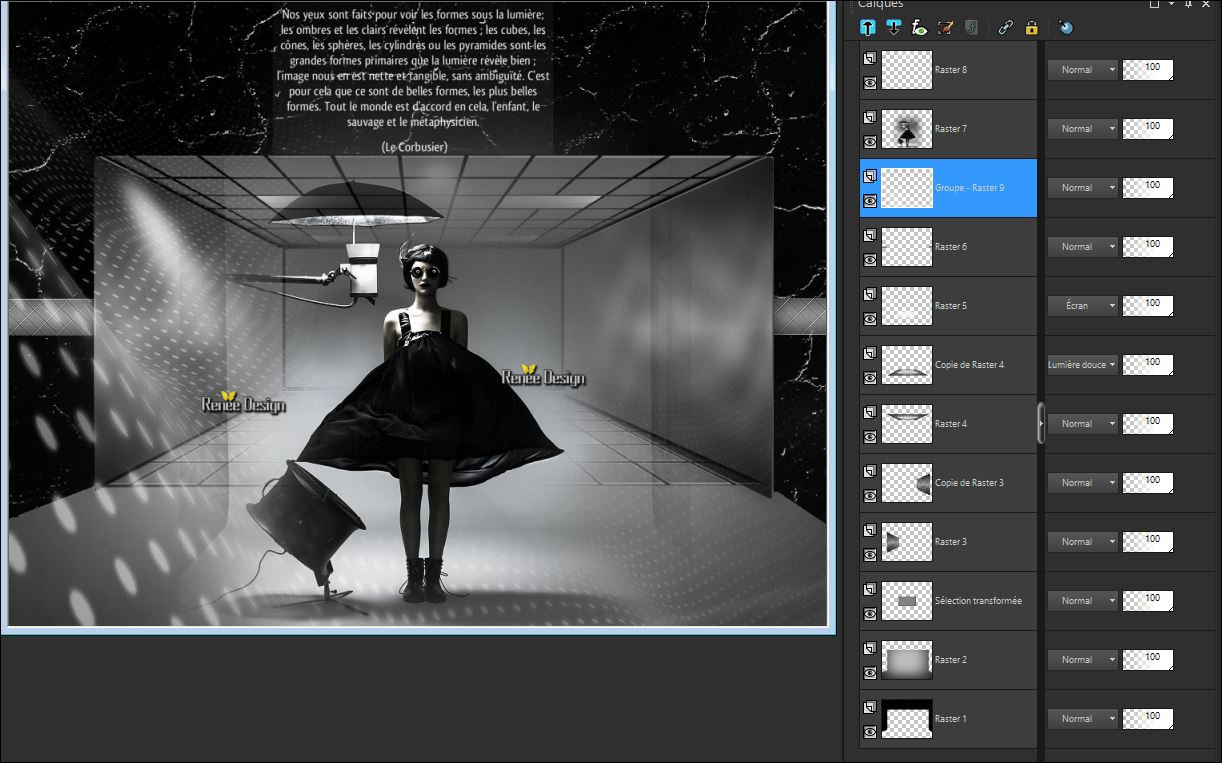
-
To replace the top of the Layer- Palette
50.
Layers- New Raster Layer
51.
Selections –load/save selection –load selection from disc and select my selection:
‘’Juliette_6’’
52.
Activate Flood Fill Tool  -
Change the opacity of the color at 100%- Fill the selection with the gradient -
Change the opacity of the color at 100%- Fill the selection with the gradient
Selections- Deselect All
53.
Effects- 3 D Effects- Drop Shadow with these settings : 1/1/100/1 black
54.
Activate the tube ‘’Juliette_texte_lumiere’’
-
Edit - Copy- Activate your work -Edit - Paste as a new layer
55.
Effects –Image Effects- Offset with these settings: H = - 1 and V =
- 96
56.
Layers-Properties-Set the Blend Mode to " Soft Light " -Set the Opacity of this layer to 57%
-
Color Palette: Set your Foreground color to gradient and select:
Corel_06_020 (Included into the zipfile) Prepare a sunburst gradient configured like this.
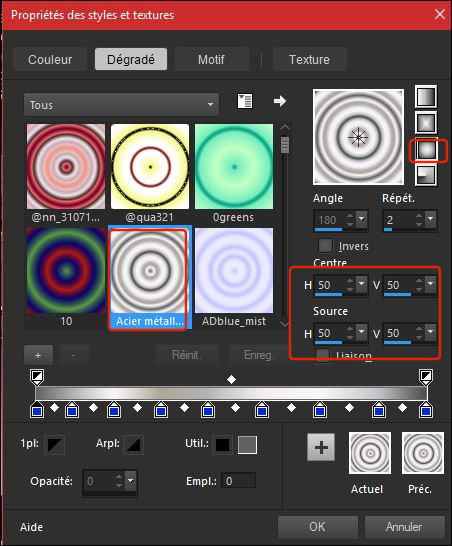
57.
Layers- New Raster Layer
58.
Selections –load/save selection –load selection from disc and select my selection:
‘’Juliette_7’’
59.Activate Flood Fill Tool  -
Change the opacity of the color at 50 and fill the selection with the gradient -
Change the opacity of the color at 50 and fill the selection with the gradient
60.
Effects –Plugins - AP[Distort] Distord wavy City
Ore Filter AP01
Innovations - Distord Wave City
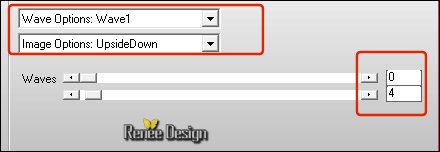
Selections- Deselect All
61
Effects- 3 D Effects- Drop Shadow with these settings 1/1/100/1 black
62. Layers- New Raster Layer
63.
Selections –load/save selection –load selection from disc and select my selection:
‘’Juliette_8’’
64. Activate Flood Fill Tool  -
Change the opacity of the color at 100%- Fill the selection with the foreground color #ffffff -
Change the opacity of the color at 100%- Fill the selection with the foreground color #ffffff
Selections- Deselect All
65.
Effects -Plugins- (Or Unlimited) VM Instant Art –
Pipeline to Siberia
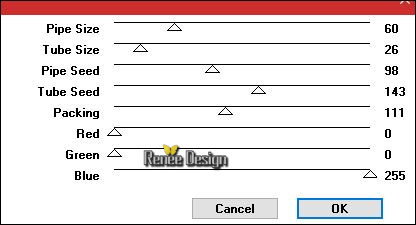
66.
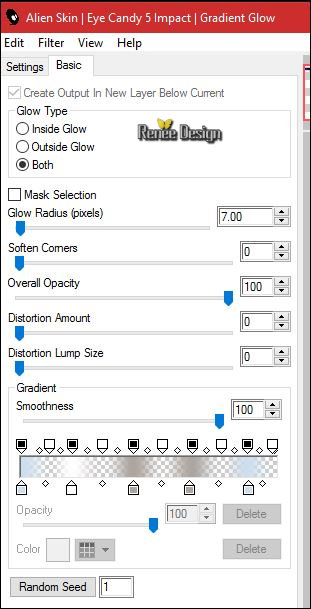
Effects –Plugins – EyeCandy 5 Impact – Gradient
Glow-Settings/User settings and choose my Preset ‘’Juliette-Gradient_glow’’
Or manual settings as shown in the example below
Color #cddeee / #aca49e and #ffffff
67.
Layers- Duplicate
68.
Image - Mirror - Mirror Horizontal (Image - Mirror in older versions of PSP)
69.
Layers- Merge- Merge Visible
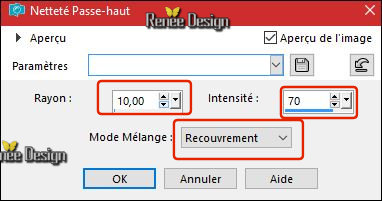
70.
Adjust- Sharpness-High Pass Sharpen
-
Color Palette:Set your Foreground color to #aab7fa
-Set your Background color to #404040
-
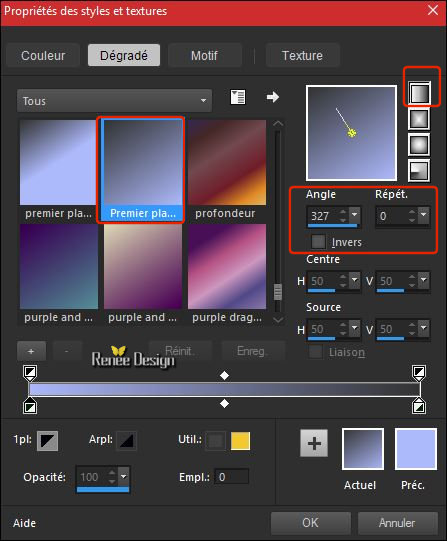
Color-Palette: Set your Foregroundcolor to foreground-background linear gradient, with these settings
71.
Layers- New Raster Layer
72.
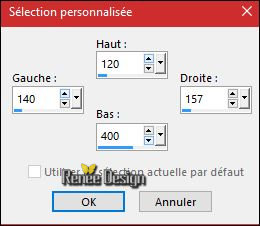
Activate Selection Tool -Custom Selection (S) -Rectangle with these settings
73.Activate Flood Fill Tool  and fill the selection with the gradient and fill the selection with the gradient
Selections- Deselect All
74.
Layers- Duplicate
75.
Image - Mirror - Mirror Horizontal (Image - Mirror in older versions of PSP)
76.
Layers- Merge- Merge-Down
77. Effects- Image Effects- Seamless Tiling using the default settings
78.
Adjust- Blur- Gaussian Blur: Radius: 8
79.
Layers- Duplicate
80.
Effects- Distortion Effects- Wave use the settings below
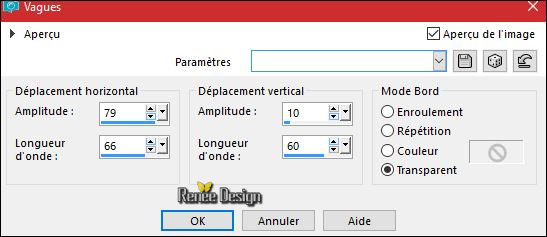
81.
Layers-Properties-Set the Blend Mode to " Screen"
Layer-Palette -
Activate the Layer Underneath ( Raster
13)
82.
Effects –Plugins– Photo Effex
Scanlines
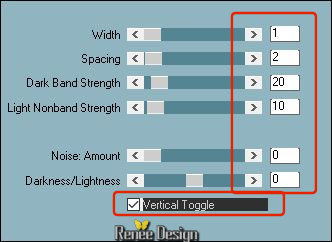
83.
Activate your tube ‘’ Juliette
_Image2.pspimage’’
-
Edit - Copy- Activate your work -Edit - Paste as a new layer
-
Activate Move Tool (M) move it the right place at the top of your image
84.
Activate your tube ‘’ Juliette
_Image3.pspimage’’
-
Edit - Copy- Activate your work -Edit - Paste as a new layer
85.
Effects- Image Effects- Offset with these settings: H = 0 and V = 244
86.
Layers-Properties-Set the Blend Mode to " Hard Light "
87.
Image - Add borders-Symmetric checked: 1 Pixel black
88.
Image - Add borders-Symmetric checked: 5 Pixels #ffffff
89.
Activate Magic Wand and click in the white border of 5 Pixels / Activate Flood Fill Tool and fill the selection with the gradient
Selections- Deselect All
90.
Image - Add borders-Symmetric checked 1 Pixel black
91.
Image - Add borders-Symmetric checked 50 Pixels #ffffff
91.
Activate Magic Wand and click in the white border of 50 Pixels
92. Activate Flood Fill Tool  -
Opacity of the color at 100 % / Activate Flood Fill Tool and fill the selection with the gradient -
Opacity of the color at 100 % / Activate Flood Fill Tool and fill the selection with the gradient
93.
Selections-Invert
94. Effects
– Plugins – EyeCandy 5 Impact – Perspective Shadow
/Preset / Drop shadow Lowest
95.
Selections – Invert
96. Effects
–Plugins – Graphic plus – Gross shadow
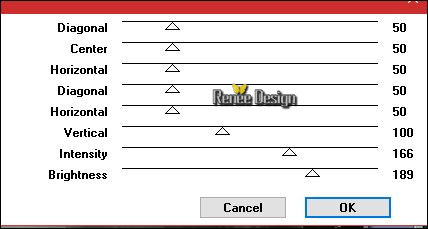
Selections- Deselect All
97
.Image - Add borders-Symmetric checked 1 Pixel black
98.
Image - Add borders-Symmetric checked 2 pixels #ffffff
99.
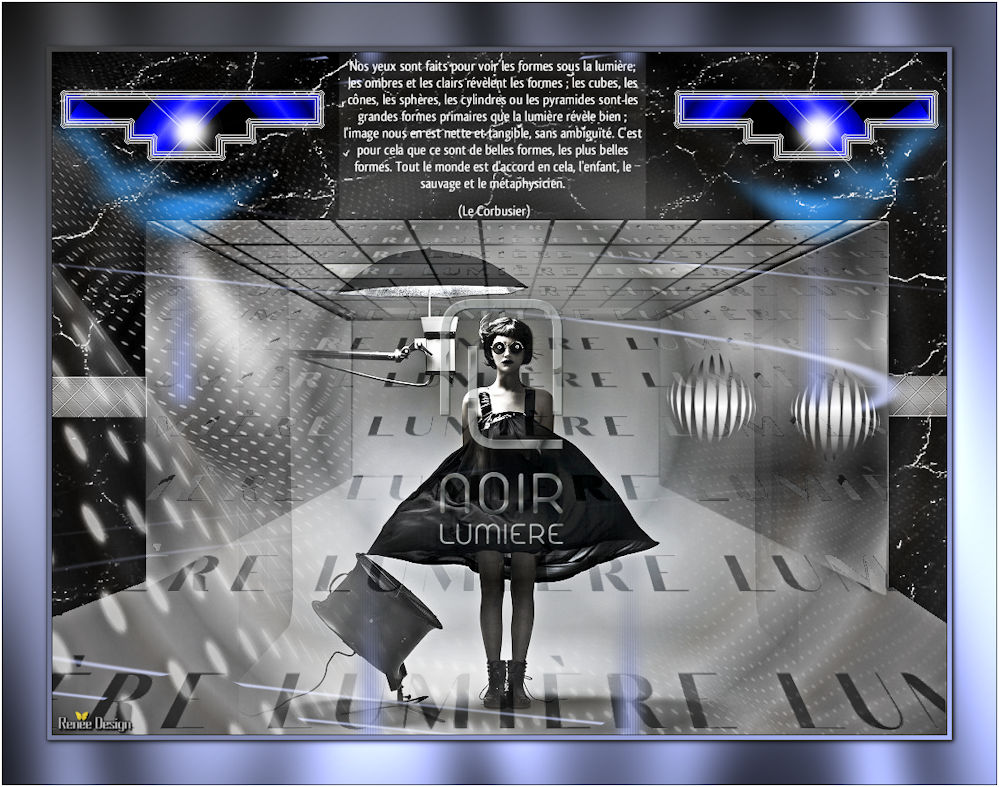
Image - Resize to 999 pixels width.
Save as JPG
I hope you enjoyed this lesson
Renée
This lesson was written by Renée 03/06/2017
Edited and Update
2017
*
Any resemblance with an existing lesson is a coincidence
* Do not forget to thank the people who work with us and for us I have appointed the tubeurs and translators
Thanks
Renée
*
| 
 Translations


 If a plugin supplied appears with this icon it must necessarily be imported into Unlimited *


 All rights reserved
