|
Let's start the lesson. Open the Color-Palette
-
Material Properties:Set your foreground color to: #f0f0f0
- Set your background color to: #343434
1.
File-Open a new transparent image –1125 x 655 pixels
2.
Set your foreground to gradient 'Foreground-background' - Linear -with these settings
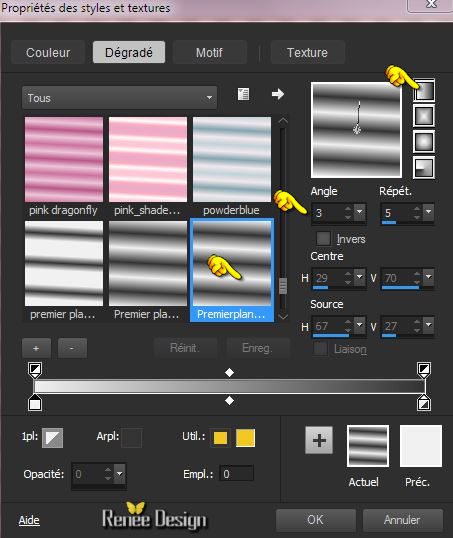
3.
Activate Flood Fill Tool and fill the layer with the gradient
4.
Adjust-Blur-Gaussian Blur: Radius: 42
5.
Effects –Plugins- Unlimited - Two Moon - Dreamulator... using the default settings 237/245/209/203
6.
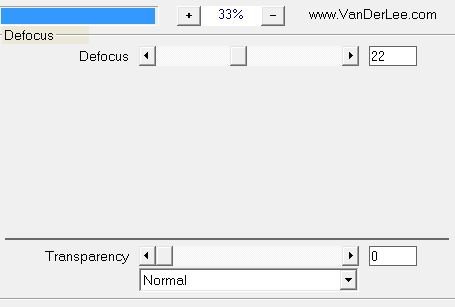
Effects – Plugins – Vanderlee – Unplugged X-
Defocus
7. Effects- Plugins – Graphic plus – Weaver a
5/15
8. Layers- Duplicate
9. Image
Free Rotate 45° Right
10.
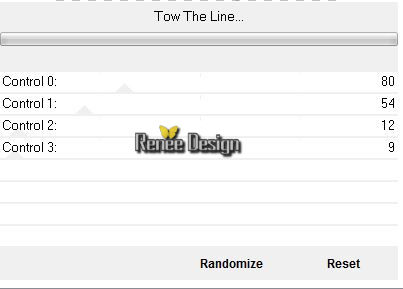
Effects -Plugins – Unlimited - Andrew's Filters 8-Tow The
Line..with these settings .
11. Layers- Duplicate
- Image
Mirror
12. Double click on this Layer and set the Blend Mode to "Hard Light "Set the layer opacity of this layer to 67%
13. Layers- Merge- Merge Down
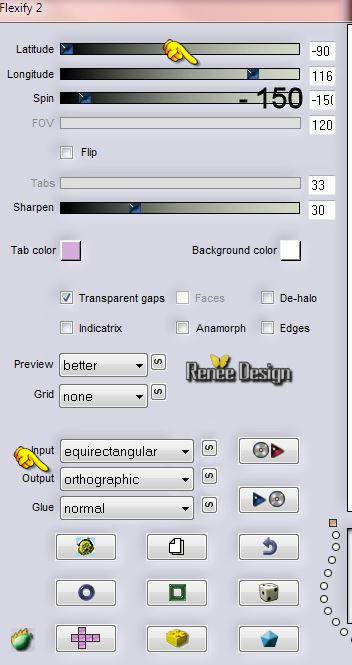
14.
Effects- Plugins – Flaming Pear –
Flexify2 with these settings
15. Effects - 3D-Effects -Drop shadow with these settings: 3/10/100/25 black
- Repeat- Drop Shadow with the same settings
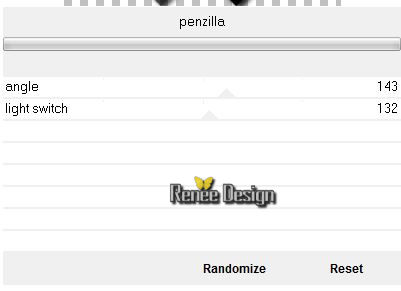
16. Effects
-Plugins – Unlimited – kang 1 – Penzilla
17.
Effects -Plugins – Unlimited – Kang1 - we make Tea
cups 6/ 161/9
18.
Selections –load/save selection –load selection from disc and choose:“ Jefferson art_1 »
19. Edit-Cut !! Edit Paste as a new layer on your working image
Selections- Deselect All
Material Properties:Set your foreground color to #343434 -Set your background color to #ffffff
20.
Effects-Plugins- Unlimited – Kang1- radio Antartica
45/54
21. Double click on this Layer and set the Blend Mode to "Dodge "
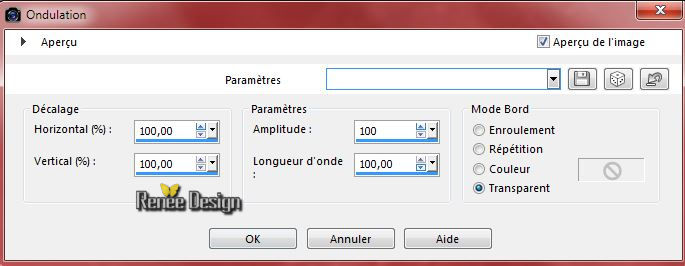
22. Effects-Distortion Effects- Ripple with these settings
23. Activate the tube ‘’Renee_tube_Jefferson
art_horloge.pspimage’’
- Edit/copy- Edit/ paste as new layer on your working image
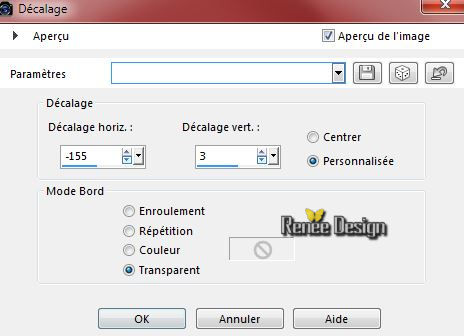
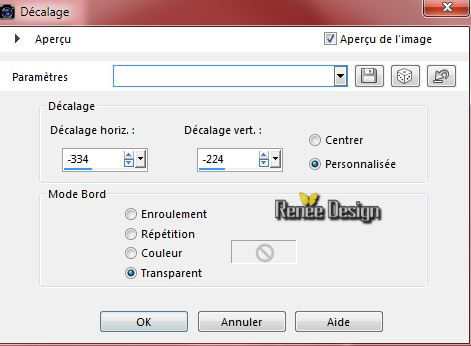
24. Effects- Image Effects- Offset with these settings H = -415 and V = 158
25. Effects- Plugins – penta com – color dot
90/2/255/255/255
26. Activate the tube ‘’ Jefferson art_tubes_tuto .pspimage’’
You may minimize the tube for a moment, but do not close, we will need it again soon.
(Some layers of the tube are still closed. But open it if you need it)
- Activate layer « femme_brisee’’ of the tube
- -Edit/copy- Edit/ paste as new layer on your working image
27. Effects- Image Effects- Offset with these settings
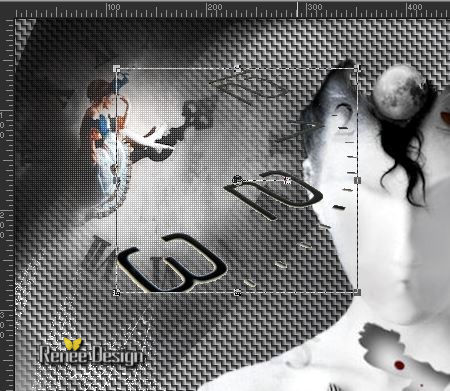
28. Activate layer ‘’heure’ of the tube
- Edit/copy- Edit/ paste as new layer on your working image
29. -Activate your Pick Tool (K) place it in the right place as shown in the example below
30. Effects- Edge Effects- Enhance
31.Layers- New raster layer
32. Activate Flood Fill Tool and fill the layer with black
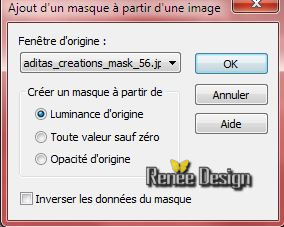
33. Open your mask in PSP -Layers- New Mask layer from Image and choose Mask: ‘’
aditas_creations_mask_56.jpg’’
- Effects- Edge Effects- Enhance
- Layers- Merge-Merge Group
34. Image – Image Negative
- Material Palette :Set your foreground color to
#343434 - Set your background color to #ffffff
35. Layers- New Raster layer
36. Selection Tool ( S ) Custom selection use settings below
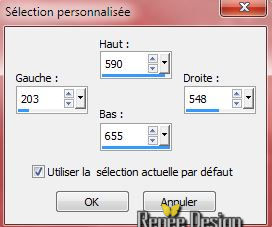
37. Activate Flood Fill Tool and fill the selection with the foreground color #343434
38. Selections- Modify-Contract with 20
pixels
39. Layers- New Raster layer
40. Activate Flood Fill Tool and fill the selection with the background color #ffffff
Selections- Deselect All
41.Layers- Merge- Merge Down
42. Effects –Plugins - Unlimited - kang 3 - waxing a Lizard using the default settings
228/228/0/137/137
43. Effects -Plugins – Unlimited - It@lian Editors
Effect-
Effetto Fantasma 17/18
44. Effects - 3D-Effects- Drop shadow with these settings: 0/0/90/48,12
black
45. Layers- Duplicate
46. Activate -Pick Tool - (K) select my file- « Preset_Pick_Jefferson
art_deformation »

click on the Preset / ok
- Hit the M key of your Keyboard to remove the Nodes
47. Effects- Edge Effects- Enhance
48. Layers- New Raster layer
49. Selections –load/save selection –load selection from disc and choose: ‘’
Jefferson
art_2’’
50. Layers- New Raster layer
51. Activate Flood Fill Tool and fill the selection with the foreground color #343434
52. Effects- Plugins Eyecandy –Glass ‘
-
-tab Settings/User settings choose my preset: ‘’jefferson_glass’
53. Selections- Modify-Contract
10 pixels
54. Layers- New Raster layer
55. Activate Flood Fill Tool and fill the selection with #ffffff
56. Adjust-Blur-Gaussian Blur: Radius: 2
Selections- Deselect All
57. Layers- Merge- Merge Down
58. Layers- Duplicate
59 . Activate -Pick Tool - (K) select my file-
« Preset_Pick_Jefferson art_deformation
2 »
-click on the Preset / ok
- Hit the M key of your Keyboard to remove the Nodes
60. Activate the tube ‘Jefferson art_tubes_tuto .pspimage’’
- Activate layer ’’femme couchee’’ of the tube
- Edit/copy- Edit/ paste as new layer on your working image
61. Effects- Image Effects- Offset with these settings
62. Layers- Arrange- Move Down
you should have this result:
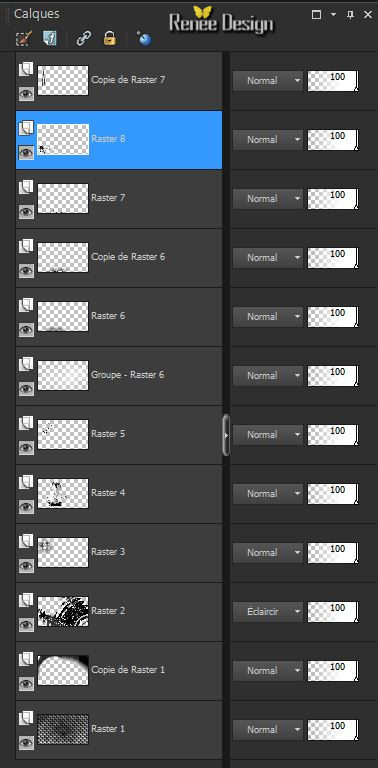
-Material palette:Set your background color to #89388c
- Activate the top of the layer-Palette =(Copy of
Raster 7)
63. Effects -Plugins – Unlimited - It@lian
Editors Effect-
Effetto Fantasma 11/19
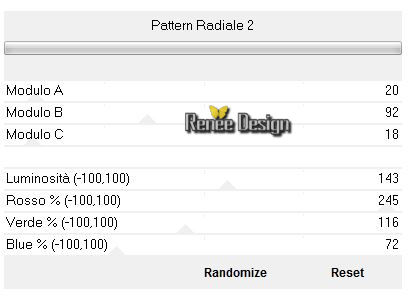
64. Effects
-Plugins – Unlimited - Italian Editors Generatore - Pattern Radiale
2
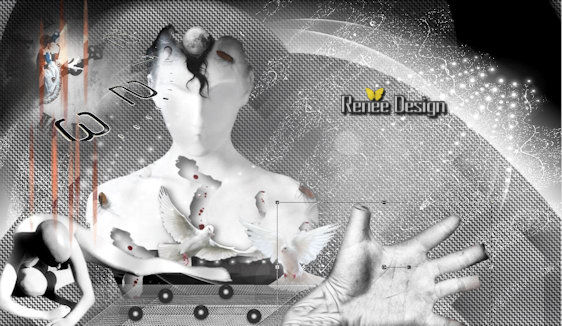
65. Activate the tube ‘’
Jefferson art_tubes_tuto .pspimage”
- Activate layer " main" of the tube
- Edit/copy- Edit/ paste as new layer on your working image
With the move tool, move it in the bottom as shown in the example below
66.Effects- Plugins – Nick Color Effex Pro 3.0- Brilliance
Warmth
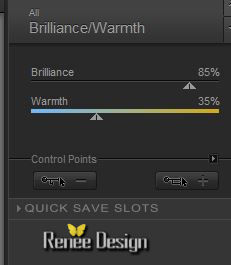
- On this tube
67. Activate the layer ”fenêtre ‘of this tube
- Edit/copy- Edit/ paste as new layer on your working image
68. Move tool / place your tube on the right side of your image
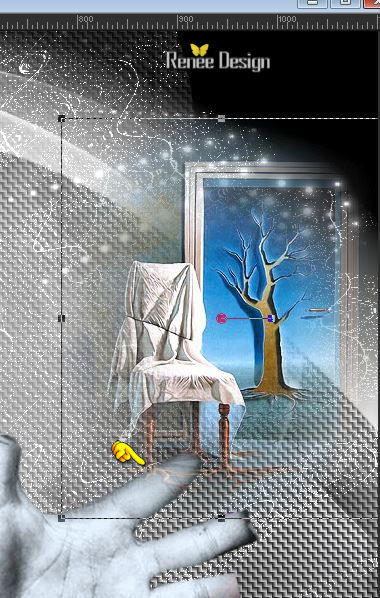
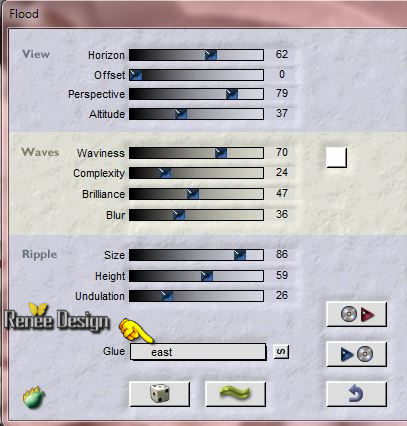
69. Effects- Plugins – Flaming Pear
–Flood with these settings (attention Glue>> east)
70. Layers- Arrange-Move Down
- Edit/copy- Edit/ paste as new layer on your working image
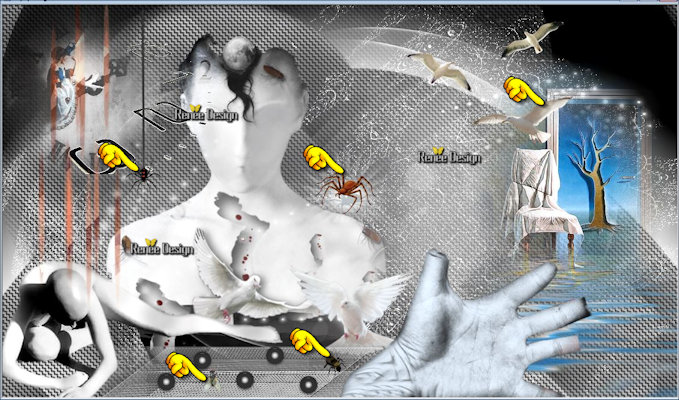
71. On the same tube
- Activate layers
« araignée1 « / araignée 2’’ /oiseaux
-Edit/copy-
- Edit/ paste as new layer on your working image
- Activate your Pick Tool (K) place it in the right place
72. Activate the tube
‘’Insectes_oiseaux_papillons »
- Activate 2 insects of choice
- Image Resize 2 x 50%
- Edit/ paste as new layer on your working image
- Activate your Pick Tool (K) place it in the right place as shown in the example below
- Activate the top of the Layer-Palette
73. Layers- New Raster layer
74. Selections –load/save selection –load selection from disc and choose: ‘’
Jefferson art_3 »
75. Activate Flood Fill Tool and fill the layer with #ffffff (click 2 times in the middle of the selection )
Selections- Deselect All
76. Effects- Edge Effects- Enhance More
- Double click on this Layer and set the Blend Mode to "Dodge "
77. Activate the tube « Jefferson art_tubes_tuto
.pspimage»
- Activate layer ’’plafond_bras’’of the tube
- -Edit/copy- Edit/ paste as new layer on your working image
-
With the move tool, move it in the upper right corner
78. Blend Mode "Luminance
Legacy "
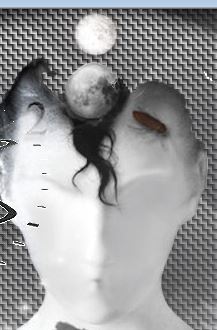
79. Layers- New Raster layer
- tube ‘’ kmoon4’’ in your psp -File-Export -Picture Tube
80. Activate Picture Tube Tool -Activer tube ‘’ kmoon4’’with these settings

- Apply the tube as shown in the example below (above the head)
- Material Properties:Set your foreground color to: #a11133 - Set your background color to: #ffffff
81.Layers- New raster layer
82. Selections –load/save selection –load selection from disc and choose:’’
Jefferson
art_4’’
83.Activate Flood Fill Tool and fill the selection with the foreground color #a11133
Selections- Deselect All
84. Effects- 3D Effects- Drop Shadow with these settings: 1/1/100/0 black
85. Selections –load/save selection –load selection from disc and choose: ‘’
Jefferson
art_5’’
Hit the DELETE key 
- move the tube so it fits
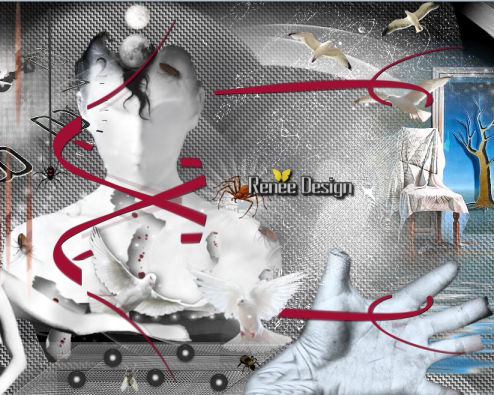
86. Activate the tube ‘’
Jefferson_art_Image1.pspimage’’
- Edit/copy- Edit/ paste as new layer on your working image
-
With the move tool, move it to the right side like this
87. Layers- Merge- Merge Visible
88. Image - Add borders-Symmetric checked: 1 pixel black
89. Image - Add borders-Symmetric checked: 10 pixels white
90. Image - Add borders-Symmetric checked: 1 pixel black
91. Image - Add borders-Symmetric checked: 50 pixels white
92. Activate the magic wand and select the white border of 50 pixels
93. Effects- Plugins – Eyecandy 5 Texture -
Texture Noise with these settings

94. Selections- Invert
95.Effects - 3D-Effects-Drop shadow with these settings: 1/1/100/10 black
Selections- Deselect All
96. Image - Add borders-Symmetric checked: 1 pixel black
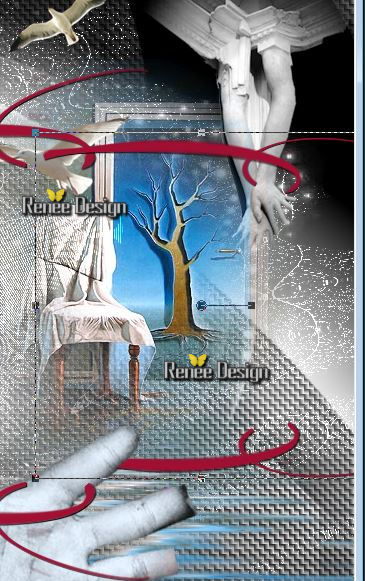
97. Activate the tube ‘’
Jefferson_art_Image2.pspimage’’
- -Edit/copy- Edit/ paste as new layer on your working image
- Move tool / place your tube at the top
98. Layers- Duplicate
- Image Flip
99. Layers- Merge- Merge Visible
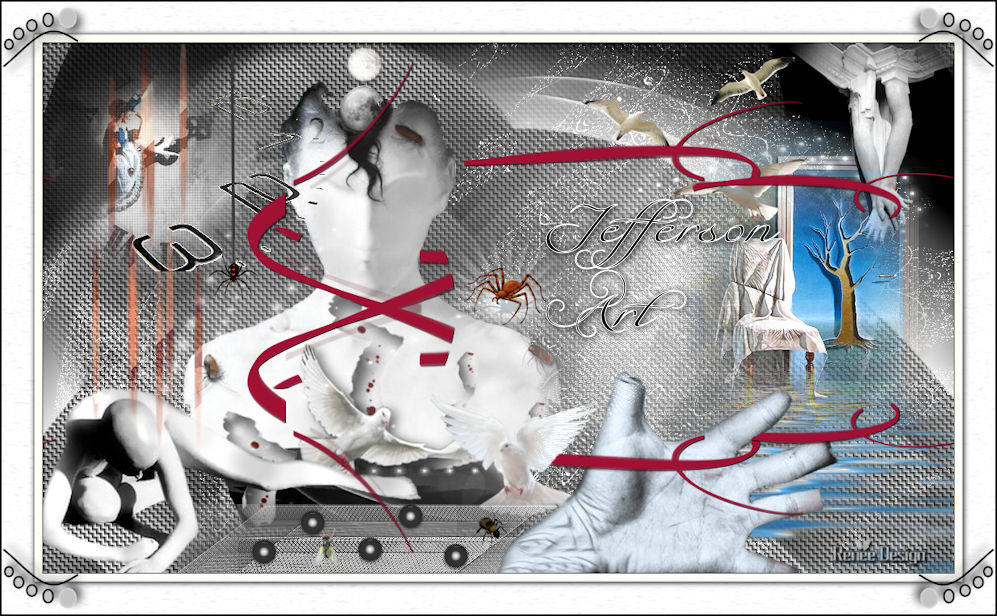
100. Image Resize 995 pixels width
101. Activate
Text Tool-Write your text -‘’font your choice or take mine
102. Image - Add borders-Symmetric checked: 1 pixel black
Save as JPG
I hope you enjoyed this tutorial .
Renée
This lesson was written by Renée 04/08/2015
edited and update
2015
*
Any resemblance with an existing lesson is merely a coincidence *
* Don't forget to thank the people who work for us and with us. I named the tubeurs - Testers and the translators.
Thanks Renée.
*
| 
 Translations


 When you see this logo the filter is imported in Unlimited

 All rights reserved