|
Illuminatie
Let's
begin
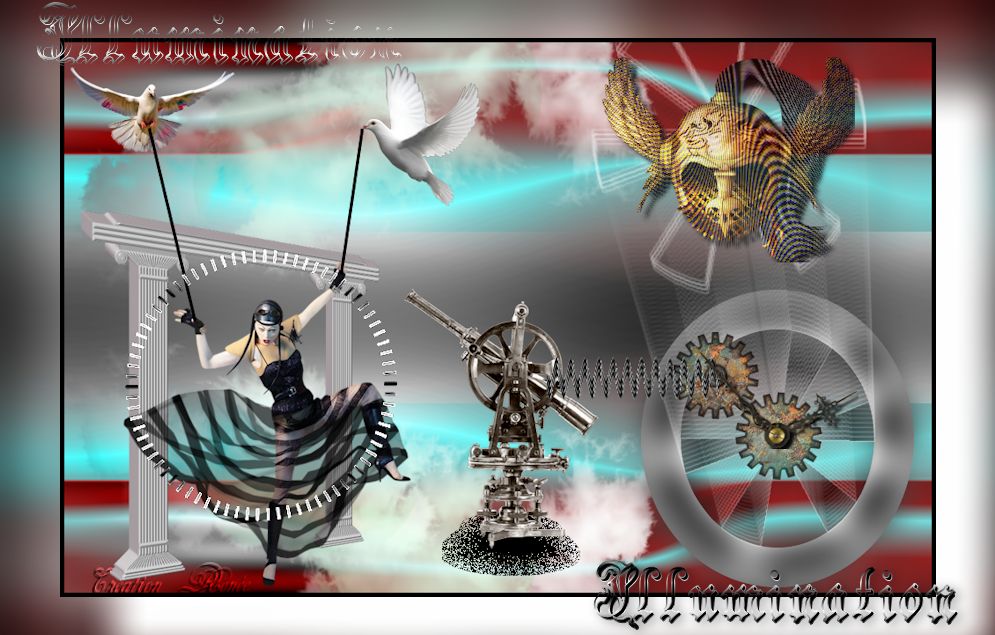
1. Open an image of 985 x 625 pixels
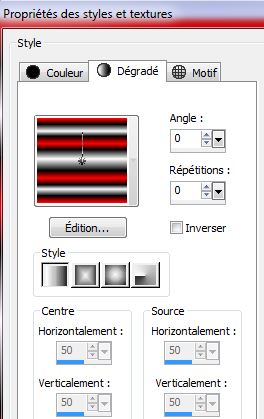
2. Color Palette - gradient/ gardient14/ "fairykiss
foreground" - linear configured like this
Fill the transparent image with the gradient
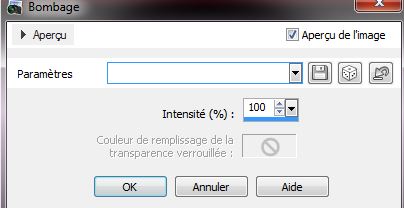
3. Effects - Distortion Effects/ Punch
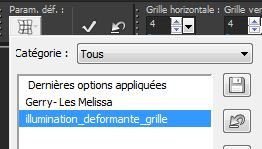
4. Choose your Mesh Warp tool and open "Preset_MeshWarping_illumination_deformante_grille"
(which you put in your default settings)
Click on apply to apply effect
5. Layers - duplicate.
Set the blend mode to exclusion
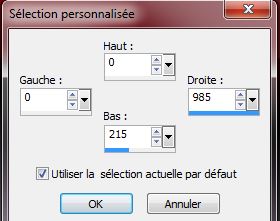
6. Selection tool - Custom selection
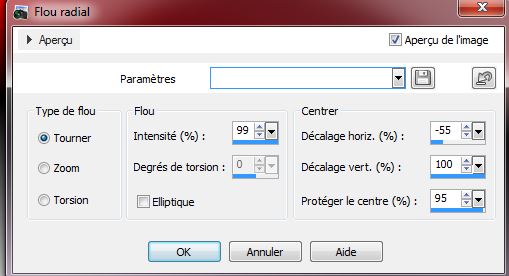
7. Adjust Blur / Radial Blur
8. Selections - Select none
9. Duplicate layer / Image Flip
10. Set your layer blend to exclusion
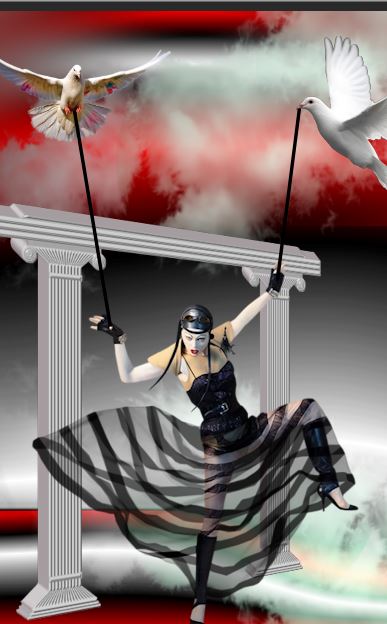
11. Open the tube "Tyna29" - resize at 80% .
Copy and paste as a new layer - move as shown on the
example
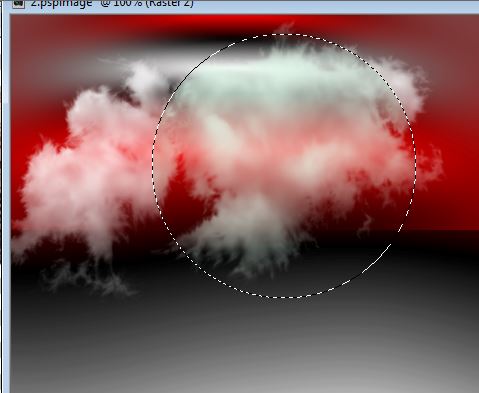
12.With selection tool (S) / Circle - select a portion
of your cloud like this
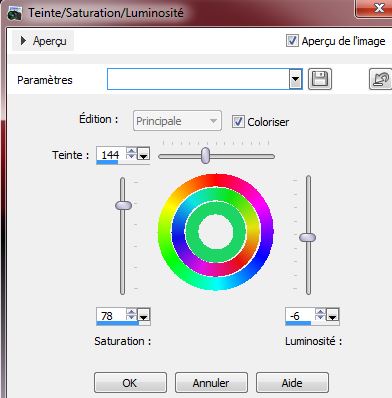
13. Adjust - Hue and Saturation Saturation and
Brightness 78 - 6 / Colour 144
/Select none
14. Layers duplicate / Mirror Image
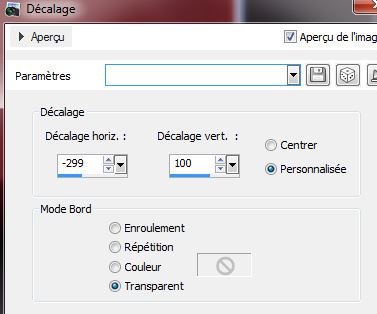
15.Effect - Image effect/ Offset
16. Layers - merge down
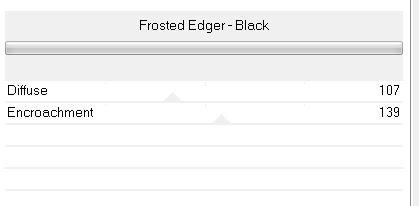
17. Effects - Filters-Unlimited 2.0 / Photo Tools /
Frosted Edger - Black
18. Layers duplicate - Image flip
19. Use hard light blend
20. Open the tube "romain_04" Copy and paste as a new
layer
21. Effects Eyecandy5/ Impact - Extrude/ Preset "illumination_extrude"
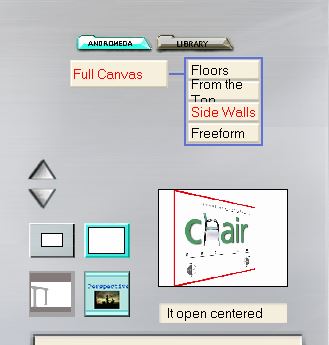
22. Effects - Andromeda Perspective / Side Walls / It
Open Centred
22. Image resize to 80%/ all layers
unchecked
Place like this

23. Open the tube "manudesigns_oiseau"
Copy and paste as new layer.
Place as shown
24. Open the tube "dove DoudouSDesign" - Copy and paste
as a new layer
Place as shown
25. Open the tube "Alies1VR492-woman-20052013" - resize
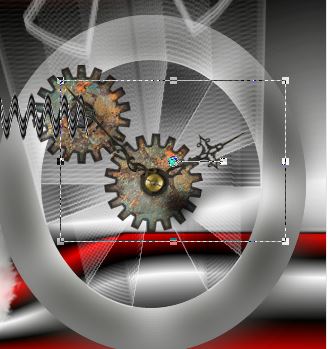
to 75% and copy and paste it in place
26. Set your foreground color to black, select the pen
tool - width = 4/style solid line

27. Draw lines like this
28. Layers - new raster layer
29. Selections - load selection from disk/
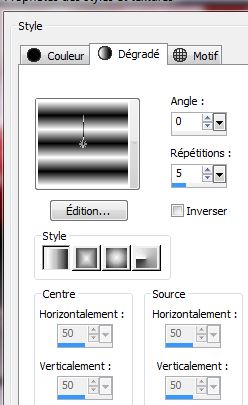
"illumination_1"
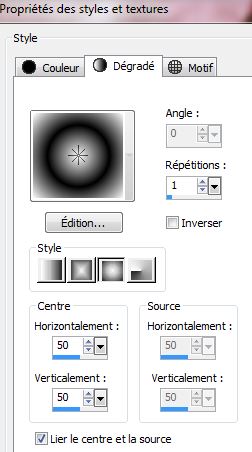
30. Prepare a sunburst gradient with white foreground
and black background
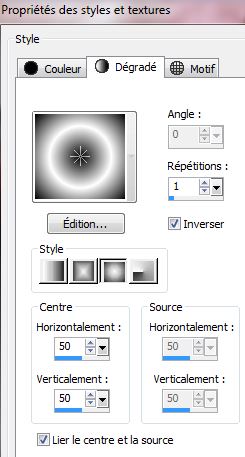
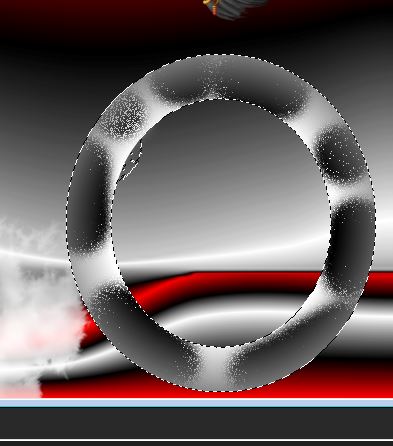
31. Fill the selection with the gradient
32. Selections - Modify/ Contract by 45 pixels - Hit the
Delete key
33. In the color palette uncheck invert your gradient
for this
34. Selections - select all - Float
selection - Defloat selection
35. Layers - add a new raster layer
36. With the Airbrush tool set like this

37. Appply small moves like this
38. Selections - select none
39. Adjust/ blur - Gaussian blur set to 18
40. Layers - new raster layer
41. Selections - load the selection "illumination_2"
fill with the sunburst gradient
DO NOT DESELECT
42. Effects - VM Distortion/ Broken
Mirror
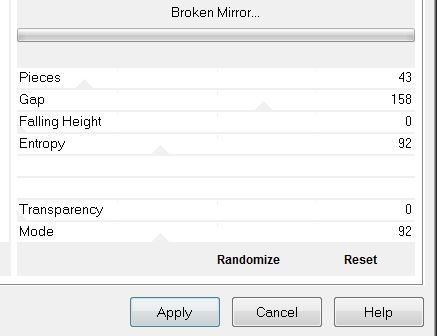
43. Selections - Select none
44. Effects Eyecandy5 Impact / Blacklight - Preset "illumination_blacklight"
/ opacity to 57 (see if the finished effect is at the
same position if not move slightly)
45. Open the tube "irondragon6-25-07" - Copy and paste
as a new layer
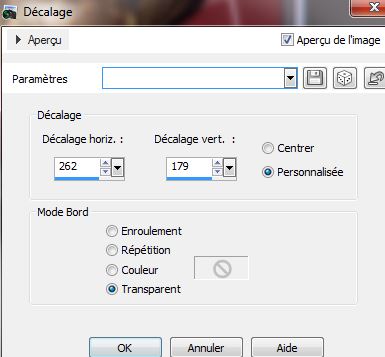
46. Effects - Image effect/ Offset
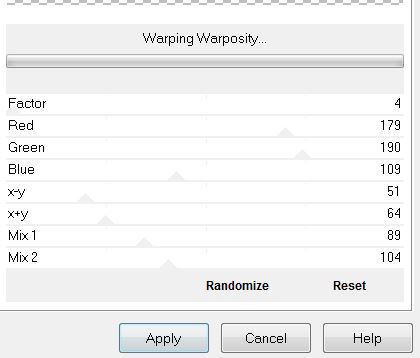
47. Effects - Filters Unlimited 2.0 /
Plugins AB06 - Warping Warposity
48. Lower opacity down to 83
49. Open and paste the tube "hg-steampungear"/ Put in
place and lower opacity to 75
50. Layer - new raster layer
51. Selections - load selection "illumination_3" / fill
with black
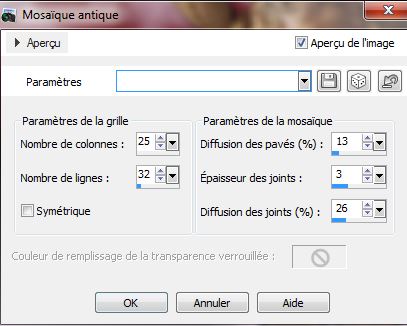
52. Effects - texture effects - Mosaic/Antique
53. Selections - select none
54. Open up the tube "lunette_illumination" - Copy and
paste as a new layer/ place as shown
55. Set your foreground color to white and background to
black/ create a linear gradient
56. Layers - Add a new layer
57. Selection - load selection from disk
"illumination_4"/ fill with the linear gradient
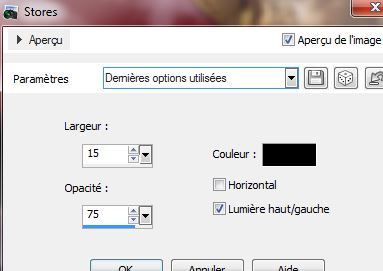
58. Effects - texture effect/ blinds using the color
black
59. Selections - select none
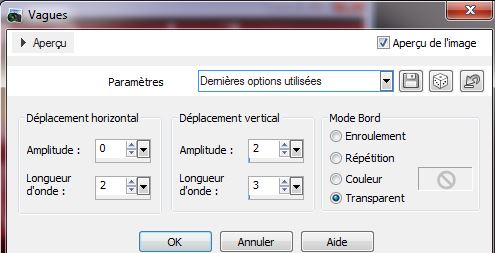
60. Effects - Distortion effect/ Wave
61. Put in place with select tool (K) as
follows
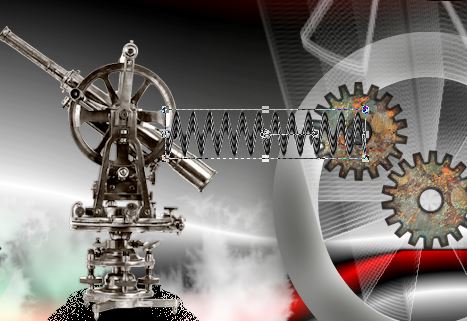
62. Open up the tube "aiguille_illumination"
Copy/paste and place like this
63. Layers - new raster layer
64. Selections - load the selection "illumination_5"
65. Fill it with the linear gradient
66. Selections - select none
67. Effects - Edge effect/ enhance more
68. Layers - Merge all layers
69. Image - add borders 5 pixels in black
70. Layers - duplicate
71. Image Resize to 88%/ all layers unchecked
72. Activate the bottom layer (Background)
73. Adjust - Blur/ Gaussian blur at 30
74. Go back on the top layer (Copy of Background)
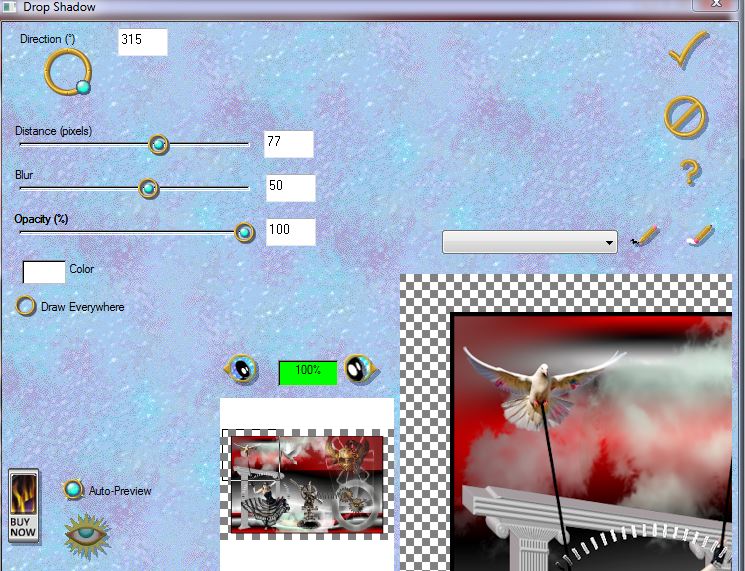
75.Effects - Eyecandy 3.1 / Drop shadow with the
following settings
76. Copy
and paste "titre.png"
77. Layers duplicate / set the blend mode Lighten
advantage
This is done thanks
Translated by
Sally
|