|
Let's start the lesson.
- Preparation
- Material Properties: Set your foreground color to color # c3c0b9= 1 – Set your background color to color # 5ea19a= 2

1. Open the Background Image ‘’ Fond –hello-baby’’
– Promote Background Layer =Raster 1
2. Layers- Duplicate
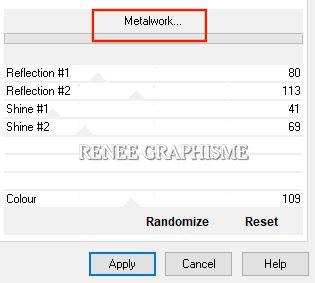
3. Effects –Plugins-
Unlimited 2.0 – Toadies – Metalwork…use the settings below
4. Layers-Properties-Change the Blend Mode to " Multiply " and Lower the Opacity to 67%
5. Effects- Image Effects-Seamless Tiling using the default settings
6. Layers- Duplicate
7. Effects –Plugins-
Unlimited 2.0 – Toadies - Ommadawn...217/217/234/17
8. Layers- Duplicate
9. Image - Mirror - Mirror Horizontal (Image - Mirror in older versions of PSP)
10. Image - Mirror - Mirror vertical ( Image - Flip in older versions of PSP)
11. Layers- Merge- Merge Down
12. Effects- Image Effects-Seamless Tiling using the default settings
13. Layers- Merge- Merge Down
14. Effects – Edge Effects – Enhance
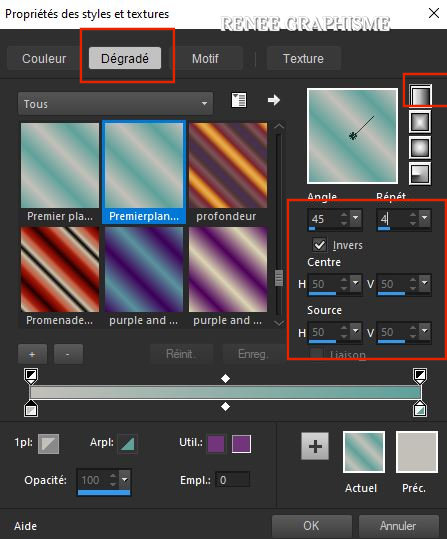
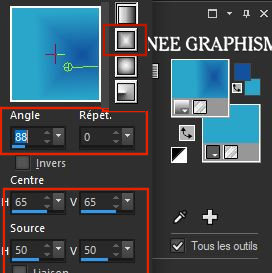
- Set your Foregroundcolor to foreground-background linear gradient configured like this
15. Layers- New Raster Layer
16. Selections –load/save selection –load selection from disc and select my selection: ‘’ Baby-1’’
17. Flood Fill Tool – Fill the selection with the gradient
18. Adjust- Blur- Gaussian Blur - Radius 25
Selections- Deselect All
19. Effects – Plugins– Alpha Works – Vertical Fade out 231
20. Layers- New Raster Layer
21. Selections –load/save selection –load selection from disc and select my selection: ‘’ Baby-2’’
22. Flood Fill Tool
–
Fill the selection with the gradient
Selections- Deselect All
23. Effects – Plugins– Alpha Works – Horizontal Fade out 226
- Repeat : Effects – Plugins– Alpha Works – Horizontal Fade out 226
24. Layers-Properties-Change the Blend Mode to " Screen " and Lower the Opacity to 55%
25. Layers- Merge- Merge Down
26. Layers- Duplicate
27. Image - Mirror - Mirror Horizontal (Image - Mirror in older versions of PSP)
28. Layers- Merge- Merge Down
29. Effects- Distortion Effects- Punch – Strength 80%
30. Layers- New Raster Layer
31. Selections –load/save selection –load selection from disc and select my selection: ‘’ Baby-3’’
32. Effects – Plugins- Alien skin Eyecandy 5 – Impact – Glass –Tab- Settings- User/Settings and select my file -
Preset : Glass-Hello-baby
Selections- Deselect All
33. Layers- New Raster Layer
34. Selections –load/save selection –load selection from disc and select my selection: ‘’ Baby-4’’
35. Flood Fill Tool
–
Fill the selection with the BG-Color =2 ( 2 clicks
)
Selections- Deselect All
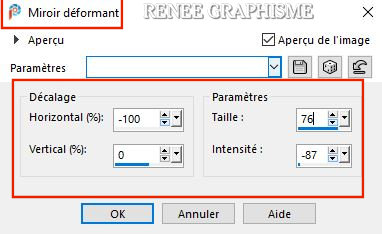
36. Effects – Distortion Effects- Warp use the settings below
37. Layers- New Raster Layer
38. Selections –load/save selection –load selection from disc and select my selection: ‘’ Baby-5’’
39. Color Palette-Close the Gradient-Set your foreground color to color #c3c0b9=1
Flood Fill Tool
–
Fill the selection with the FG-Color =1
Selections- Deselect All
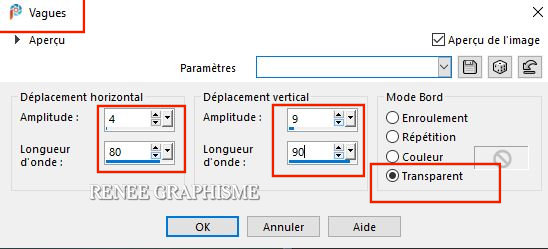
40. Effects- Distortion Effects-Wave use the settings below
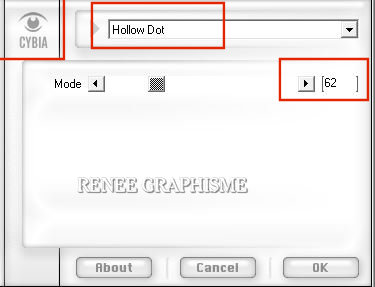
41. Effects – Plugins – Cybia Screenworks- Hollow Dot with these settings
42. Layers-Properties-Change the Blend Mode to " Soft Light "
Put the image aside for now
we will need it later
- We start building the cloud bag image
- Open the Color Palette – ‘’Montage Sac"
43. File-Open a new transparent image 626 x 802 Pixels
44. Selections –load/save selection –load selection from disc and select my selection: ’’Baby-5-sac 1’’
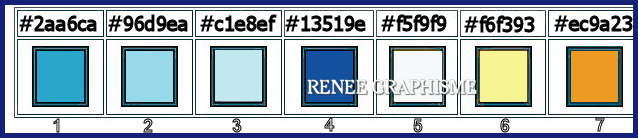
- Color Palette: Set your Foreground color to color #2aa6ca=1 – Set your Background color to color #96d9ea= 2
-
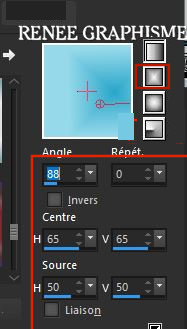
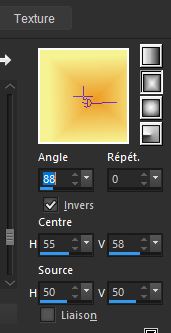
Set your Foregroundcolor to foreground-background rectangular gradient configured like this
Flood Fill Tool- Fill the selection with the gradient
Selections- Deselect All
45. Layers-New Raster Layer
- Selections –load/save selection –load selection from disc and select my selection:’’Baby-5-sac 2’’
Color Palette-Close the Gradient-Change the Foreground color to color #ffffff
- Flood Fill Tool
– Opacity 50% - Fill the selection with #ffffff
Selections- Deselect All
46. Layers- New Raster Layer
- Selections –load/save selection –load selection from disc and select my selection: ‘’Baby-5-sac 2’’
- Selections -
Modify – Expand with 3 Pixels
Set your Foregroundcolor to foreground-background rectangular gradient
- Flood Fill Tool
–
Opacity 50% - Fill the selection with the gradient
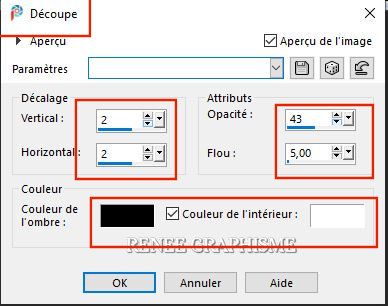
47. Effects– 3 D Effects– Cutout - use the settings below-Colors Black and White
Selections- Deselect All
Color Palette-Close the Gradient-Change your foreground color to color #13519e= 4
48. Layers- New Raster Layer
- Selections –load/save selection –load selection from disc and select my selection: ‘’Baby-5-sac 3’’
- Flood Fill Tool
-
Opacity 100% - Fill the selection with the foreground color #13519e= 4
Selections- Deselect All
49. Open the tube
‘’Image-sac – 1’’
-Edit - Copy- Activate your work -Edit - Paste as a new layer
- Pick Tool: (K) on your keyboard -Enter these parameters for the X:202,00 and Y: 304,00 positions on the Toolbar
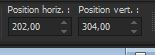 202 /304
Press ( M ) to close the Pick Tool
Color Palette: Change the foreground color to #13519e=4 – and the Background color to color #2aabca=1
-Set your Foregroundcolor to foreground-background rectangular gradient configured like this
50. Layers- New Raster Layer
- Selections –load/save selection –load selection from disc and select my selection: ‘’Baby-5-sac 4’’
- Flood Fill Tool
- Opacity 100%- Fill the selection with the gradient
Selections- Deselect All
51. Layers- New Raster Layer
- Selections –load/save selection –load selection from disc and select my selection: ‘’Baby-5-sac 5’’
- Flood Fill Tool
-
Opacity 100%- Fill the selection with the gradient
Selections- Deselect All
- Adjust- Sharpness- Sharpen
52. Layers- New Raster Layer
- Selections –load/save selection –load selection from disc and select my selection: ‘’Baby-5-sac 6’’
Color Palette-Close the Gradient-Set your foreground color to color #13519e=4
Flood Fill Tool
-Fill the selection with the foreground color=4
Selections- Deselect All
53. Open the tube
‘’Image-sac – 2’’
-Edit - Copy- Activate your work -Edit - Paste as a new layer
- Pick Tool: (K) on your keyboard -Enter these parameters for the X:494,00 and Y: 272,00 positions on the Toolbar
 494/ 272
Press ( M ) to close the Pick Tool
Color Palette- Change the foreground color to #f6f393= 6 – and the Background color to color #ec9a23= 7
- Set your Foregroundcolor to foreground-background rectangular gradient configured like this
54. Layers- New Raster Layer
- Selections –load/save selection –load selection from disc and select my selection: ‘’Baby-5-sac 7’’
- Flood Fill Tool
-
Fill the selection with the gradient
Selections- Deselect All
55. Layers- New Raster Layer
- Selections –load/save selection –load selection from disc and select my selection: ‘’Baby-5-sac 8’’
Color Palette-Close the Gradient- Flood Fill Tool
-
Fill the selection with the foreground color = 6
Selections- Deselect All
56. Layers- New Raster Layer
- Selections –load/save selection –load selection from disc and select my selection: ‘’Baby-5-sac 9’’
Color Palette- Change the foreground color to #f5f9f9=5
- Flood Fill Tool
-
Fill the selection with the foreground color =5
Selections- Deselect All
57. Effects-3 D Effects- Drop Shadow with these settings: 1/1/100/0 BLACK
58. Open the tube
‘’Image-sac – 3’’
-Edit - Copy- Activate your work -Edit - Paste as a new layer
- Pick Tool: (K) on your keyboard -Enter these parameters for the X: 106,00 and Y: 0,00 positions on the Toolbar
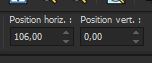 106 / 0
Press ( M ) to close the Pick Tool
Your work and Layer Palette look like this now-You should have this result

59. Layers- Merge- Merge Visible
60. Image –Resize to 70 % and Image Resize to 90 %
-EDIT-COPY !!!! - Activate your minimized image you created earlier on in the lesson ( from step 42)
Edit - Paste as a new layer
– With the move tool, move it in the bottom right corner (
see finished image )
61. Effects – Plugins – Alien skin EyeCandy 5 Impact – Perspective
shadow Tab- Settings- User/Settings and select my file – Preset : ‘’Hello-Baby-perspective
shadow’’
62.Open the tube Renee_Hello-Baby -
nuage.pspimage -Edit - Copy- Activate your work -Edit - Paste as a new layer –
- With the Move Tool, move it in the upper right corner (
see finished image )
Color Palette- Change the foreground color to color # 156d85
63. Layers- New Raster Layer
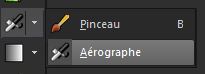
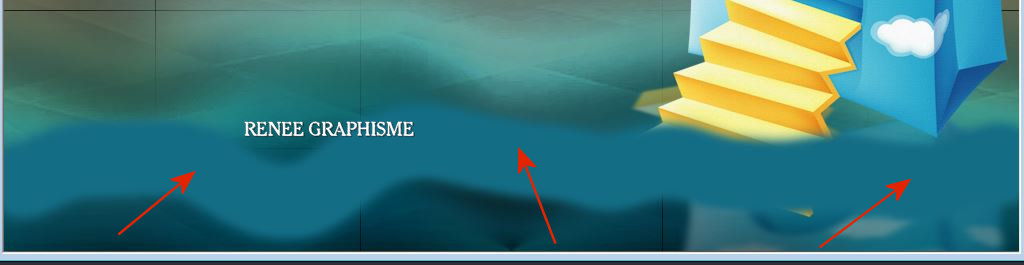
64. Activate Air Brush Tool use the setting below

- With the left button of the mouse pressed glide gently over your image from the left side to the right side (order to obtain this effect as shown in the example below )
65. Adjust- Blur- Gaussian Blur - Radius 45
66. Layers- New Raster Layer
67. Selections –load/save selection –load selection from disc and select my selection: ‘’Baby-6’’
68. Effects-3 D Effects- Drop Shadow with these settings: – 44/1/ 40 /100 WHITE
69. Adjust- Blur- Gaussian Blur - Radius 28
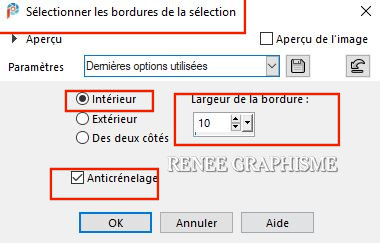
70. Selections-
Modify – Select-Selection Borders with these settings
71. Effects-3 D Effects- Drop Shadow using the default settings
Selections- Deselect All
72. Layers- New raster Layer
-Color Palette- Change the foreground color to color # #00217a
(When using your own colors: the color must be darker than the background color
)
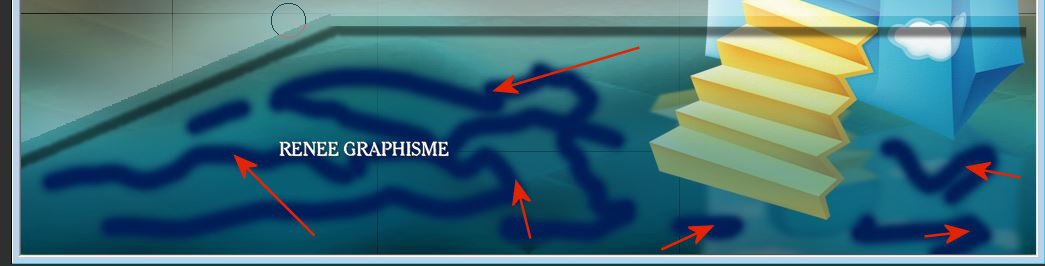
73. Activate the Brush Tool -Shape Round :-
Reset to default  use the correct settings as below use the correct settings as below

Draw lines order to obtain this effect as shown in the example below
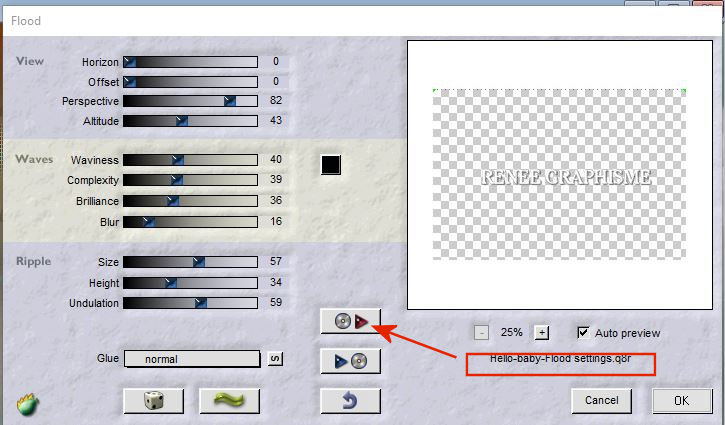
74. Effects – Plugins – Flaming Pear –Flood-clicking on the red arrow and search your file- Preset : Hello-‘’baby-Flood
settings’’ Or manual settings as shown in the example below
75. Layers-Properties-Change the Blend Mode to " Hard Light "
- Activate the bottom layer in the layer palette= Raster 1
76. Effects –Plugins-
Unlimited 2.0 - &<Background Designers IV> -sf10 Slice N
Dice
77. Layers- Duplicate
78. Image - Mirror - Mirror Horizontal (Image - Mirror in older versions of PSP)
79. Layers-Properties-Change the Blend Mode to " Hard Light " and Lower the Opacity to 59%
- Activate the bottom layer in the layer palette= Raster 1
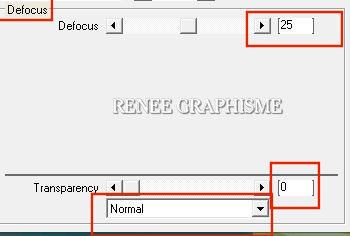
80. Effects – Plugins – Vanderlee – Unplugged X- Defocus use the settings below
- To replace the top of the layer-palette
81. Open the tube
‘’Tubes -divers- Renee_TUBES_Baby.pspimage’’
-and place the decorative elements individually according to your taste
82. Layers- Merge- Merge Visible
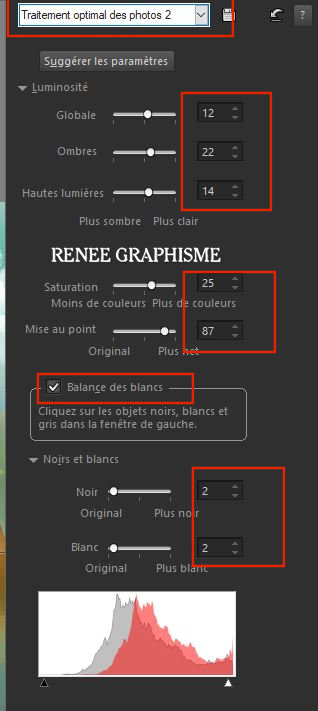
83. Adjust-Smart Photo Fix
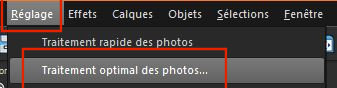
-Category : Smart Photo Fix 2
with these settings
 OK
OK
Edit- Copy !!!
84. Open tube ‘’
cadre-Hello- baby ‘’ in your Psp
85. With your Magic Wand,(add shift) select the inside of that frame.
85. Edit- Paste Into Selection (Image is still in your PSP memory)
Selections- Deselect All
86. Open the tube "
filigrane/watermark" -Edit - Copy- Activate your work -Edit - Paste as a New Layer and move
87. Layers- Merge- Merge All
88. Image -Resize to 999 Pixels width.
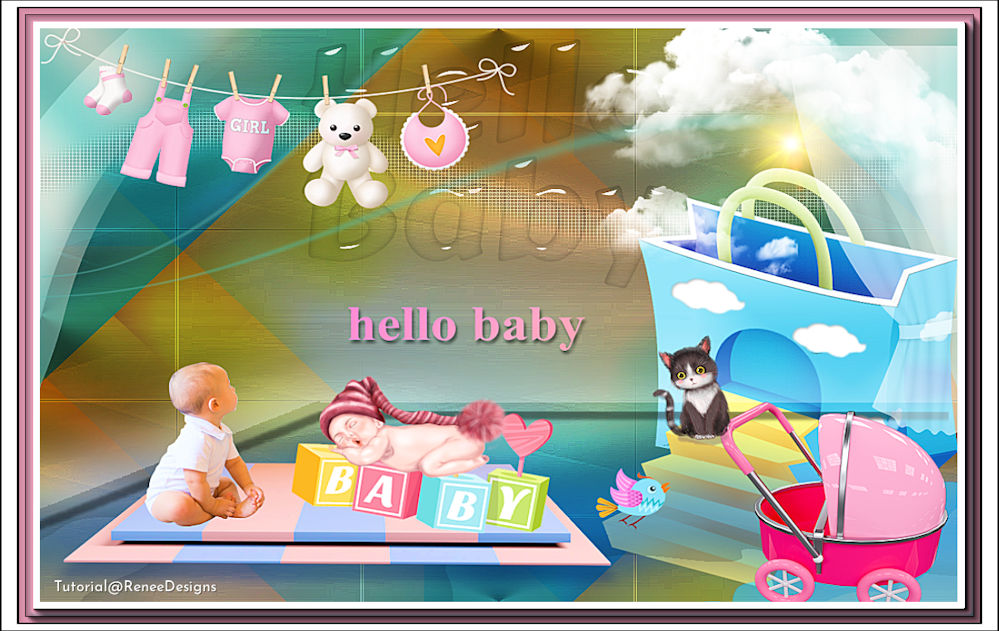
Save as JPG file and you're done!
I hope you enjoyed this lesson
Renée
This lesson was written by Renée 20-04 -2020
Edited and Update
2020
*
Any resemblance with an existing lesson is a coincidence
* Do not forget to thank the people who work with us and for us
I have appointed the tubeurs and translators
Thanks
*
|

 Translations