1. Open the image "fond_fraicheur_d'ete" - Window/
duplicate - close original and we will work on the
copy
- Layer duplicate
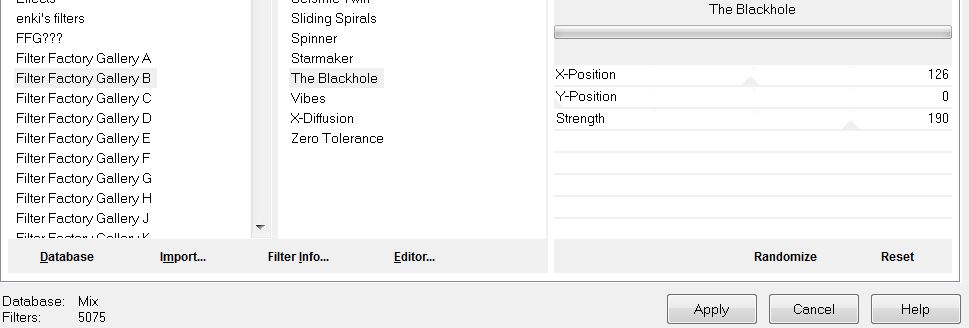
2. Effects - Filters Unlimited 2.0 - Filter Factory
Gallery B - The Blackhole
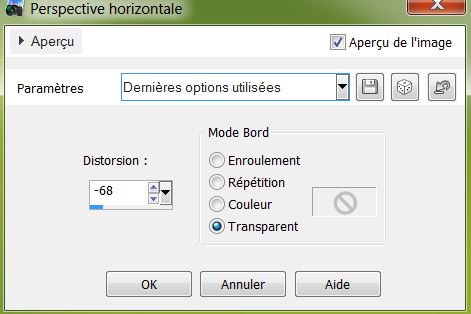
3. Effects - Geometric effects - Perspective
Horizontal
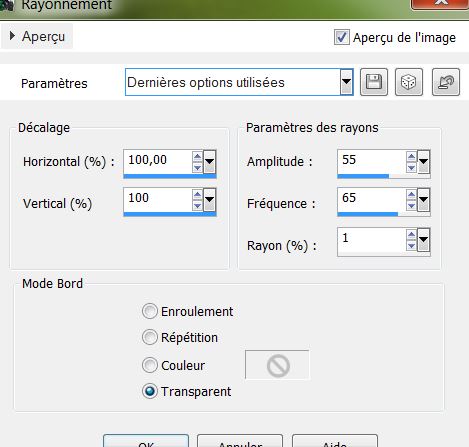
4. Effects - Distortion effects - Spiky Halo
5. Adjust - Sharpness - Sharpen
6. Color palette - Change the foreground color to
#276604 and background color to #240f03
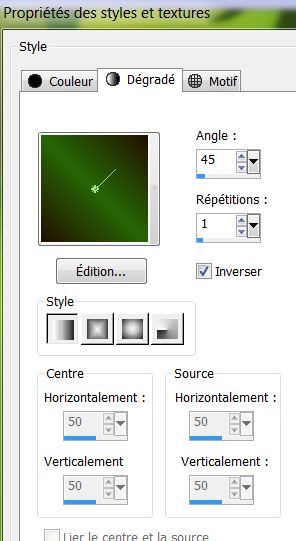
7. Create a linear gradient with these settings
8. Layers - Add a new raster layer/ Selections -
load selection from disk - "fraicheur_ete" and fill
with the gradient/ deselect
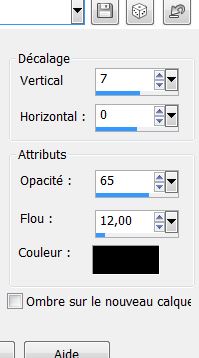
9. Effects - Eyecandy 5 Impact - Perspective shadow
- Preset "fraicheur_ete_perps"
10. Layers - duplicate
11. Adjust - Blur - Gaussian blur/ radius = 5
12. Layers - add a new raster layer
13. Selections - load selection "fraicheur_ete_2"
14. Color palette - change background color to
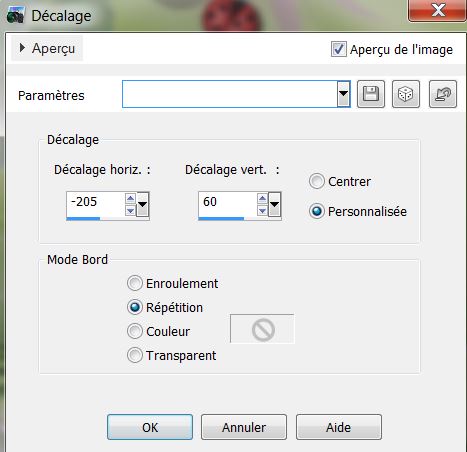
#d4c6b9 and change the linear gradient like this
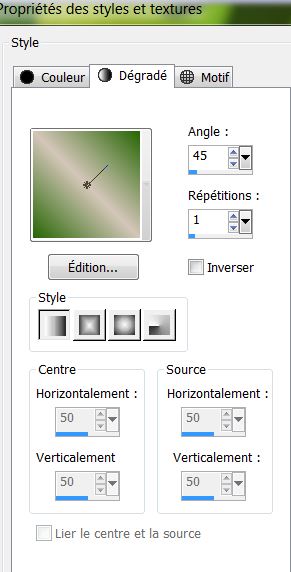
15. Fill the selection with the gradient
16. Selections - deselect
17. Effects - EyeCandy 5 Impact - Gradient Glow/
Preset "fraicheur_ete_gradientglow"
18. Open the tube "coccinelle" Paste as new layer
and move into place as shown
19. Layers - add a new layer and fill it with color
#276604
20. Effects - Redfield Water Ripples v1.33
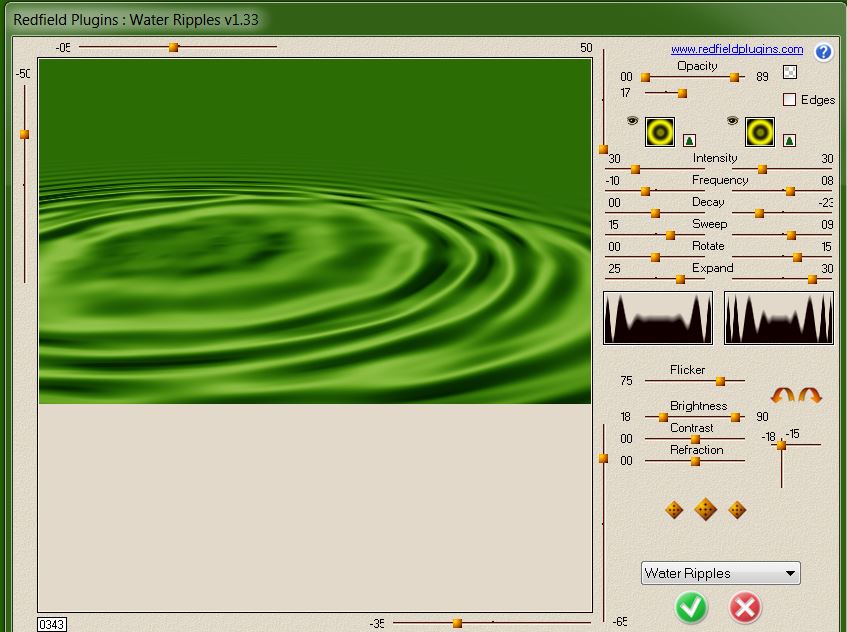
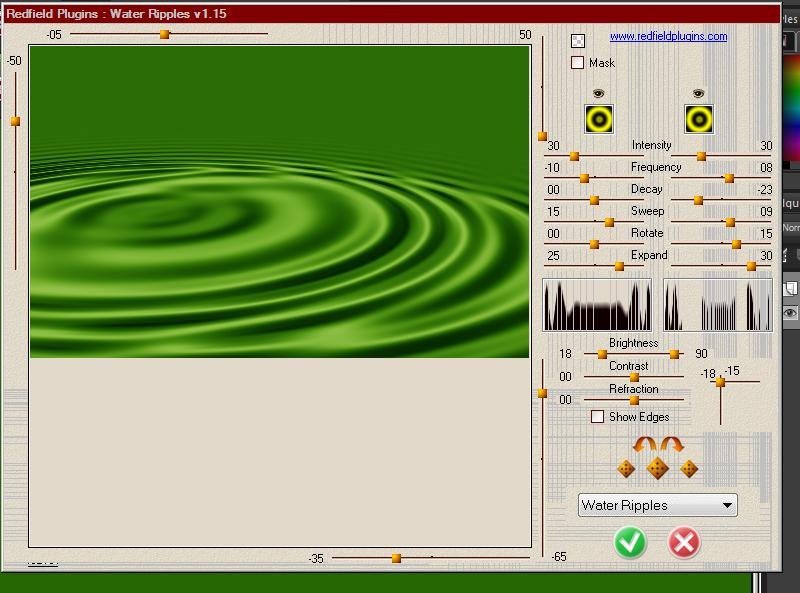
For other version this result
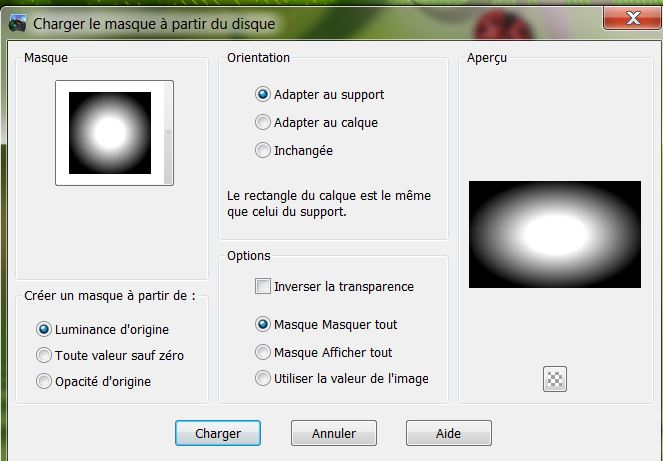
21. Layers - Load/ Save Mask - load mask from disk
"20.20''
22. Layers - merge group
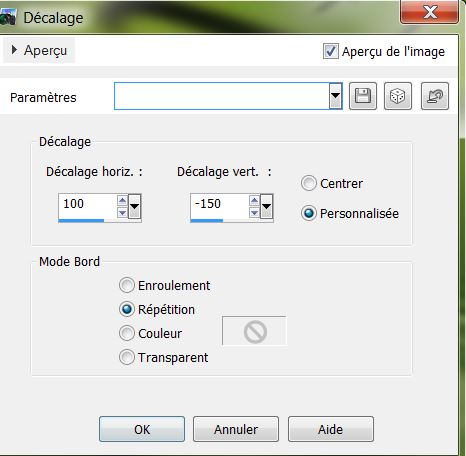
23. Effects - Image effects - Offset
24. Open the tube "nenuphar" Paste as new layer and
place well
25. Layers - new raster layer
26. Selections - load selection from disk
"fraicheur_ete_3" - fill with the color #c0c0c0
27. Selections - select none
28. Effects - EyeCandy 5 Impact - Glass-Preset -
Aqua with reflection
29. Open the tube "double_feuille" Paste as new
layer
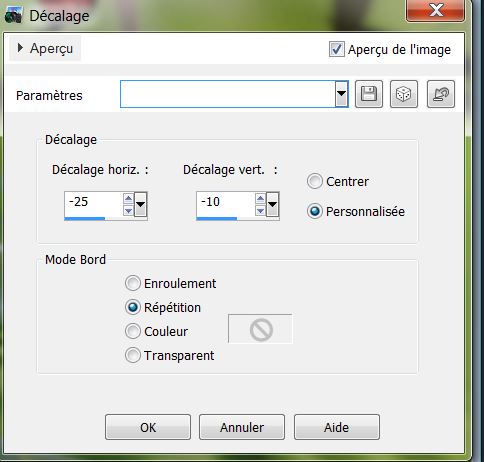
30. Effects - Image effects - Offset
31. Layers - add a new layer and fill it with color
#f4fbf3
32. Layers - new mask layer from an image
"Narah_mask_Abstract142.jpg''
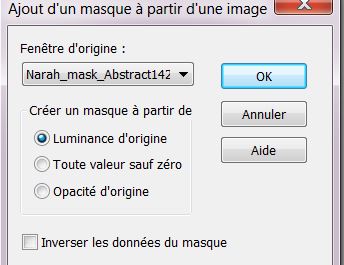
Layers merge group
33. Effects - edge effect - enhance
34. Open the tube "bille_verte" and paste as a new
layer
35. Effects - Image effects - Offset
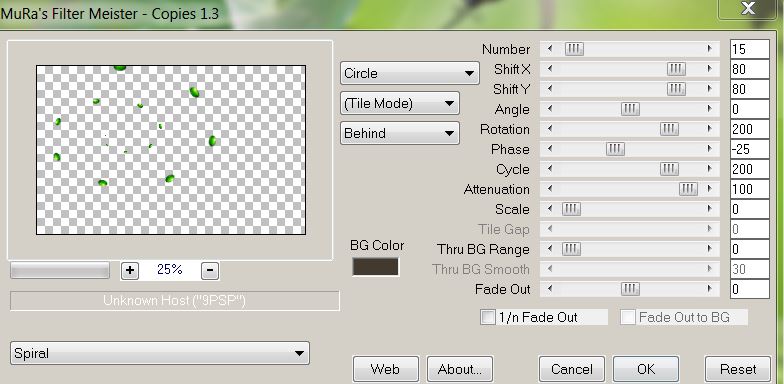
36. Effects - Mura's Meister Copies
37. Effects - 3-D effect - Drop Shadow
38. Open the tube "angeldesign_animaux23'' paste as
a new layer / move to the bottom right corner
39. Open the tube "bug" - Paste as new layer /
position on the leaf as shown
40. Open the tube "chenille_c54_L" Click on raster 1
copy and paste as a new layer / image flip - move to
the right place
41. Layers - add a new layer
42. Selections - load the selection
"fraicheur_ete_4" fill color #f4fbf3
43. Selection - deselect
44. Effects - Edge effects - enhance
45. Open the tube "0_aa59e_9 e 0cf386_L" Paste as
new layer/ move to a good place
46. Open up the tube "goutte_eau" Paste as new layer
- move to a place of your choice
47. Open ''barbe_kermis_tube" Paste as new layer -
see the finished image
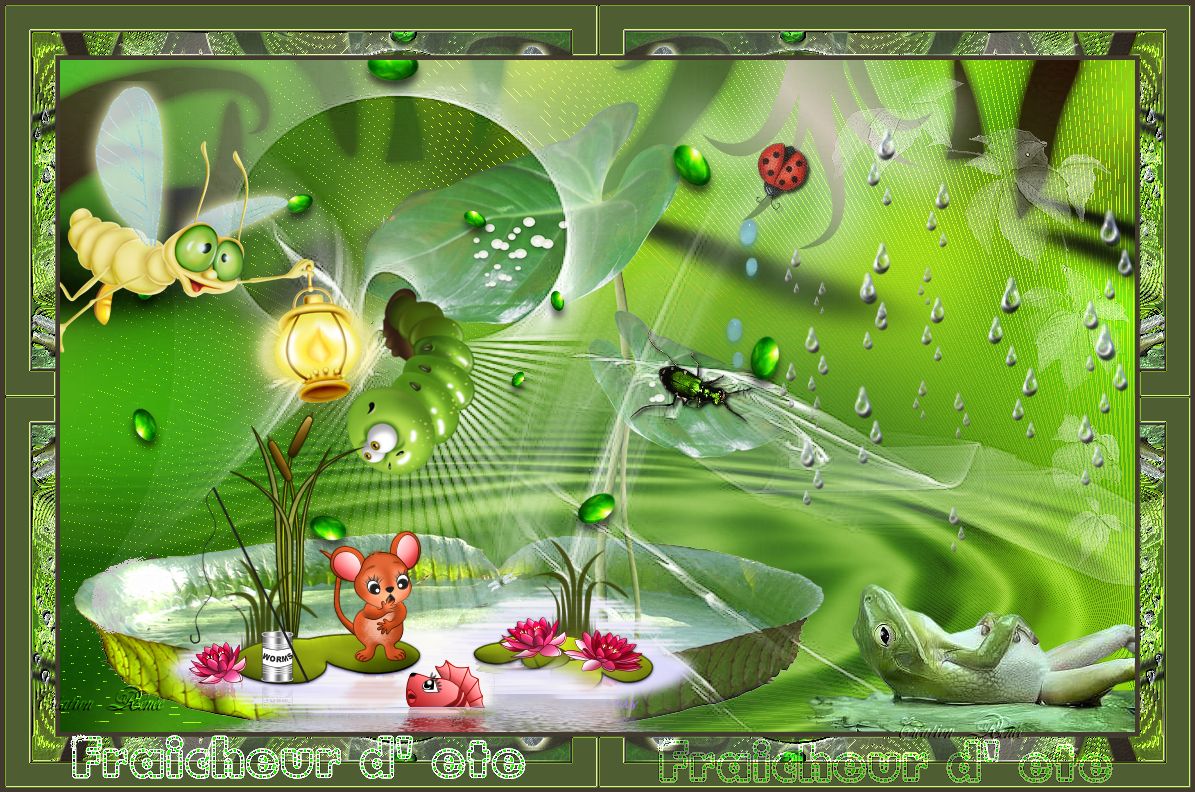
48. Everything is now in place
49. Layers - merge visible
50. Image - add borders 5 pixels #54643b
51. Image - add borders 50 pixels #8ebd38
52. Image - add borders 5 pixels #54643b
53. Selections/ Select All
54. Selections - modify/ contract by 55 pixels. /
Selections - Invert
55. Effects - Filters Unlimited - bkj Designer SF10
IV/ Instant Tile default
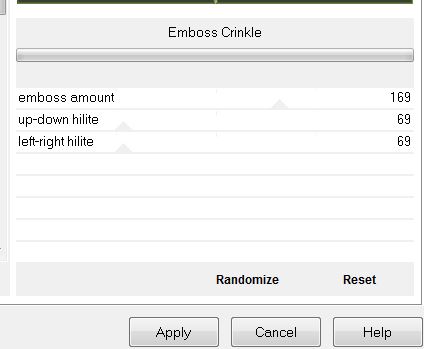
56. Effects - Filters Unlimited 2.0 / bkj designer
sf10 II - emboss Crinkle
57. Open the tube "tittre" Paste as new layer -
Layers - duplicate and paste on the other side -
change the blend mode to something of your choosing.
*
All finished
Thanks Sally