|
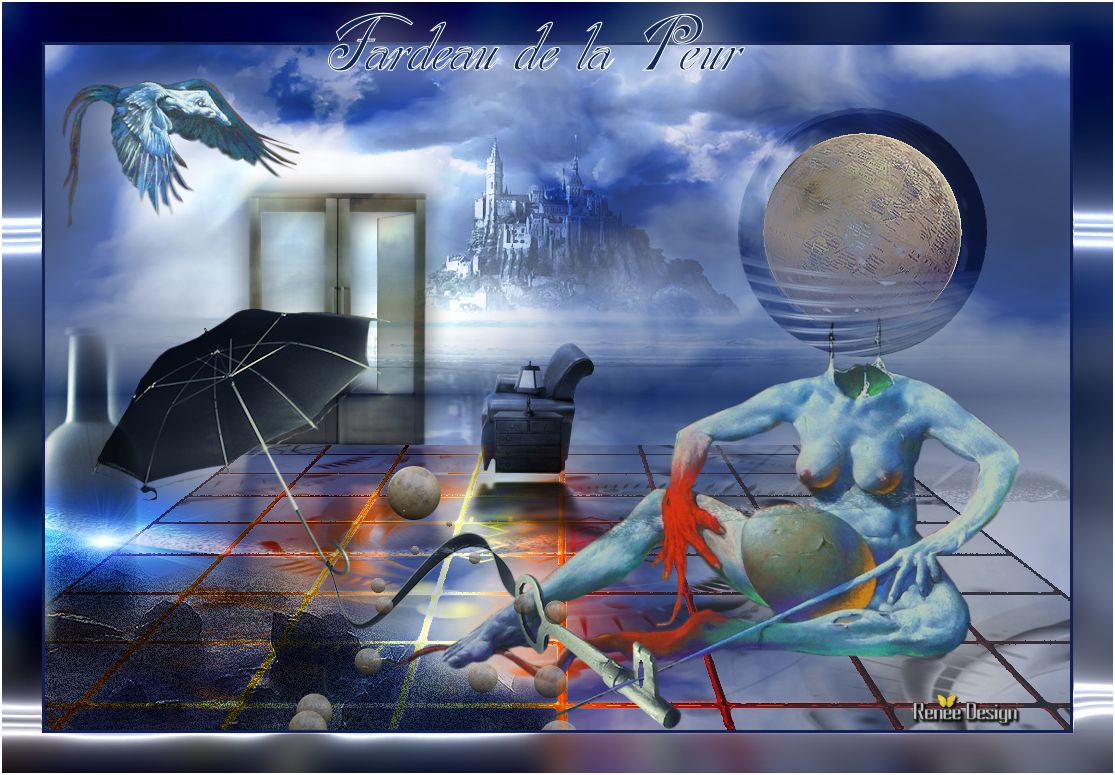
Let's begin
1.
File - New - New Image 1025 x 685 pixels white
2.
Layer - New raster layer.Flood Fill Tool: Fill the layer with black
3.
Layers-New mask layer from image and open mask
''masque_fardeau_de_la_peur''

4.
Layers-Merge-Merge Group
5.
Layers-Duplicate
6..
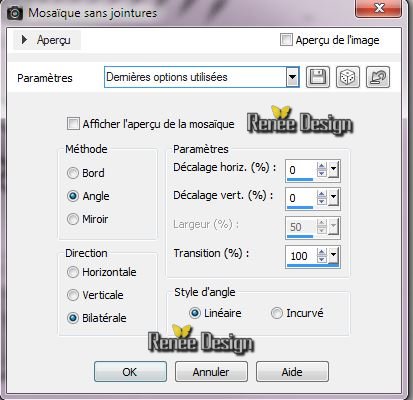
Effects -Image Effects- Seamless Tilling
7.
Layers-Merge-Merge Down
8.
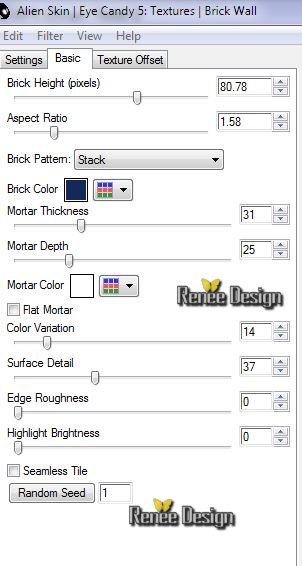
Effects -Plugins Eye Candy 5 Textures/ Brick wall
9.
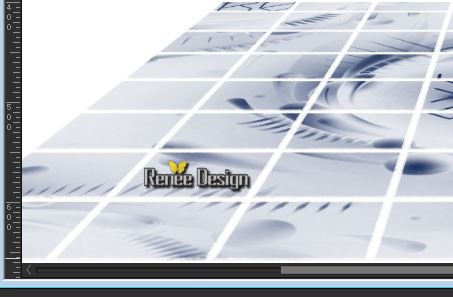
Effects -Plugins Andromeda Perspective /Floors /Center
wide
10.
Aktivate Picktool(K) down to 400 pixels high (like this)
11.
Material Properties: Foregroundcolor to gradient choose gradient: "Bleu_fardeau_1" with these settings
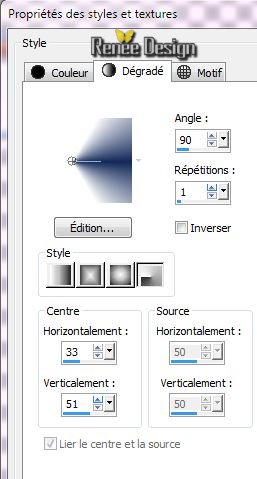
Background color :#13295a
12.
Layer - New raster layer.
13.
Selections - load/save selection - load selection from disk and choose ''fardeau_peur_1''
/ Flood Fill Tool: Fill the layer with your backgroundcolor
14.
Effects -Plugins EyeCandy 5 -Impact - Chrome /Preset
''fardeau-peur_chrome ''
Selections - Deselect all
15.
Layers-Merge-Merge Down
16.
Activate your bottom layer in your layer palette (raster 1)
17.
Effects- Plugins Mura's Meister /clouds
/colors

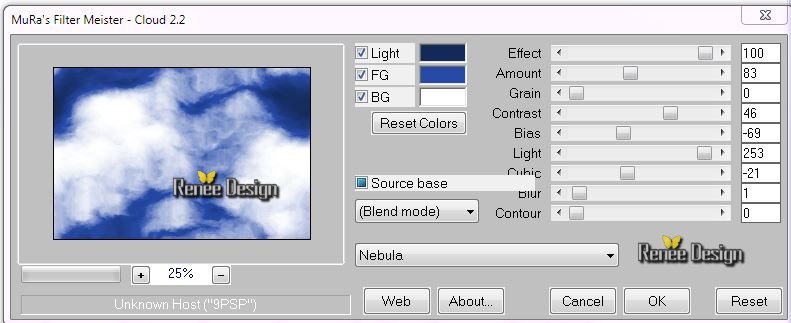
Plugins : to reset / then set the settings
(Effect will be slightly different .To get a nice effect you have to play with the settings. Do not make it too bright white)
Aktivate the top of the Layers palette
18.
Open the tube ''ocean_city_fardeau_peur'' /Edit/copy -Edit/paste as a new Layer
19.
Effects - Image Effects - Offset: H= 0 et V =
150
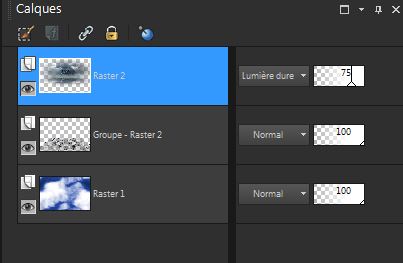
6.Layer palette: Blend mode "Hard Light" and lower the opacity down to 75%
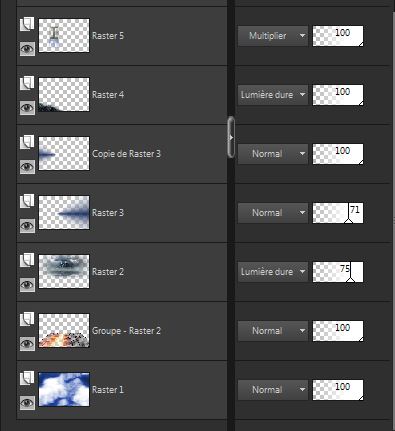
20.
Effects -Plugins Eye Candy 5 Impact -Perspective shadow /Preset
"fardeau_peur_perspective_shadow''
Your work and Layer Palette look like this now:
21.
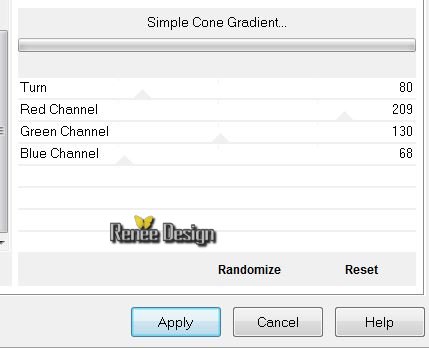
Layerpalette: Activate the layer underneath (Groupe-Raster 2'')
22.
Effects -Plugins Unlimited - Lumiere Ambiance /Simple Cone
Gradient
Aktivate the top of the Layers palette
23.
Layer - New raster layer. / Flood Fill Tool: Fill the layer with your gradient
24.
Effects - Plugins Transparency /Eliminate White
25.
Layers-Duplicate /Image Mirror
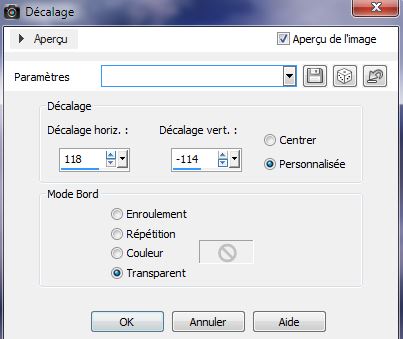
26.
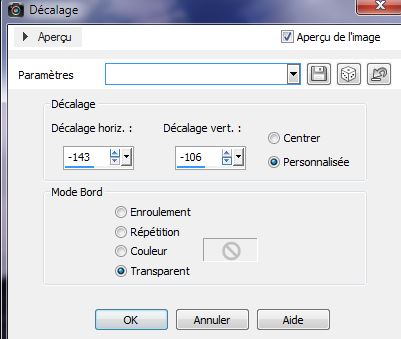
Effects - Image Effects - Offset
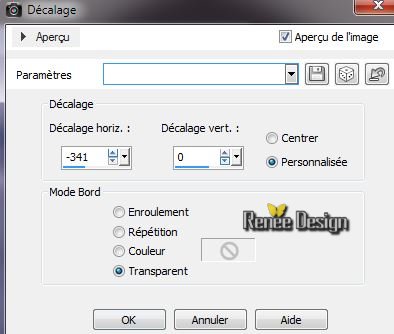
27.
Layer palette: Back on the layer below (Raster 3) Lower the opacity down to 71%
28.
Open the tube ''Rochers'' / Edit/copy -Edit/paste as a new Layer /place in the bottom left corner
6.Layer palette: Blend mode "Hard Light"
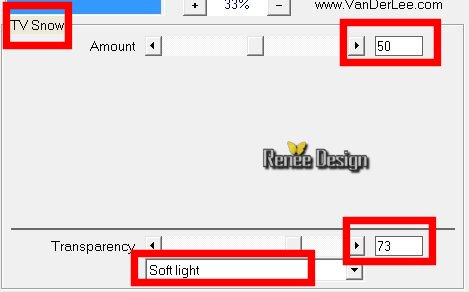
29.
Effects -Plugins Vanderlee -Unpplugged X/ TV Snow
30.
Open the tube ''KRYSSURREALISME-29-01-14-102.pspimage'' be placed on the layer 1 of your tube /Edit/copy -Edit/paste as a new Layer
Layer palette: Blend mode "Multiply" and lower the opacity down to 83% / place at the left-hand side
31.
Remain the tube ''KRYSSURREALISME-29-01-14-102.pspimage''
/Activate the layer of glass 1 / Edit/copy -Edit/paste as a new Layer
-
Effects -Plugins Andromeda Perspective / Site Walls / rtopen
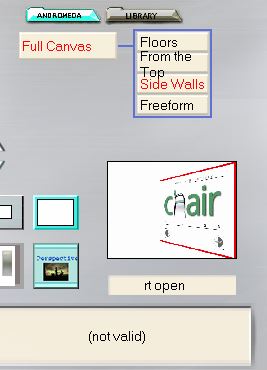
6.Layer palette: Blend mode "luminance" and lower the opacity down to
73%. Aktivate Pick Tool (K) move to this example
-Still on tube
''KRYSSURREALISME-29-01-14-102.pspimage'' / Activate the layer of glass 2/ Edit/copy -Edit/paste as a new Layer
Place it in the door on the left .Lower the opacity to 18%
.Layer palette: Blend Mode "Normal"
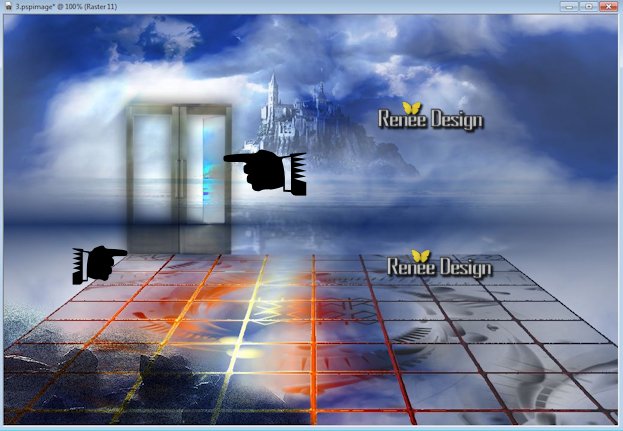
32.
Layers-Merge-Merge Down 2x/(door and the glass are merged )
Layer palette: Blend mode: " Multiply"
Your work and Layer Palette look like this now:
33.
Effects -Plugins EyeCandy 5 Impact -Perspective shadow
''Preset''fardeau_peur_persp_2''
34.
Open the tube ''AR26'' be placed on the tube body/Image-
Mirror /Image Resize to 70%
Edit/copy -Edit/paste as a new Layer
35.
Effects- Image Effects- Offset
36.
Open the tube ''Kryssurrealisme-25-01-14-99(umbrella)"/ be placed on the layer 1 of your tube
Image Resize 85 % - Edit/copy -Edit/paste as a new Layer
37.
Selection Tool: (S) Ellipse / Draw an oval in the key bit, see the black hand/Delete
-
Selections - Deselect all
38.
Activate your tube layer (layer tube AR26) -
Freehand Selection: draw a selection around to that point of the sword, see example
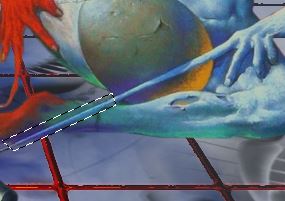
Edit/copy -Edit/paste as a new Layer
come and place like this (to create effects that will cross the key)
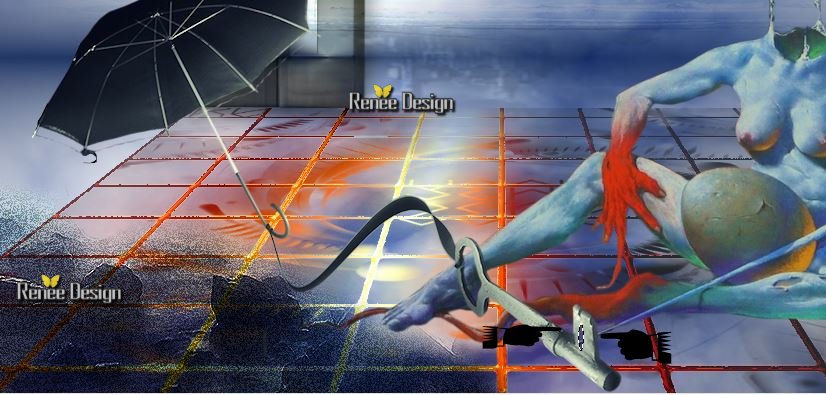
39.
Open the tube "logan_mistedbouteilles1_05-juin212'' be placed on the layer 4 of your tube / Edit/copy -Edit/paste as a new Layer
Place the left (see example) -6.Layer palette: Blend mode: "Hard Light" /Layers-Arrange-Move -Down (comes under the layer of the umbrella
)
40.
Open the tube ''fardeau_peur_faisceau '' Edit/copy -Edit/paste as a new Layer
41.Layer palette: Blend mode: "Hard Light"
42.
Open the tube ''fardeau_peur_terre_metal '' /Edit/copy -Edit/paste as a new Layer. Put your tube below the layer of the body
6.Layer palette: Blend mode: "Soft Light"
43.
Selections-Select All-Selection Float-Selection-Defloat
Selections- Modify -Contract 25 pixels
44.
Layer - New raster layer.
45.
Open the tube "KRYSSURREALISME-29-01-14-100.pspimage''/Edit/copy -Edit/paste into selection
46.
Selections-Select none - Layer palette: Blend mode: "Exclusion"
47.
Effects-Edge Effects-Enhance
48.
Layers-Merge- Merge- Visible
49.
Open the tube''KRYSSURREALISME-29-01-14-103.pspimage'' Edit/copy -Edit/paste as a new Layer / Layer palette:Blend Mode "Luminance
Legacy"
50. Effects
-Plugins Eye Candy 5 Impact -Perpectiv shadow/ Preset''
fardeau_peur_persp_2"
51. Open the tube ''KRYSSURREALISME-29-01-14-101.pspimage
Edit/copy -Edit/paste as a new Layer
52. Effects
- Image Effects- Offset
53. Layers-Duplicate
54.
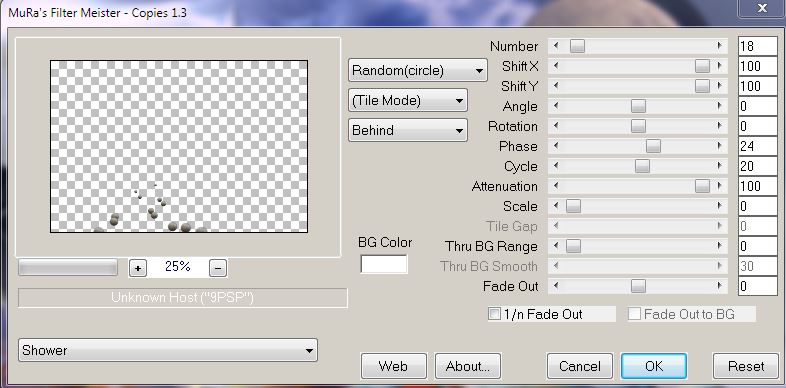
Effects -Plugins Mura's meister / Copies
55.
Layer palette: lower the opacity down to 71%
56. Re-open tube"AR26'' be placed on the tube bird- Image Mirror -Image Resize 55%
Edit/copy -Edit/paste as a new Layer
and place
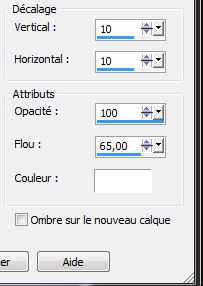
57. Effects
-3D Effects -Drop Shadow
58.
Layers-Merge- Merge- Visible
59. Edit/ copy
60.Image - Add Borders - Symmetric 3 pixels #132054
61.Image - Add Borders - Symmetric 40 pixels white
62.With your magic wand select the border of 40 pixels
63. Edit paste into selection image in memory
64.
Adjust-Blur-Gaussian Blur: Radius 15
65. Effects
- Plugins Unlimited Kang3/ Scanners
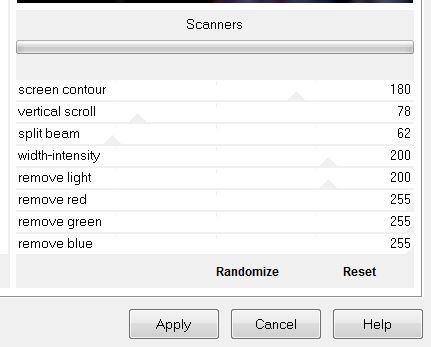
66.
Selection-Select none
67.Image - Add Borders - Symmetric 2 pixels white
68. Open the Tube titre Edit/copy -Edit/paste as a new Layer and place
That's it !! You've done it !
Renée
This lesson was written by Renée
29/01/2014
Created the 2014
*
Any resemblance with an existing lesson is merely a coincidence
*
Don't forget to thank the people who work for us and with us. I named the tubeurs - Testers and the translators
Thanks Renées.
| 

 Translations