|
Let's start the lesson.
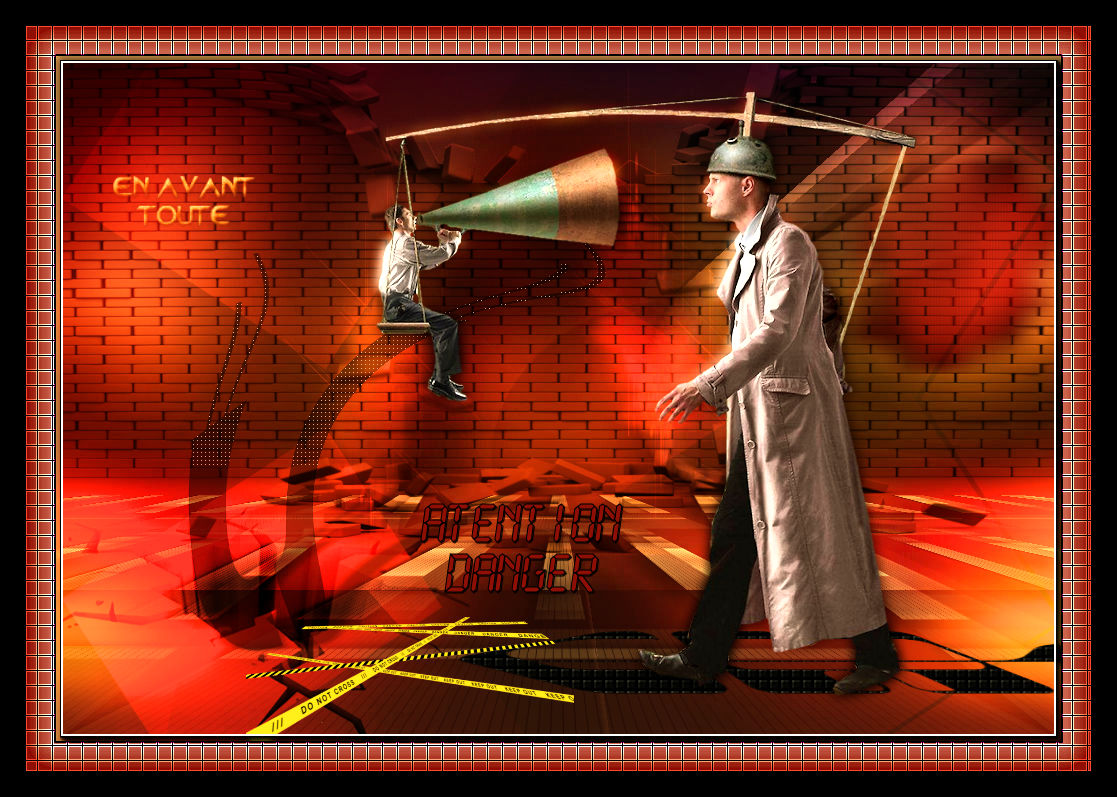
En avant toute ….Full speed ahead ...
Preparation - Material Properties: Set your foreground color to color #fac170 -Set your background color to color #720b04

Attention this work will depend on many colors used, try not to take too pale color if you change the colors
1. Open the Backgroundimage ‘’Fond_En_Avant’’ /Window - Duplicate (or shift+D) - Close the original and proceed on the copy -Promote Background Layer =
Raster 1
2.Layers- New Raster Layer
3. Activate the Flood Fill Tool  – Flood Fill the layer with the foreground color – Flood Fill the layer with the foreground color
4. Layers- New Mask Layer-From Image and select Mask ‘’aditascreation_mask_12’’
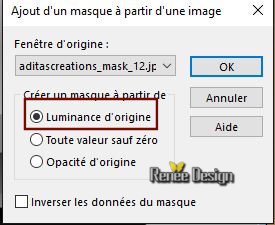
-
Layers- Merge - Merge Group
5. Effects- Image Effects-Seamless Tiling use the settings below
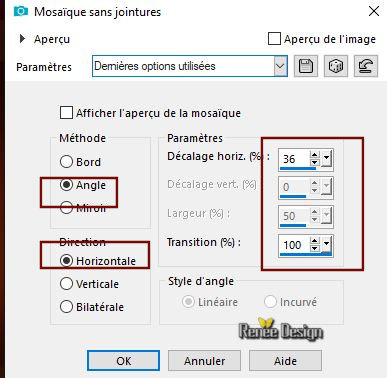
-
Repeat-Seamless Tiling with the same settings
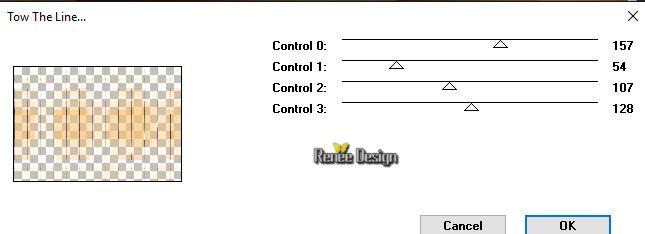
6. Effects – Plugins (for me in Unlimited
)–Tramage – Tow the line
7. Selections –load/save selection –load selection from disc and select my selection:
‘’en_avant_1’’
DELETE

Selections- Deselect All
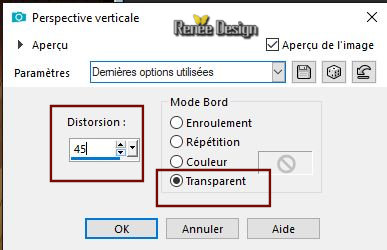
8. Effects – Geometric Effects – Perspective Vertical-Distortion 45-Transparent
9. Effects- 3 D Effects- Drop Shadow with these settings: 6 /- 9 / 85 / 22
color black
10.
Image - Mirror - Mirror vertical ( Image - Flip in older versions of PSP)
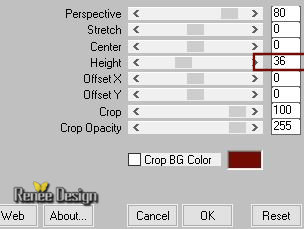
11. Effects – Plugins – Mura’s Meister –
Perspective Tilling use the settings below
12.
Effects- 3 D Effects- Drop Shadow with the same settings:
13. Open the tube ‘’ en_avant_toute_MUR
brise.png’’
-
Edit - Copy- Activate your work -Edit - Paste as a new layer
14. Effects- Image Effects- Offset with these settings H = 0 and V =
151
15. Layers-Properties-Set the Blend Mode to " Overlay "
16. Layers- New Raster Layer
17. Selections –load/save selection –load selection from disc and select my selection:
‘’en_avant_2’’
-
Material Properties: Set your foreground color to color Black
18. Activate the Flood Fill Tool –
Flood Fill the selection with the foreground color Black
Selections- Deselect All
19. Layers-Properties-Set the Blend Mode to " Overlay "
20. Open the tube ‘’
en_avant_toute_texte.png’’
-Edit - Copy- Activate your work -Edit - Paste as a new layer
- Move tool / place your tube on the top left side of your image (see finished image )
- Material Properties: Set your foreground color to color #ff0000 =(4)
21. Layers- New Raster Layer
22. Selections –load/save selection –load selection from disc and select my selection:
‘’en_avant_3’’
23.
Activate the Flood Fill Tool -Flood Fill the selection with the foreground color #ff0000=(4)
Selections- Deselect All
24. Layers-Properties-Set the Blend Mode to " Soft Light "
25. Effects – Plugins-Unlimited 2.0 - &<Bkg Designer sf10
III> - SE Shiver: with these settings 188-22
26. Layers- Duplicate
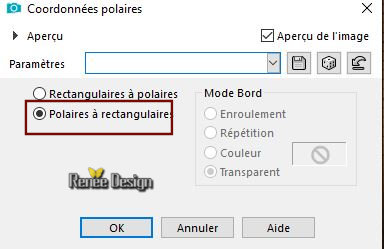
27.
Effects- Distortions Effects-Polar Coordinates-Polar to Rectangular
28. Layers-Properties-Set the Blend Mode to " Dodge "-Lower the Opacity of the layer to 71
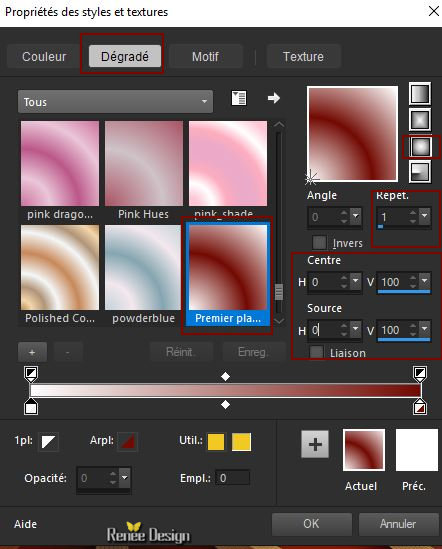
29. Set the FG-Color to #ffffff -Set your foreground to gradient 'foreground-background' sunburst gradient configured like this.
30. Layers- New Raster Layer
31. Activate the Flood Fill Tool
Flood Fill the layer with the gradient
32. Adjust- Blur- Gaussians Blur: Radius 37
33. Effects –Plugins- Unlimited 2.0 - Kiwis Oelfilter - 3,5
Promille with the default settings
34. Effects –Plugins- Unlimited 2.0 - Kiwis Oelfilter –Videowand
with these settings : 195 / 0 /0
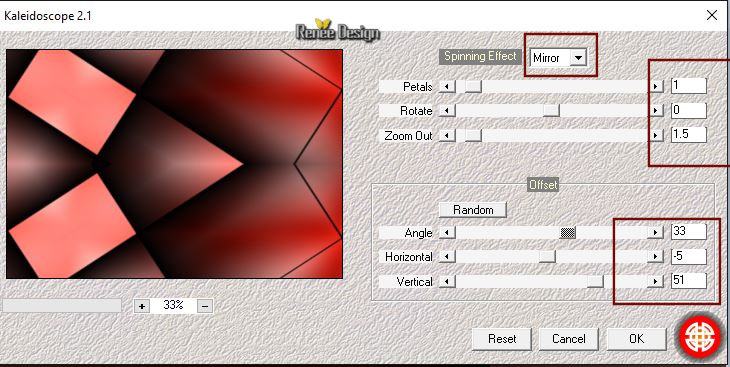
35. Effects – Plugins – Medhi- Kaleidoscope
2.1 use the settings below
36. Layers- Arrange- Move Down- Above
Raster 1
37. Layers-Properties-Set the Blend Mode to " Dodge "-Lower the Opacity of the layer to 28
-
Your work and Layer Palette look like this now-You should have this result
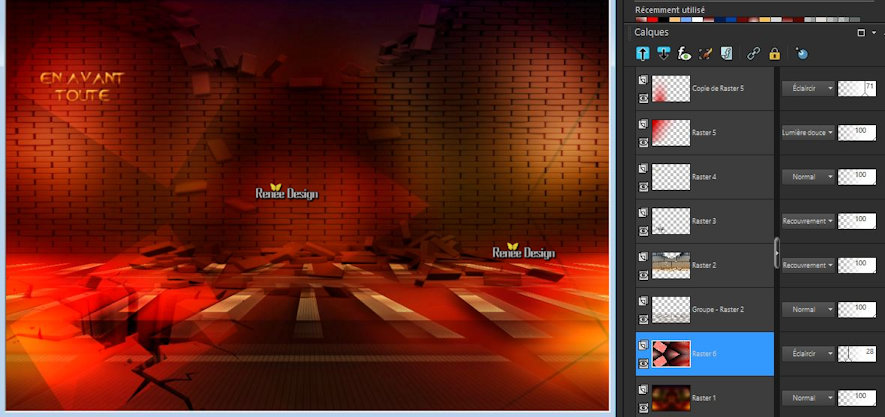
- To replace the top of the layer-palette
38. Layers- New Raster Layer
39. Selections –load/save selection –load selection from disc and select my selection:
‘’en_avant_4’’
40.
Activate the Flood Fill Tool
– Flood Fill the selection with the foreground color #ffffff
Selections- Deselect All
41. Layers-Properties-Set the Blend Mode to " Overlay "
42. Layers- Duplicate
43. Layers- Merge- Merge Down
44. Layers- Duplicate
-
Layers-Properties-Set the Blend Mode to "Multiply "
45. Layers- New Raster Layer
46. Selections –load/save selection –load selection from disc and select my selection:
‘’en_avant_5’’
47.
Activate the Flood Fill Tool –
Flood Fill the selection with the foreground color #ffffff
Selections- Deselect All
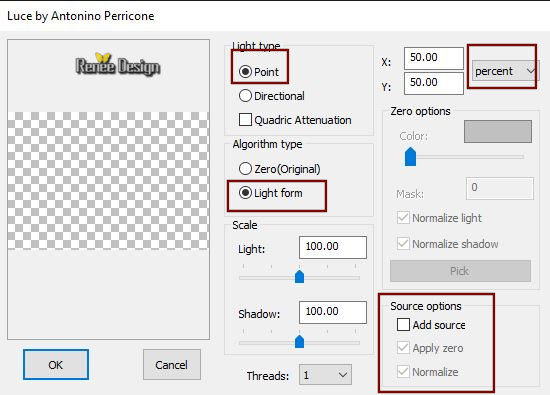
48. Effects – Plugins – Amico Perry- Luce use the settings below (Name of this filter Amigo Perry (the preset is into the zipfile)
49. Layers-Properties-Set the Blend Mode to " Soft Light "
50. Layers- Duplicate – Layers-Properties-Set the Blend Mode to " Overlay "
51. Layers- New Raster Layer
52. Selections –load/save selection –load selection from disc and select my selection:
‘’en_avant_6’’
-
Material Properties: Set your foreground color to color Black
53. Activate the Flood Fill Tool –Flood Fill the selection with #000000
( 2 clicks)
Selections- Deselect All
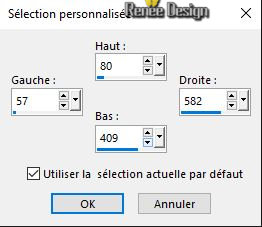
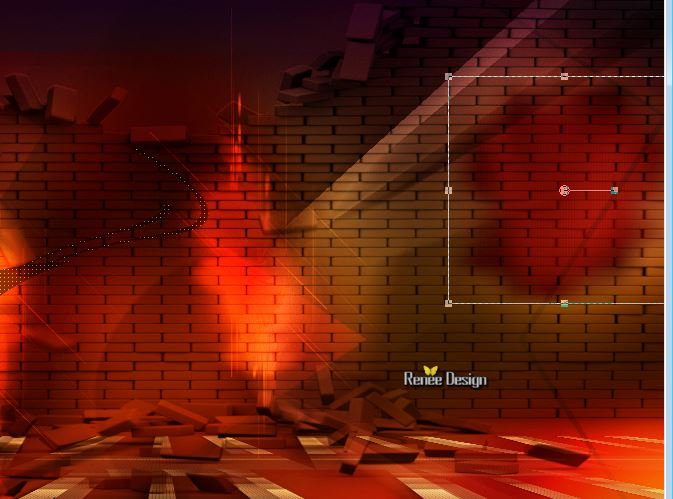
54. Activate Selection Tool -Custom Selection (S) -Rectangle with these settings
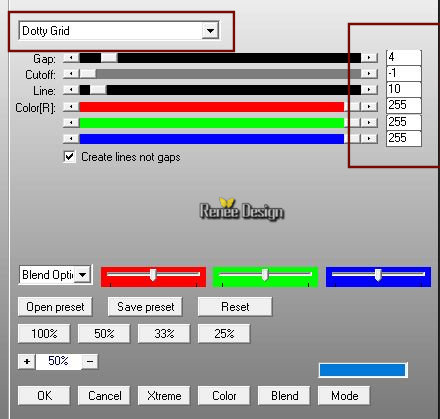
55. Effects – Plugins – AP[lines]
Silverling-Dotty Grid use the settings below
Selections- Deselect All
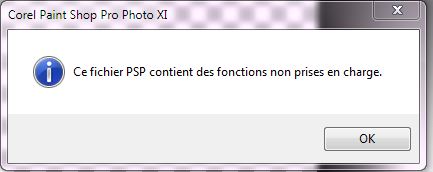
56. Effects –Plugins – Eye Candy 3 –
Perspective shadow
You get this message >>Click Ok -and the window opens and you can use the filter with these settings
.jpg)

57. Open the tube ‘’ en_avant_toute_tache_rouge.png’’
-
Edit - Copy- Activate your work -Edit - Paste as a new layer
With your Move Tool move to the right side as shown in the example below
58. Layers-Properties-Set the Blend Mode to "Multiply "
59. Effects- Illumination Effects-Sunburst with these settings
60. Layers- New Raster Layer
61. Selections –load/save selection –load selection from disc and select my selection:
‘’en_avant_7’’
62.
Activate the Flood Fill Tool
– Flood Fill the selection with the foreground color black
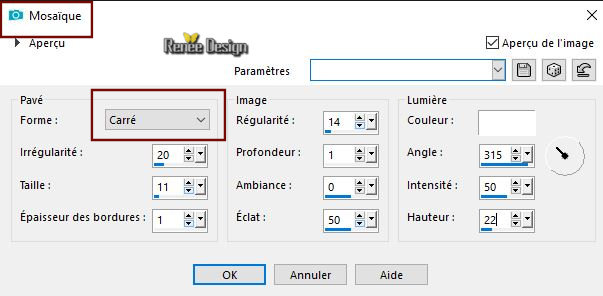
63. Effects- Texture Effects- Tiles -Square use the settings below
Selections- Deselect All
64. Effects- Edge Effects- Enhance
65. Open the tube ‘’ en_avant_toute_Not
cross.png’’-Edit - Copy- Activate your work -Edit - Paste as a new layer
-Place in front of the crack on the ground( see finished image)
66. Open the tube ‘’ Renee_TUBES_Action_Avant_toute.pspimage’’
67.
Image-Resize to 75%
-
-Edit - Copy- Activate your work -Edit - Paste as a new layer
-Activate your Move Tool (M) place it in the right place ( see finished image )
68. Layers- Duplicate
69. Adjust- Blur- Gaussian Blur: Radius 6
70. Layers Arrange-Move Down
71. Layers-Properties-Set the Blend Mode to "Hard Light "
72.Activate Text Tool- Font-LCDMore-Size 48-Or choose the font of your choice/ Write the text‘’attention danger’’
73.
Effects – 3D Effects –Drop Shadow with these settings : 1/1/100/1 Black

74. Image - Add borders-Symmetric checked 1 Pixel Color #fac170 =(1)
75. Selections- Select All
76. Image - Add borders-Symmetric checked 55 pixels Color #720b04=(2)
77. Selections-Invert
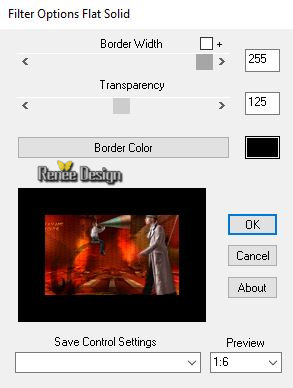
78. Effects – Plugins – Bordermania – Flad
solide
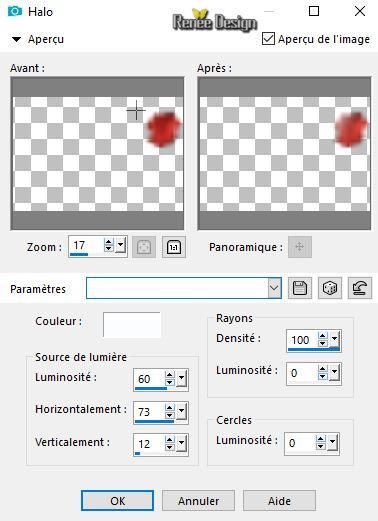
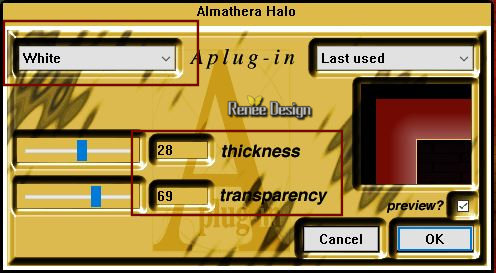
79. Effects – Plugins – Almathera – A Halo with these settings
80.
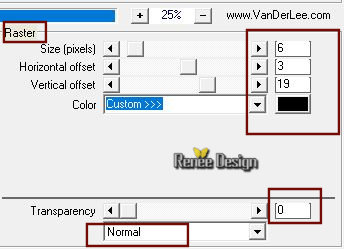
Effects –Plugins – Vanderlee Unplugged X –
Raster
81. Effects- Edge Effects- Enhance More
82. Selections- Invert
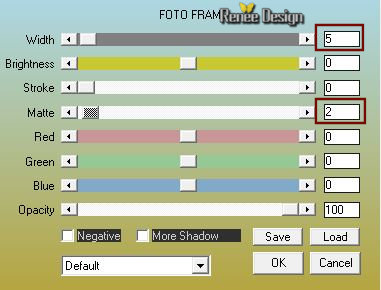
83. Effects - Plugins –AAA Frames – Foto Frame
Selections- Deselect All
84. Adjust – Brightness and Contrast-Histogram Adjustment use the settings below
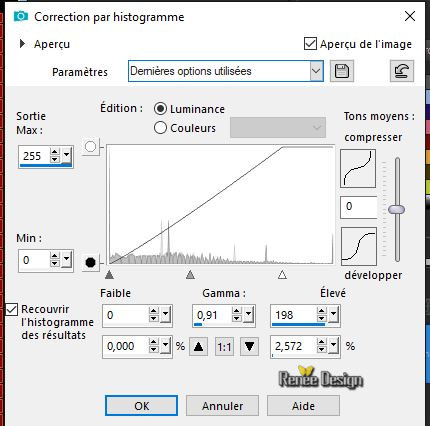
Save as JPG
I hope you enjoyed this lesson
Renée
This lesson was written by Renée 30-09-2018
Edited and Update
2018
*
Any resemblance with an existing lesson is a coincidence
* Do not forget to thank the people who work with us and for us I have appointed the tubeurs and translators
Thanks
*
| 
 Translations


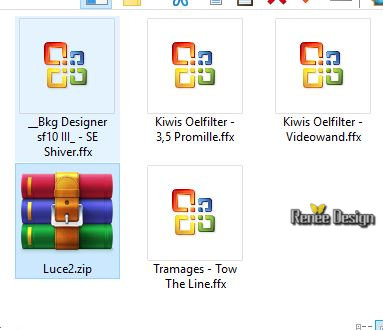


 If a plugin supplied appears with this icon it must necessarily be imported into Unlimited *