|
Let's start the lesson.
-
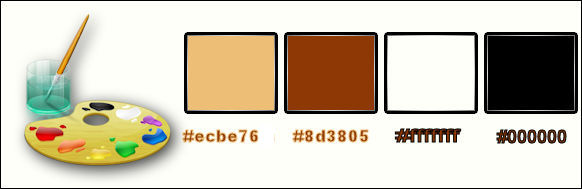
Color-palette:Set your foreground color to #ecbe76
- Set your background color to #8d3805
1. Open the background image ‘’fond_emotive’’/ -Window - Duplicate (or shift+D) - Close the original and proceed on the copy= Raster 1
2.
Layers- New Raster Layer
3.
Activate Flood Fill Tool and fill the layer with the layer with the background color
-Open then Minimize the mask in PSP
4.
Layers- New Mask layer from Image and choose Mask:
‘’maskcameronF125.jg’’

-
Layers- Merge-Merge Group
5.
Effects- Plugins – Toadies – What are you
99/59
6. Effects- Edge Effects- Enhance More
7. Layer Palette - Double click on this Layer and set the Blend Mode to "Hard Light "
8.
Effects –Plugins- Eyecandy 5 Impact – Perspective Shadow –tab Settings/User settings choose my Preset ‘’
Renee_Emotive_shadow’’
9.
Effects –Plugins- Eyecandy 5 Impact – Perspective Shadow –tab Settings/User settings choose my Preset
‘’
Renee_emotive_shadow2’’
10.Layers- Merge- Merge Down
11.
Layers- Duplicate
12.
Effects –Plugins- Unlimited - &<Bkg Designer sf10 I>- ALFs
Border Mirror Bevel a 97/64
13.
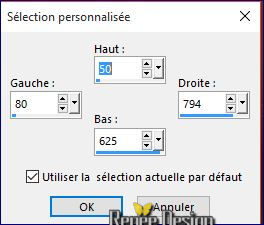
Activate Selection Tool -Custom Selection (S) with these settings
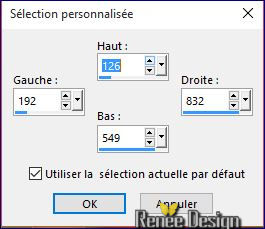
14.
Selections- Promote selection to Layer
15.
Effects- Plugins- Flaming Pear –
Atherize use settings below
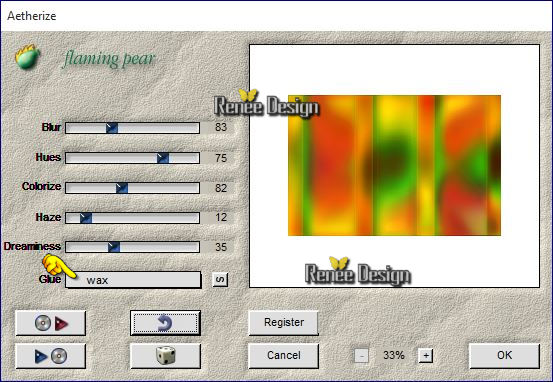
Selections- Deselect All
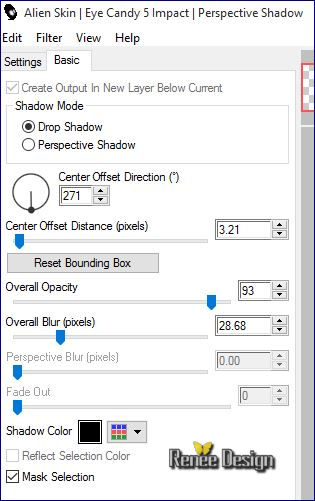
16. Effects- Plugins – EyeCandy 5 Impact – Perspective
shadow with these settings-color black
-
Layer-Palette: activate layer underneath (Copy of Raster 1)
17. Image Resize 85 % resize all layers not checked
-
Stay on this layer
18.
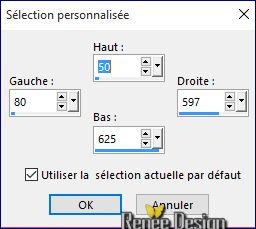
Activate Selection Tool -Custom Selection (S) with these settings
19.
Effects- Plugins – Eyecansy 5 Impact – Perspective
shadow -tab Settings/User settings choose my - Preset “Renee_emotive_shadow3”
Selections- Deselect All
Stay on this layer
20.
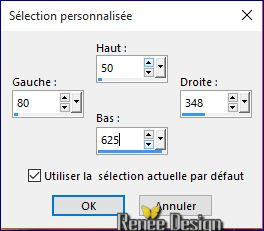
Activate Selection Tool -Custom Selection (S) with these settings
21.
Effects- Plugins – Eyecansy 5 Impact – Perspective
shadow -tab Settings/User settings choose my - Preset “Renee_emotive_shadow3”
Selections- Deselect All
Stay on this layer
22.
Activate Selection Tool -Custom Selection (S) with these settings
23.
Effects- Plugins – Eyecansy 5 Impact – Perspective
shadow-tab Settings/User settings choose my - Preset “Renee_emotive_shadow3”
Selections- Deselect All
24. Effects- Edge Effects- Enhance More
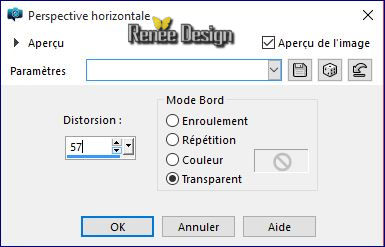
25. Effects- Geometric Effects– Perspective Horizontal with these settings
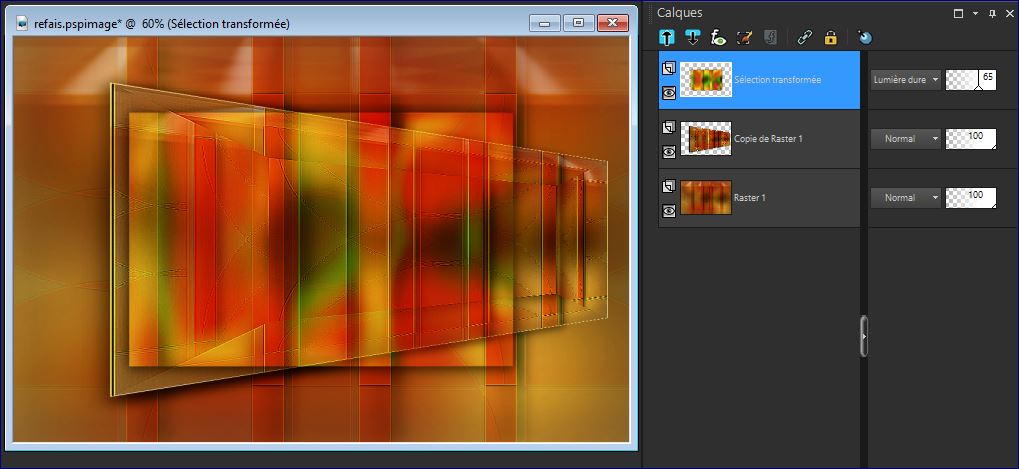
- Stay on the layer above (Selection transformed)
-Double click on this Layer and set the Blend Mode to "Hard Light "
-Set the layer opacity of this layer to 65%
- Your work and Layer Palette look like this now
-
Color Palette: Change the foreground color to #000000
26.
Layers - New Raster Layer
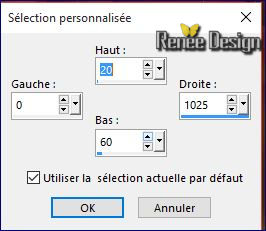
27.
Activate Selection Tool -Custom Selection (S) with these settings
28. Activate Flood Fill Tool and fill the selection with the foreground color black
Selections- Deselect All
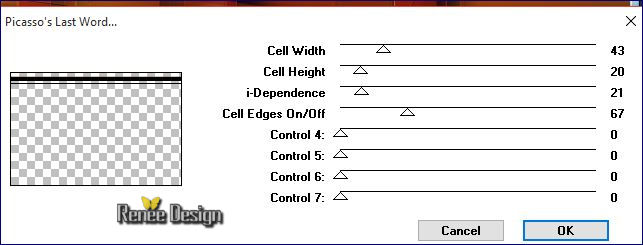
29.
Effects- Plugins – Toadies – Picasso’s Last
Word use settings below
30.
Effects –Plugins - Unlimited - &<Bkg Designer sf10 I>- ALFs
Border Mirror Bevel 145/113
31. Effects- Edge Effects- Enhance
32. Layer Palette - Double click on this Layer and set the Blend Mode to "Screen "
33. Open the tube ‘’ emotive_image1’’
- Edit/ Copy-Edit - Paste as new layer on your working image
34. With your Pick Tool (K) place it in the right place as shown in the example below
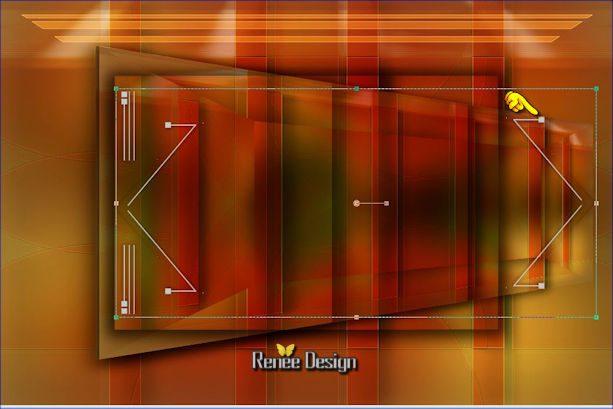
Hit the M key of your Keyboard to remove the Nodes
35. Open the tube ‘’ emotive_image2.pspimage’’’
- Edit/ Copy-Edit - Paste as new layer on your working image
-With your Move Tool: move it to the left ( see finished image)
36. Layers- New Raster Layer
- Color Palette: Change the Foreground color to #ffffff
37. Activate Flood Fill Tool and fill the layer with the layer with the foreground color
- Open and minimize your mask "Renee_Masque_Emotive" in PSP
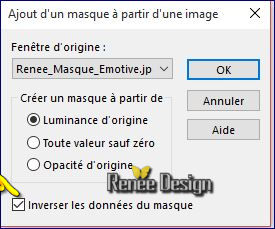
38. Layers- New Mask layer from Image and choose Mask:
‘’Renee_Masque_Emotive’’
- Layers- Merge- Merge- Group
39. Activate your Pick Tool (K) select my file
Preset_Pick_Deformation_Emotive

- Apply (effect will be done)
- Hit the M key of your Keyboard to remove the Nodes
40. Effects- 3 D Effects- Drop Shadow using the default settings
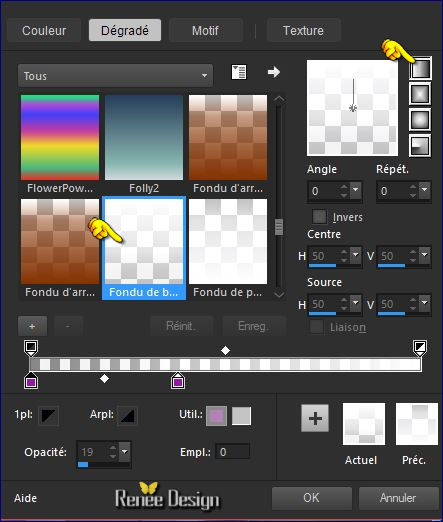
-Color-Palette-Change foreground material into a "fading (white) foreground" linear gradient with these settings (
Corel_06_028)
41. Layers- New Raster Layer
42.
Activate Selection Tool -Custom Selection (S) with these settings

43. Activate Flood Fill Tool and fill the selection with the gradient
Selections- Deselect All
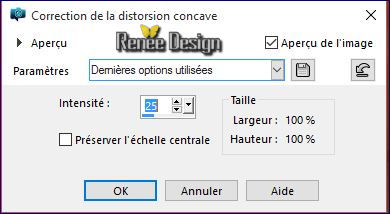
44. Effects- Geometric Effects- Circle- Transparent
45. Adjust- Pincushion Distortion Correction with these settings
46. Effects- Image Effects- Offset with these settings H = -180 and V =
0
47. Effects- Plugins – EyeCandy 5 Impact – Perspective
shadow-Tab-Factory settings-’’Preset _Drop_shadow_Blury using the default settings
48. Double click on this Layer and set the Blend Mode to "Overlay "
-Set the layer opacity of this layer to 59%
49. Effects- Plugins – L and K’s – Elvida
a 55
50. Layers- Duplicate
51. Image Resize 85 % resize all layers not checked
52. Effects –Plugins- Unlimited - &<Bkg Designer sf10
I>- Blur’em! a 14/12
53. Effects- Edge Effects-Enhance
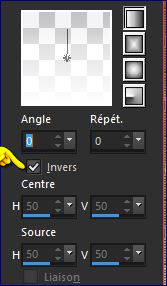
- Color-Palette: Foreground gradient: changes the settings-Invert checked
54. Layers- New Raster Layer
55. Activate Flood Fill Tool and fill the layer with the gradient
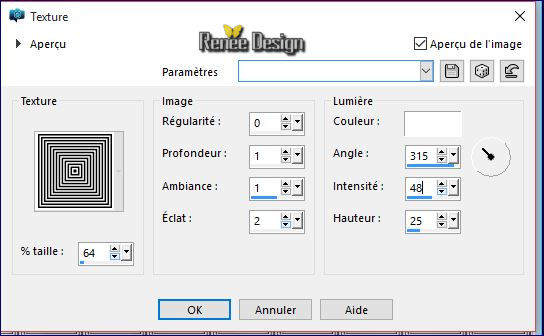
56. Effects- Texture Effects- Texture–motif
« Squares« with these settings » Corel_15_012 Corel_15_012
57.
Effects- Plugins – Simple -Top left
Mirror
58. Effects- Plugins – Simple- Quick Tile
59. Layer Palette - Double click on this Layer and set the Blend Mode to "Soft Light "
60.
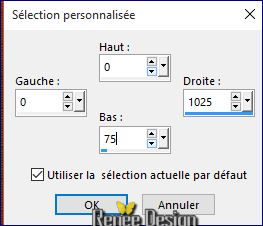
Activate Selection Tool -Custom Selection (S) with these settings
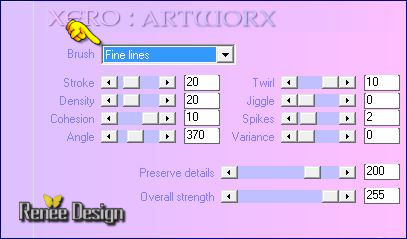
61. Effects- Plugins – Xero – Artworx use settings below
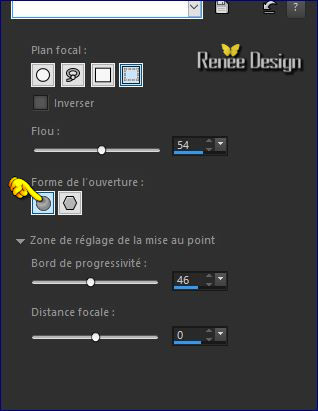
62. Adjust-Depth of Field -Aperture Shape-Circular aperture shape use settings below
63.
Selections- Promote selection to Layer
Selections- Deselect All
64.Layer Palette - Double click on this Layer and set the Blend Mode to "Multiply"-Set the layer opacity of this layer to 75%
65. Layers- Duplicate
66
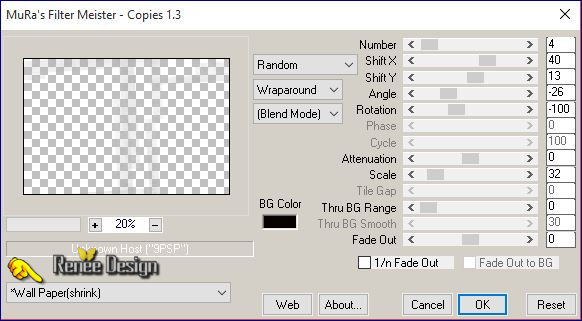
Effects- Plugins – Mura’s Meister –
Copies use settings below
67. Layer Palette - Double click on this Layer and set the Blend Mode to "Multiply"-Set the layer opacity of this layer to 100%
68.
Selections –load/save selection –load selection from disc and choose my selection:’’
emotive_selection_1’’
DELETE
Selections- Deselect All
69. Open the tube ‘’ Belscrap_Steampunk_El 9 Free.pspimage’’
- Edit/ Copy-Edit - Paste as new layer on your working image
70. Effects- Plugins – Mura’s Meister –Copies use settings below
Do you have problems with this filter- Image ’’effet_Copie et découpe sur papier’’ is into the zipfile and Paste as new layer on your working image and continue with step 72
71. Image Resize 65 % resize all layers not checked
-
With the Move Tool, move it in the upper left side (see finished image )
72. Effects- 3 D Effects- Drop Shadow using the default settings
73. Open the tube’’ renee_tube_ciseau
- Edit/ Copy-Edit - Paste as new layer on your working image
74. Activate Eraser Toll with these settings (if you take my tube rectify if necessary)

- Erase for this result
75. Layers- Arrange- Move Down (cut paper effect to give this)

- To replace the top of the layers palette
76.
Open the tube ‘’ Renee_tube_Femme_Papier’’
- Image Resize 65 %
- Edit/ Copy-Edit - Paste as new layer on your working image
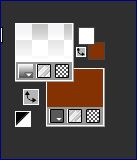
Color -Palette looks like this
77. Activate your Text Tool- Font -« INTERDIM »- >Size 48
Pixels-Stroke Width 3
-And write ‘’ EMOTIVE ‘’
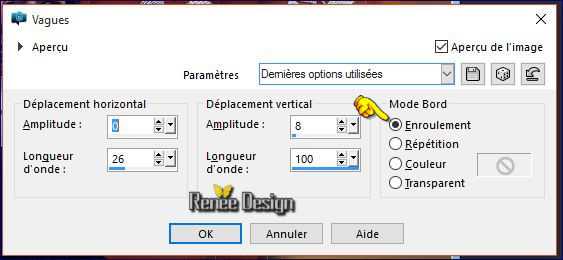
78. Effects- Distortion Effects- Wave use settings below
79 .
With your Pick Tool (K) place it in the right place as shown in the example below
80.
Repeat: Effects- Distortion Effects- Wave with the same settings
81. Layers- New Raster Layer
82.
Selections –load/save selection –load selection from disc and choose my selection:’’
« emotive_selection_2 »
83. Activate Flood Fill Tool and fill the selection with the foreground gradient (2
clicks)
Selections- Deselect All
84. Adjust- Blur- Gaussian Blur: Radius 10
85.
-Set the layer opacity of this layer to 95%
-Color Palette: Change your Foregroundcolor to #000000
86. Layers- New Raster Layer
87.
Selections –load/save selection –load selection from disc and choose my selection:’’
emotive_selection_3 »
88. Activate Flood Fill Tool and fill the selection with the foreground color black
-
Set the layer opacity of this layer to 36%
Selections- Deselect All
89. Open the tube ‘’Renee_tube_tutoriel Emotive-papiers »
- Activate layer 1 of the tube
90.
-Edit/ Copy-Edit - Paste as new layer on your working image
- With the Move Tool -(M) move it on the left
91.
Open the tube ‘’Renee_tube_tutoriel
Emotive-lettres.pspimage »
Edit/ Copy-Edit - Paste as new layer on your working image-Move and resize the letters a taste of work
(Colorize if want and adjust the brightness mode of each letter )
92. Image - Add borders-Symmetric checked: 2 pixels color #8d3805
93 . Image - Add borders-Symmetric checked: 2 pixels color #ecbe76
94. Image - Add borders-Symmetric checked: 35 pixels color #ffffff
95. Image - Add borders-Symmetric checked: 1 pixels color #000000
96. Image - Add borders-Symmetric checked: 35 pixels color #ffffff
97.
Selections- Select All
98.
Selections- Modify-Contract 55 pixels
99.
Effects- Plugins – EyeCandy 5 Impact – Perspective
shadows-tab Settings/User settings choose my - Preset ‘’ Renee_emotive_shadow4’’
100. Effects- 3 D Effects- Drop Shadow using the default settings
Selections- Deselect All
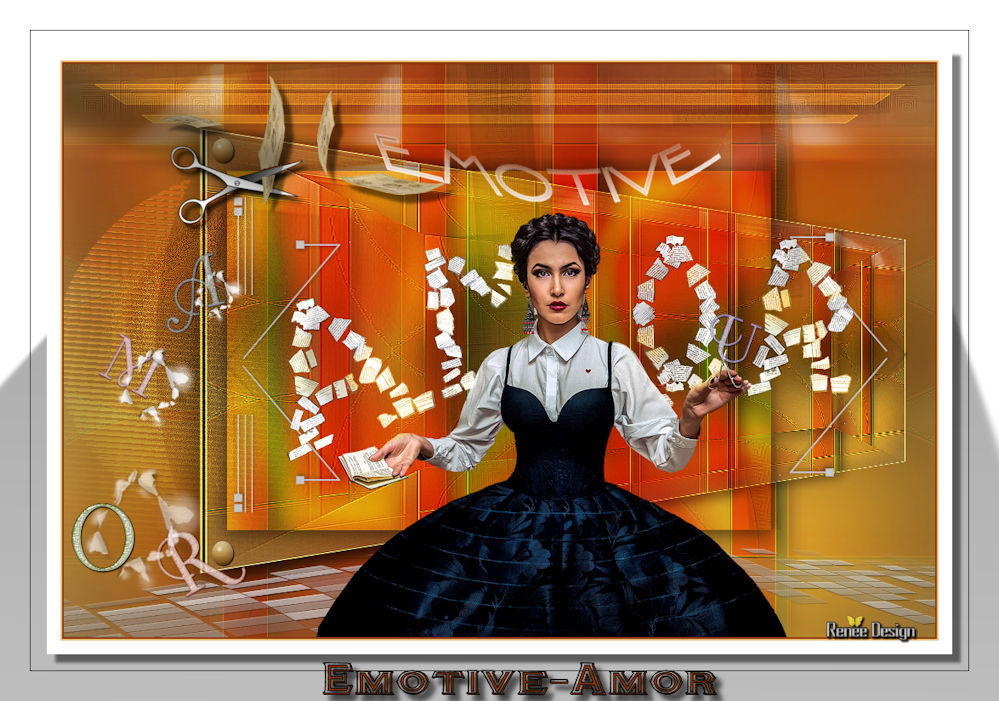
101. Open the tube " texte"- Edit/Copy -Edit paste as new layer on your working image and move -Ore write your own text
101. Image Resize 999 pixels width
-Save as JPG
I hope you enjoyed this lesson
Renée
This lesson was written by Renée 30/01/2016
Edited and Update
2016
*
Any resemblance with an existing lesson is a coincidence
* Do not forget to thank the people who work with us and for us I have appointed the tubeurs and translators
Thanks Renée
*
| 
 Translations


 When you see this logo the filter is imported in Unlimited

 All rights reserved