|
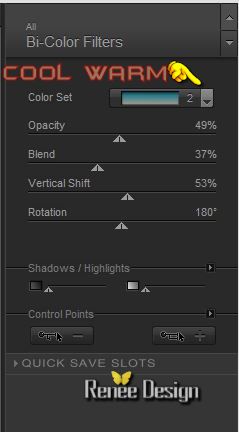
Let's start the lesson. Open the Color-Palette
-
Material Properties: Set your foreground color to #d5ccbb
-Set your background color to #9c715e
1.
Open a transparent image of 1005 x 615 Pixels
2.
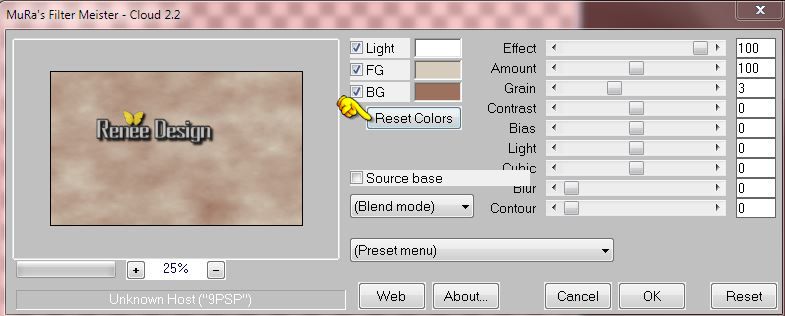
Effects-Plugins – Mura’s Meister –
Clouds with these settings
-
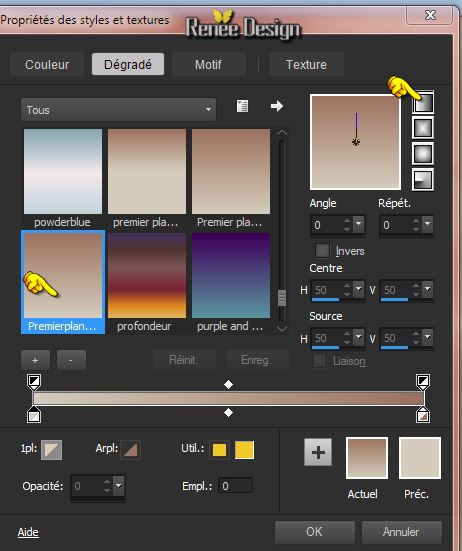
Set your foreground to gradient 'Foreground-background' - Linear -with these settings
3.
Layers - New raster layer
–
Activate Flood Fill Tool and fill the layer with the gradient
4.
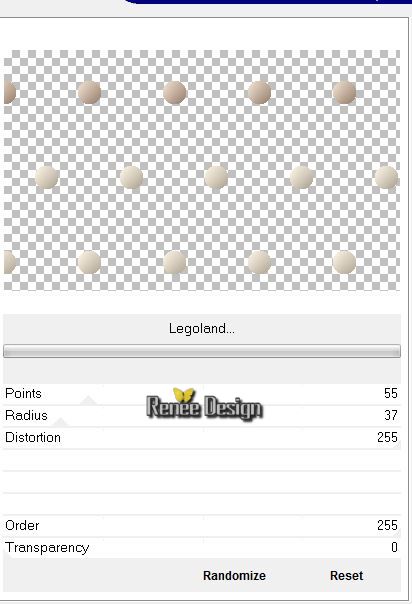
Effects-Plugins - Unlimited – VM Natural –
Legoland with these settings
5.Double click on this layer and set the Blendmode to Hard Light
-
Color -Palette: Set the foreground color to black
6.
Layers- New raster layer
Activate Flood Fill Tool and fill the layer with the foreground color black
7.
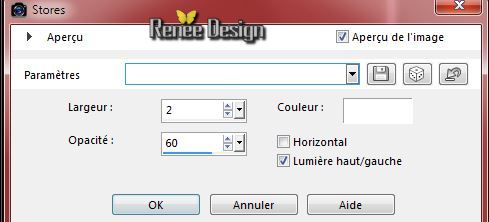
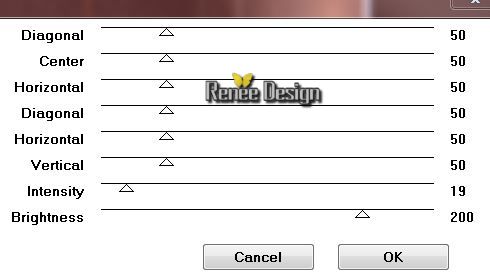
Effects- Texture Effects- Blinds with these settings
8.
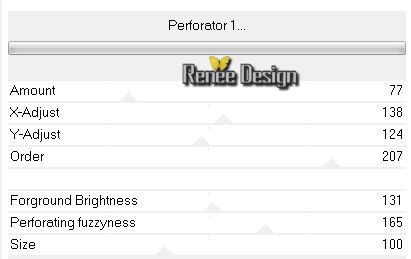
Effects-Plugins-– Tramages -Perforator
1..with these settings.
9.
Effects-Plugins–Unlimited ICNET FILTERS - Tile & Mirror-Seamless
Blend (vertical)
10. Layers-Duplicate
11.
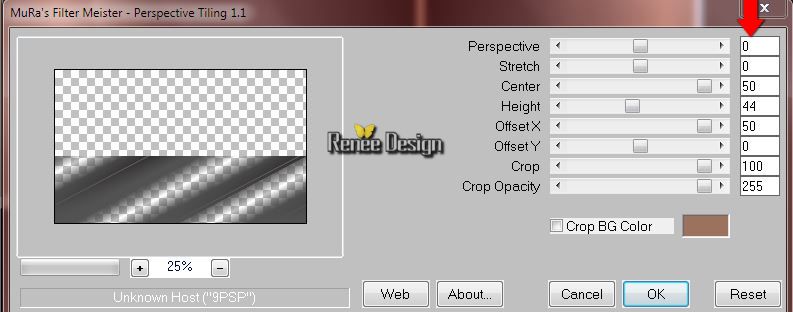
Effects-Plugins –Mura’s Meister –Perspective
Tilling with these settings
12. Layers- Duplicate
13. Image -
Mirror
14. Layers- Merge- Merge-Down
15.
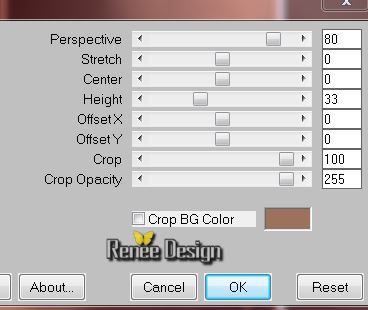
Effects-Plugins – Mura’s Meister – Perspective Tilling with these settings
16. Effects-Plugins-– EyeCandy 5 – Extrude -
tab Settings/User settings choose my preset: ‘’eclosion
_extrude’’

- Double click on this layer and set the Blendmode to Overlay
Layer palette look like this now
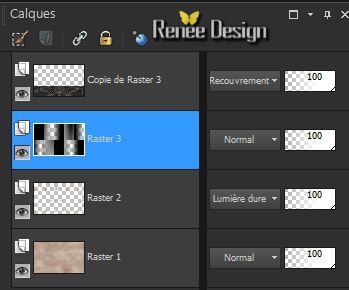
-Layer-Palette: activate raster 3
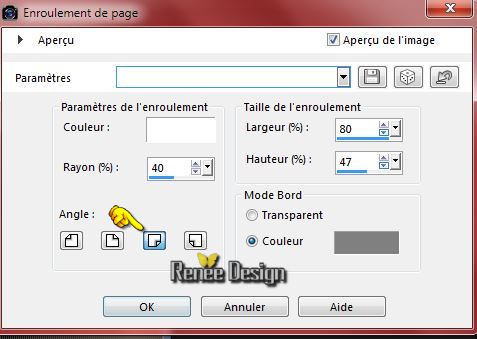
17. Effects- Image Effects-Page Curl with these settings
18. Layers-Duplicate
19.
Effects-Plugins –Unlimited 2.0 - Andrew's Filters 35 - A Bit Of a
Funnel..with these settings.
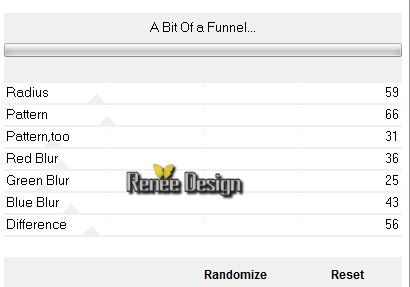
- Repeat this Filter again with the same settings
20. Layer Palette -Double click on this layer and set the Blendmode to Luminance
21.
Effects-3D effects-Drop Shadow with these settings-Check box for shadow on new layer
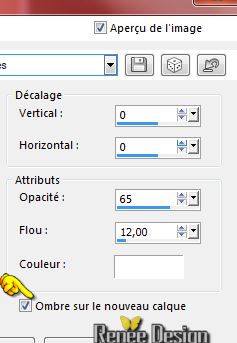 (Attention Uncheck shadow on
the new layer
) (Attention Uncheck shadow on
the new layer
)
22.Layer Palette-Activate - Copy of Raster 3 Shadowlayer / en mode Lumière dure
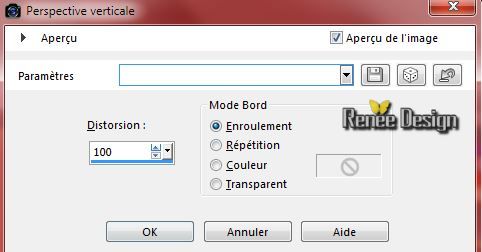
23. Layers- Duplicate
24. Effects-Geometric Effects-Perspective Vertical with these settings
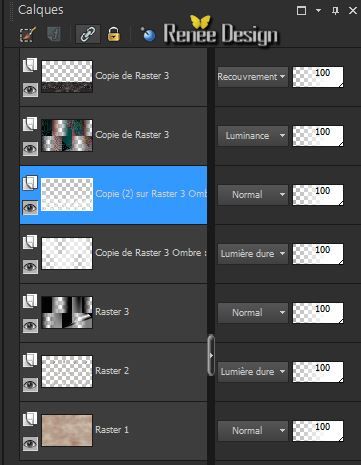
25. Layer-Palette: Activate ( Copy (2) Raster 3 Shadowlayer : 1)Layer Palette -Double click on this layer and set the Blendmode to Normal
- Layer palette look like this now
- Activate the top of the layer-Palette
26. Activate the tube ‘’nicole_oeufAnnMei.pspimage’’
- Image
Resize with 60 %
- Edit/copy-Edit paste as a new layer on your working area
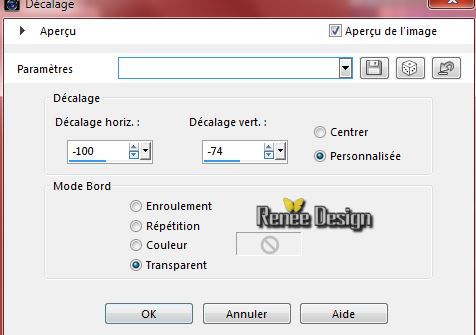
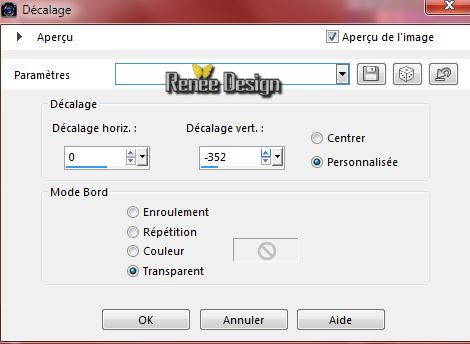
27. Effects- Image Effects- Offset with these settings
28. Effects-Plugins – Graphic plus – Cross Shadow with these settings
29. Layers- Duplicate
30. Image Flip
31. Effects- Image Effects- Offset with these settings
32. Layers-Arrange-Move Down
-
Set the Opacity of this layer to 57%
- Layer-Palette: Activate raster 3
33.
Selections - load/save selection - load selection from disk and select my file: ‘’eclosion_1’’
34.
Promote selection to layer
Selections-Deselect All
35.
Effects-Plugins – Unlimited 2.0 - &<Bkg Designer sf10
I>-Cruncher 79/20
36. Effects-Edge Effects-Enhance More
37. Layers-Arrange-Move Up
38. Layers- Duplicate
39. Effects- Geometric Effects-Skew with these settings

40. Double click on this layer and set the Blendmode to Overlay
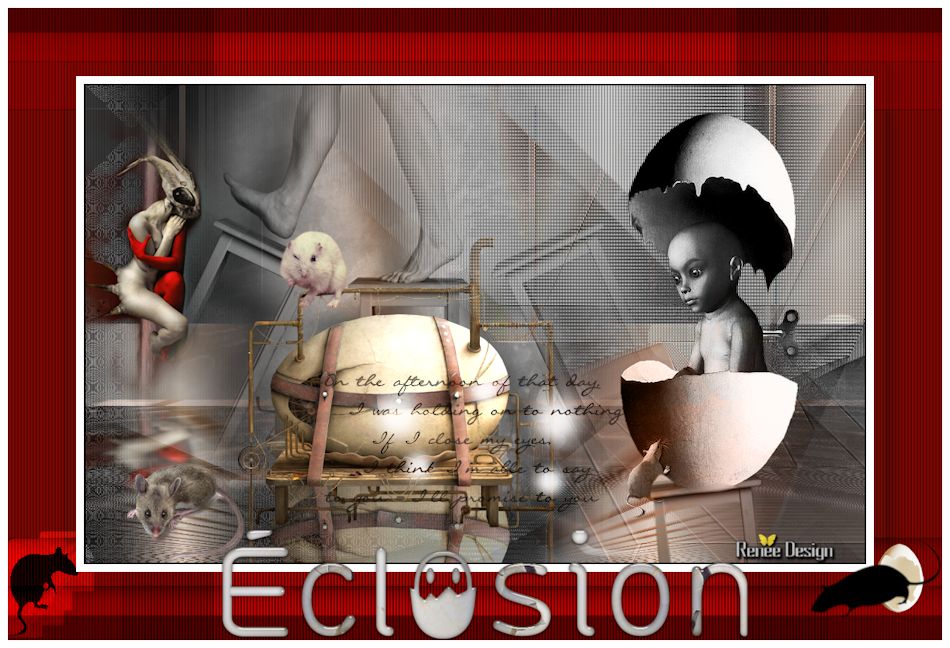
41. Activate the tube ‘’ Renee_tube_Hatching’’ activate ’’pour
_tuto_eclosion’’ of the tube
If you choose the tag :Eclosion 2
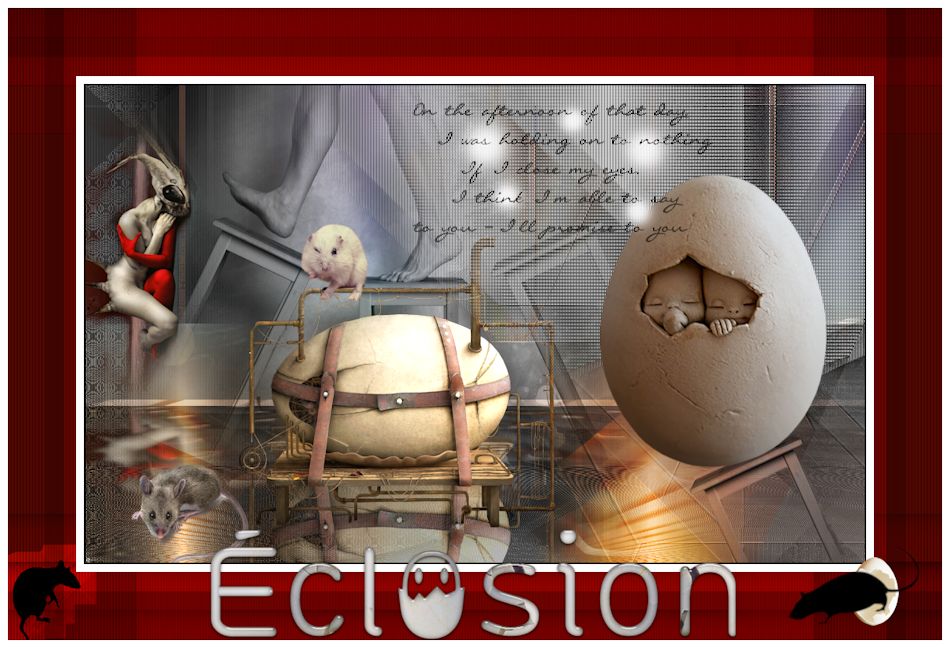
- Activate the tube ‘’SvB Ei met babytjes’’ erase the signature,
- Edit/copy-Edit paste as a new layer on your working area and move
If you choose the tube de Syl and the creation(version)
2
- Activate the tube ‘’image_4’’- Edit/copy-Edit paste as a new layer on your working area and move
- Double click on this layer and set the Blendmode to Luminance Legacy (
your choice)
- Activate Copy of raster layer 3 in the layer palette
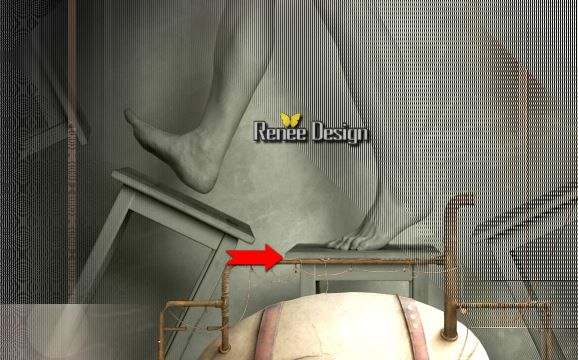
42. Activate the tube ‘’Renee_tubes_Walk_on.pspimage’’
- Edit/copy-Edit paste as a new layer on your working area
- With the move tool, move as shown below
- Double click on this layer and set the Blendmode to Luminance Legacy
- Activate the top of the layer-Palette
43. Activate the tube ‘’ femmefourmie_Roserika’’
- Edit/copy-Edit paste as a new layer on your working area and move-
- Move Tool: Move to the left side
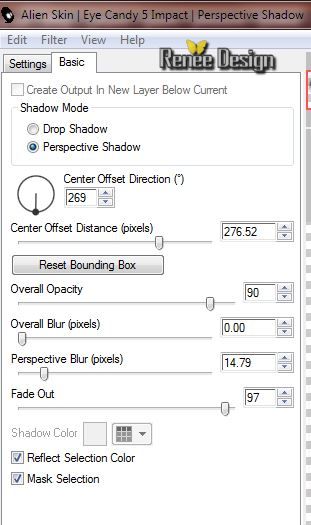
44.
Effects-Plugins – EyeCandy 5 Impact-perpsective
shadow- tab Settings/User settings choose my preset:’’ eclosion_shadow’’
45. Activate the tube ‘’eclosion_rats’’
tuben ‘’rat1 and rat2 ‘’
- Edit/copy-Edit paste as a new layer on your working area and move
46. Activate the tube « eclosion_texte’’
-
Edit /copy -Edit -paste as new layer on your working area and move
Double click on this layer and set the Blendmode to Hard Light
-
In the layer palette: activate raster 1 –(I did it only for version 2
with the tube of Syl)
- Effects-Plugins - Nick Color Effex
Pro3.with these settings
47. Layers- Merge- Merge-Visible
48.Image - Add borders-Symmetric checked:2 pixels color black
49. Image - Add borders-Symmetric checked: 10 pixels color white
Put the image aside for now, but do not close, we will need it again soon
50.
Open a transparent image of 1205 x 815
- Set your foreground color to #9c1006 -Activate Flood Fill Tool and fill the layer with the foreground color the foreground color #9c1006
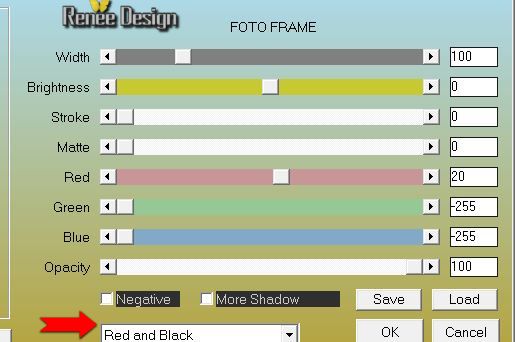
51. Effects-Plugins - AAA Frame - Foto Frame with these settings
50.
Effects-Plugins - Unlimited 2.0 / -&<Bkg Designer sf10
I>-Cruncher 50/0
51. Activate the minimized image
–
Edit/copy- Edit/ paste as new layer (do not move it is in the right place)
52. In the layer palette: activate the layer underneath
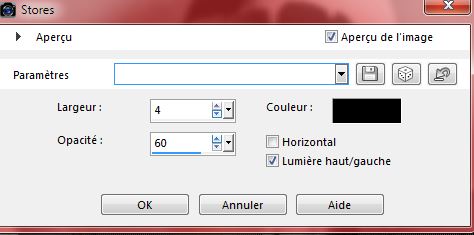
53. Effects- Texture Effects- Blinds with these settings
54.
Effects-Plugins - Unlimited 2.0 -&<Bkg Designer sf10 I>-Cruncher
20/20
55. Activate the tube ‘’ eclosion_rat_noir’’JPG
- With the magic wand – Mode
“Add Shift ” , Tolerance 10 Feather 2
select a rat
56.
Selections- Modify-Contract 2 pixels
- Edit/copy-Edit paste as a new layer on your working area
- Move Tool: Move to the left bottom edge
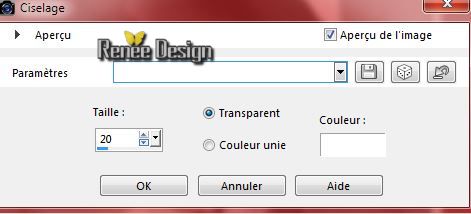
57. Effects-3D Effects-Chisel with these settings
58. Double click on this layer and set the Blendmode to Overlay
- Activate again the tube‘’ eclosion_rat_noir’’JPG
Selections-Deselect All
59. With the magic wand select some other form of rat
60.
Selections- Modify-Contract 2 pixels
- Edit/copy-Edit paste as a new layer on your working area
Move Tool: Move to the bottom right side
61. Activate the tube ‘’demi_oeuf_eclosion’’
- Edit/copy-Edit paste as a new layer on your working area Move Tool: Move to the bottom right side
59. Layers-Arrange-Move Down
60. Image - Add borders-Symmetric checked:10 pixels color white
- Activate the tube Text- Edit/copy-Edit paste as a new layer on your working area
61. Image
Resize with 950 Pixels Width
Write or paste your signature
I hope you enjoyed this lesson
Renée
This lesson was written by Renée 11/03/2015
Created
2015
*
Any resemblance with an existing lesson is merely a coincidence *
* Don't forget to thank the people who work for us and with us. I named the tubeurs - Testers and the translators.
Thanks Renée.
*
| 
 Translations


 When you see this logo the filter is imported in Unlimited *

 All rights reserved