|
New
Translations here
Let's begin
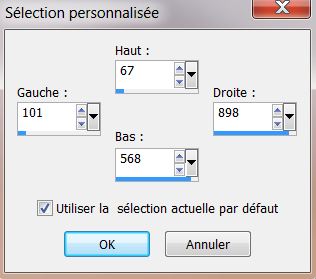
1. Open the image ''delicate_fantaisie_Fond. Promote to background layer raster 1 2. Layers - New raster layer 3. Selections-Custom selection with these settings
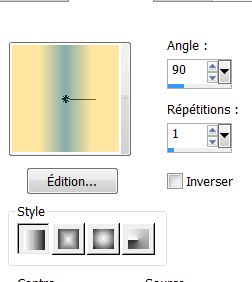
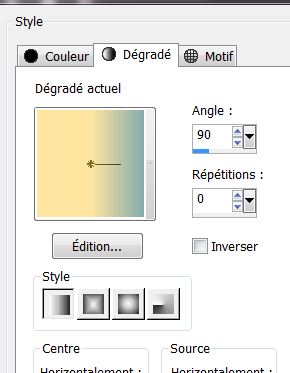
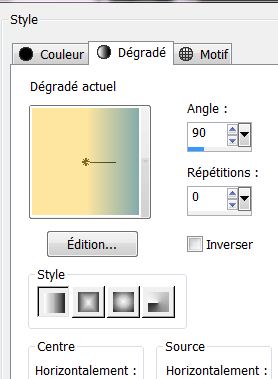
4. Material Properties: Foregroundcolor: #fee6a0 and your Backgroundcolor to color: #85acab 5. Prepare a linear gradient configured like this
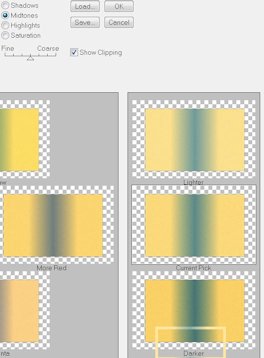
6. Flood Fill Tool: Fill the selection with the gradient. Selections-Select none 7. Effects- Plugins Adjust Variation / Darker
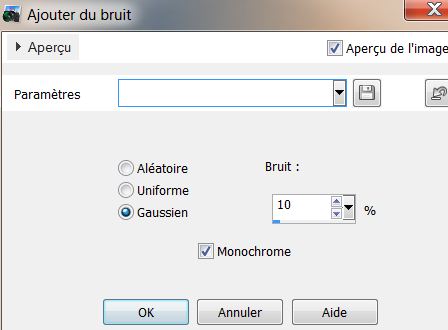
8. Adjust - Add /Remove noise-Add noise: Settings
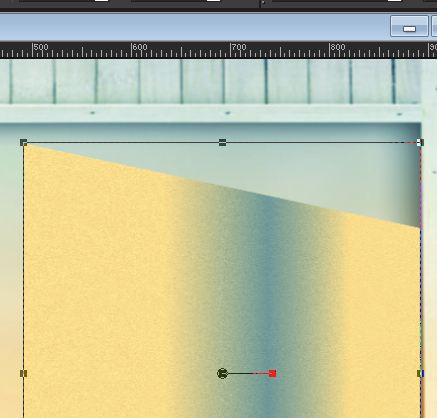
9. Effects- Geometric Effects /Perspective Horizontal. Distortion to 50. Transparent 10. Aktivate your Pick-Tool: ''preset de deformation ''renee_Pick_delicate fantaisie'' This will give you( placed in your default settings )
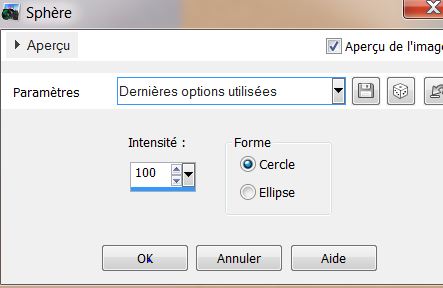
- Will be placed on the right if necessary 11. Effects-Distortion Effects /Punch 100 12. Effects- Geometric Effects/Spherize
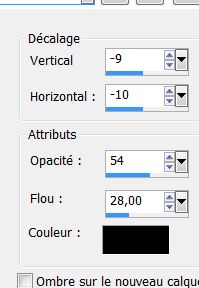
13. Effects -3D Effects-Drop Shadows:
14. Layers-Duplicate 15. Effet de distorsion /Punch 100 16. Image Resize to 85% Resize all layers not checked 17. Blend Mode "Hard Light" and the Opacity down to 51% 18.Effects -3D Effects-Drop Shadows:
19. Layers-Duplicate 20. Effects-Distortion Effects /Punch 100 21. Image -Resize down to 85% Resize all layers not checked -Blend Mode "Hard Light" and the Opacity down to 69% - This is the result
22. Close raster 1 . Layers-Merge-Merge Visible 23. Open your closed layer 24. Be placed on the merged layer 25. Image Resize to 85% Resize all layers not checked 26. Effects- Geometric Effects- Circle /settings Wrap
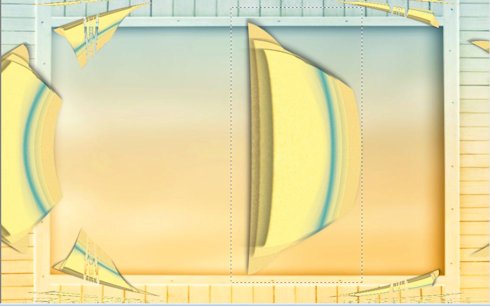
- This is the result
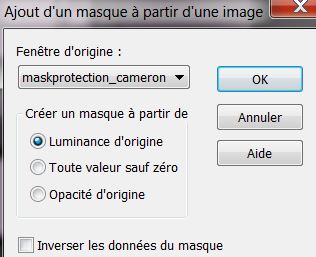
27. Selection Tool: Select the part as shown and. Delete 28. Effects -3D Effects-Drop Shadows: withe the same settings 29. Layers - New raster layer 30. Flood Fill Tool: fill the layer with color:#85acab 31. Layers-New Mask Layer From Image /Open Mask: ''maskprotection_cameron''
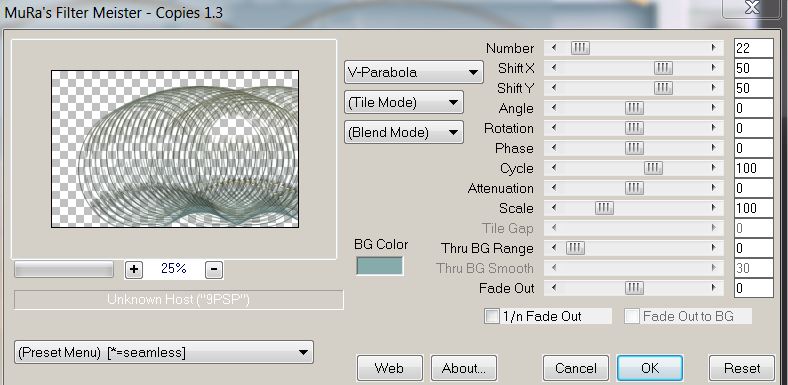
32. Effects - Edge Effects-Enhance 33.Layers-Merge Merge Group 34. Open the tube ''delicate_fantaisie_image_cercle'' Edit/ copy- Edit/ paste as new layer - DO NOT MOVE it is in the correct location 35. Effects - Plugins Mura's meister - copies
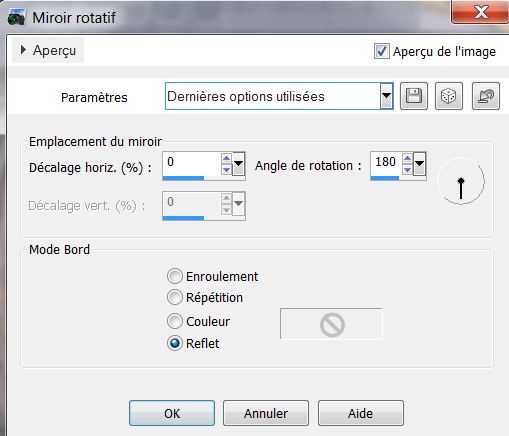
36. Effects- Reflection Effects- Rotating Mirror
37. Effects -Plugins Flaming Pear Flexify 2
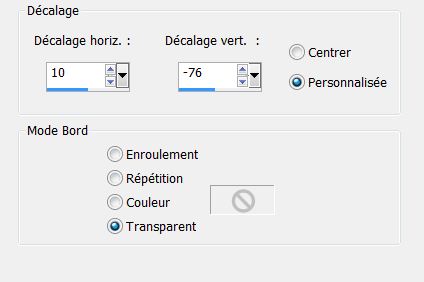
38. Layers-Duplicate 39. Image /Mirror/Image Flip 40. Effects - Image Effects/Offset
41. Layers-Arrange-Move Down 42. Effects -Plugins FM Tile Tools / Blend emboss default - Blend Mode to this layer" Hard Light" 43. Layers - New raster layer 44. Selections - load/save selection - load selection from disk and choose– "renee_delicate_fantaisie1'' 45. Flood Fill Tool: Fill the selection with the gradient
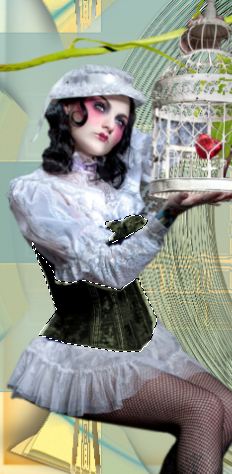
46. Selections-Select-none 47. Open the tube ''fleur_delicate_fantaisie'' Edit/ copy- Edit/ paste as new layer and place 48. Open the tube ''cage_delicate_fantaisie'' Edit/ copy- Edit/ paste as new layer and place .Eraser Tool: Erase a piece of the ring from the cage 49. Effects -3D Effects-Drop Shadows: 0/0/10/22 black 50. Open the tube ''cerf_volant_delicate_fantaisie'' Edit/ copy- Edit/ paste as new layer and place 51.Open the tube ''oiseau_delicate_fantaisie'' Edit/ copy- Edit/ paste as new layer and place 52. Open the tube ''panier_delicate_fantaisie'' Edit/ copy- Edit/ paste as new layer and place 53. Open the tube ''tube_1007'' Edit/ copy- Edit/ paste as new layer and place -Aktivate your Freehand selection: On the tube :select parts in blue see Example
54. Adjust /Hue and Saturation/Colorize. Hue: 57 and Saturation: 41 55. Selections-Select-none 56. Layers-Merge- Merge Visible 57.Open the tube ''clef_delicate_fantaisie »Edit/ copy- Edit/ paste as new layer 58. Effects- Image Effects- Offset
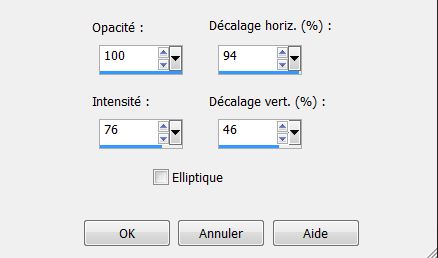
59. Effects -Reflection Effects-Feedback
60. Blend Mode to this layer :" Luminance" 61. Image - add borders symmetric 2 pixels Backgroundcolor 62. Image - add borders symmetric 50 pixels Foregroundcolor 63. Image - add borders symmetric 2 pixels Backgroundcolor 64. Activate your Magic wand : Click with your magic wand in to the 50 pixels 65. Flood Fill Tool: Fill the selection with the gradient.
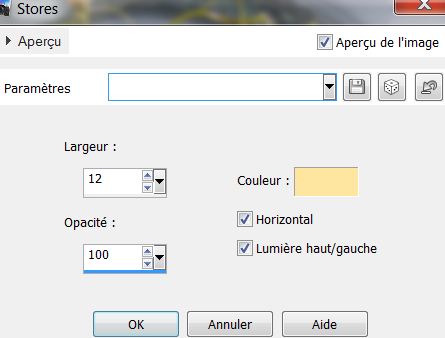
66. Effects- Texture Effects/Blinds
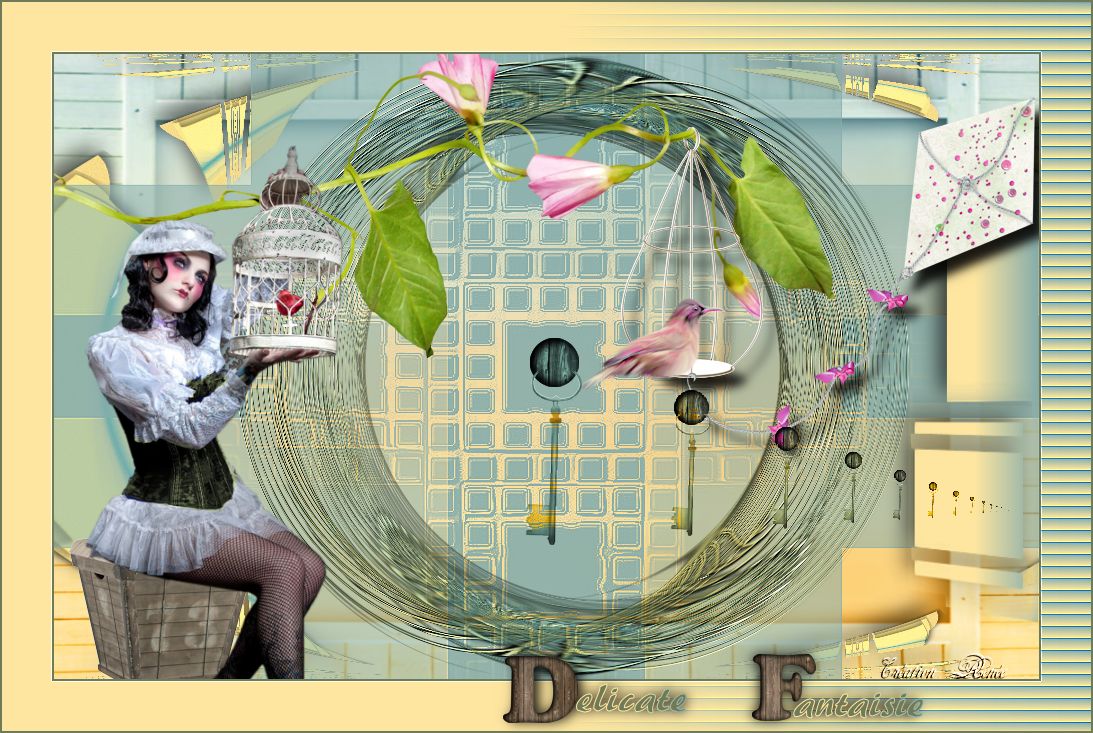
67. Effects- Edge Effects-Enhance 68.Selections-Select none 69.Open the tube " titre" Edit/ copy- Edit/ paste as new layer and place That's it !! You've done it ! This lesson was written by Renée 8/03/2013 * I am part of tutorial writers inc. My tutorials are regularly recorded
*
|
 Translations