|
Let's start the lesson.
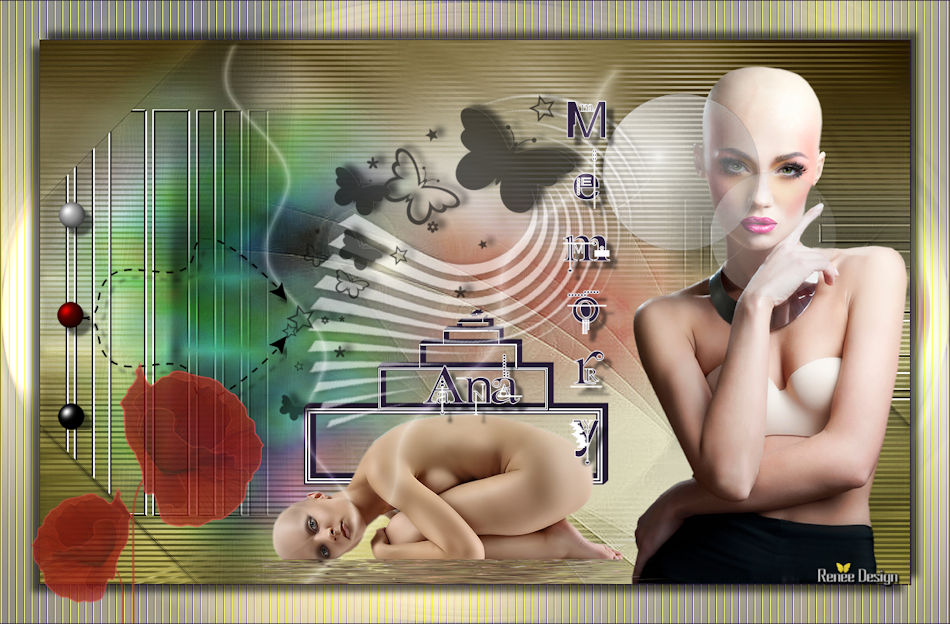
Anna_Ridzi _Hommage
Color-palette:Set your foreground color to color #e5e1c4 -Set your background color to color:
#705f30
1.
Open the Image –‘’fond_Anna_Ridzi_Hommage’’/Window - Duplicate (or shift+D) - Close the original and proceed on the copy -Promote Background Layer =Raster 1
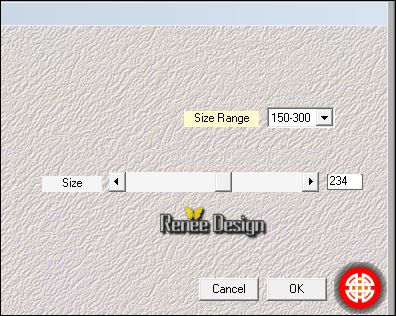
2. Effects –Plugins- Unlimited - Two Moon -Wish it would
Rain...with these settings 244/243/64
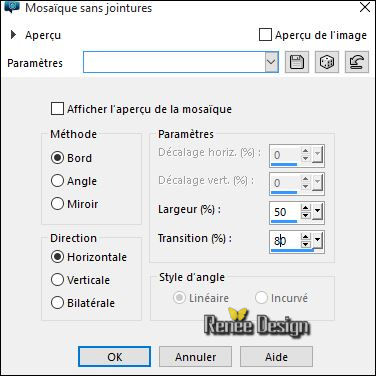
3. Effets-Image Effects- Seamless Tiling with these settings
4. Effects- Distortion Effects- Pinch 100
5.
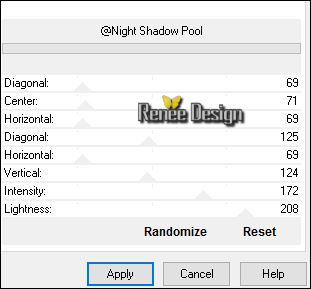
Effects –Plugins- Unlimited - &<Background Designers IV>-
@Night Shadow Pool with these settings
6. Layers- New Raster Layer
- Activate Flood Fill Tool and fill the layer with the foreground color #ffffff
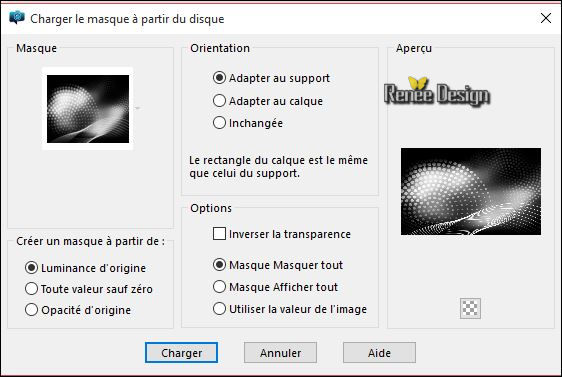
7. Layers-Load/Save Mask-Load mask from Disk and select mask
’’narahmaskabstract63’’
- Layers- Merge- Merge Group
8. Layers-Merge-Merge- Down
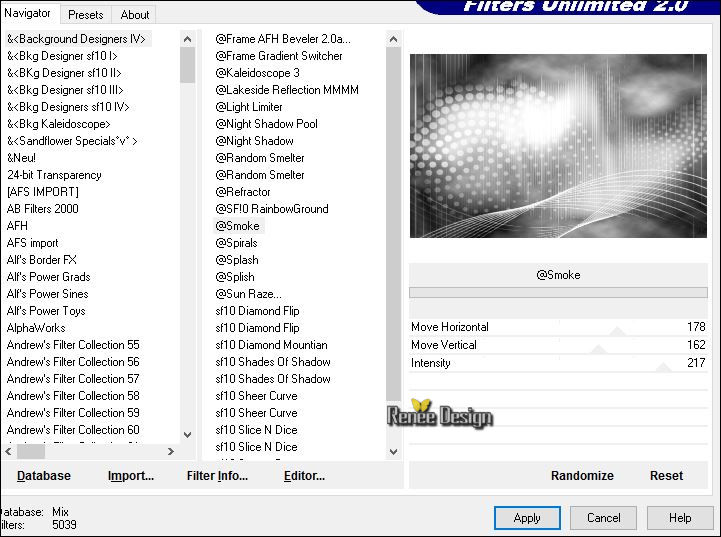
9. Effects –Plugins- Unlimited -
&<Background Designers IV>-@Smoke use settings below
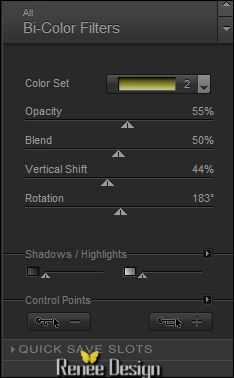
10. Effects- Plugins -Nick color effex /Bi color
Filters / Brown 2 use settings below (you can choose another effect with this filter Bi color )
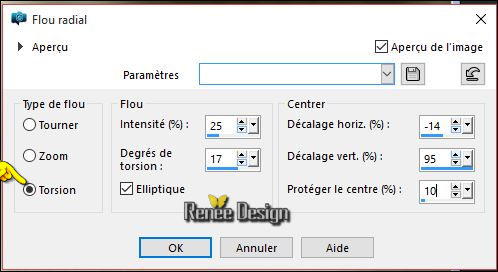
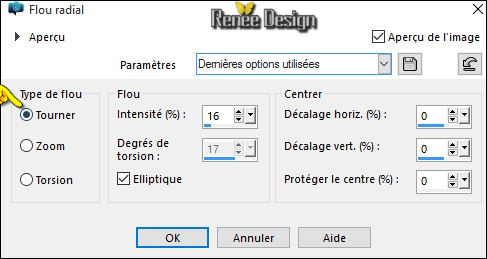
11. Adjust- Blur- Radial Blur with these settings
12. Effects-Edge Effects- Enhance More
13. Effects- Plugins – Carolaine and Sensibility- CS-Linear
–H with these settings 18/21/0
14. Layers-New Raster Layer
15. Color-palette:Set your foreground color to color #e5e1c4 -Activate Flood Fill Tool and fill the layer with the foreground color #e5e1c4
16.
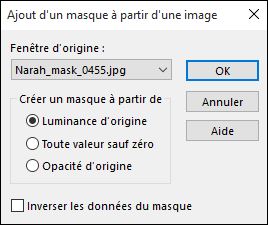
Layers- New Mask layer from Image and choose Mask:‘’
Narah-Mask_0445.jpg
17. Effects-Edge Effects- Enhance More
- Layers- Merge- Merge Group
18. Effects-3D Effects-Drop Shadow with these settings
1/1/50/20 black
19. Activate the tube ‘’ AR81.pspimage’’
- Edit/ Copy-Edit - Paste as new layer on your working image
- Do not move it is the right place
20. Layers- Arrange- Move Down
- Activate the top of the layer palette
21. Activate the tube ‘’ AnaRidzi127.pspimage’’
- Edit/ Copy-Edit - Paste as new layer on your working image do not move
22. Effects- Plugins - Andromeda –perspective
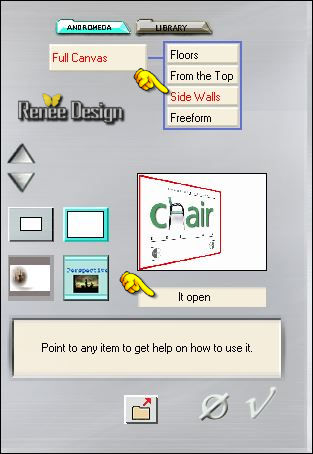
- Activate your Move Tool (M) move to the left side
23.
Effects –Plugins- Unlimited – Render-Difference Clouds a
128/255
24.
Effects –Plugins- Unlimited – Render- Color Clouds a
237
- Layers- Arrange- Move Down
25. Activate the tube ‘’ AnaRidzi1661.pspimage’’
- Edit/ Copy-Edit - Paste as new layer on your working image
- Do not move it is the right place
26. Adjust- Blur- Radial Blur with these settings
27. Effects- Plugins - Medhi – Weaver with these settings
28. Effects- Edge Effects- Enhance More
29. Effets
–Plugins - Unlimited-IC.NET-FILTERS- Color Filters – Sunshine a
183/70
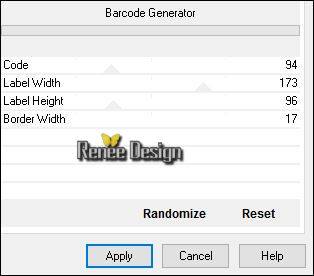
30. Effects
–Plugins- Unlimited - Pattern Generators- Barcode
Generator with these settings
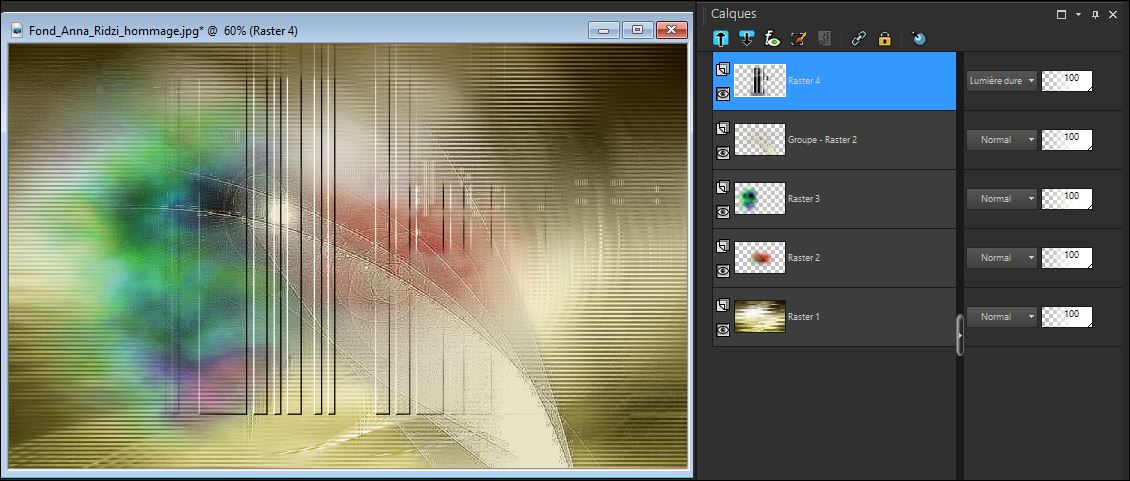
31. Effects
–Plugins - Unlimited – Sedsoft- Emboss Greyscale(into the zip file)
- In the Layer-Palette: Double click on this Layer and set the Blend Mode to "Hard Light "
if the lines are slightly different it does not matter continue the tutorial
32.
Effects- Plugins -Simple – Pizza Slice
Mirror
33.
Effects- Plugins - Simple - Left Right
Wrap
34. Effects-3D Effects-Drop Shadow with these settings
1/1/65/12 black
- Repeat- Drop Shadow with the same settings
35. Effects- User Defined Filter Emboss 3 using the default settings
36. Activate the tube « Anna_deco1.png’’
Edit/ Copy-Edit - Paste as new layer on your working image
- Activate your Move Tool (M) move to the left side
37. Activate the tube ‘’ AR1047’’
- Image
Resize to 75%
- Edit/ Copy-Edit - Paste as new layer on your working image
- Activate your Move Tool (M) move to the bottom right side
38. Activate the tube ‘’ anna_deco2.png’’
- Edit/ Copy-Edit - Paste as new layer on your working image
- Move it there on the woman's face (see finished image)
39. Layers-New Raster Layer
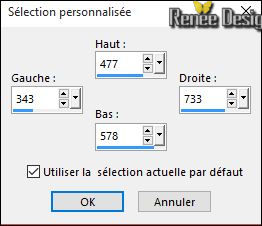
40.
Selection Tool -(S) Rectangle - Custom Selection with these settings
- Color-palette:Set your foreground color to color #ffffff -Set your background color to color: #2f223e
41. Activate Flood Fill Tool and fill the selection with the background color #2f223e
42.
Selections- Modify-Contract 2 pixels
Delete 
43. Activate Flood Fill Tool and fill the selection with the foreground color#ffffff
44.
Selections- Modify-Contract 2 pixels
Delete
45. Activate Flood Fill Tool and fill the selection with the background color #2f223e
46.
Selections- Modify-Contract 2 pixels
Delete
47. Activate Flood Fill Tool and fill the selection with the foreground color#ffffff
48.
Selections- Modify-Contract 2 pixels
Hit Delete on your Keyboard
49. Activate Flood Fill Tool and fill the selection with the background color #2f223e
50.
Selections- Modify-Contract 2 pixels
Delete
Selections- Deselect All
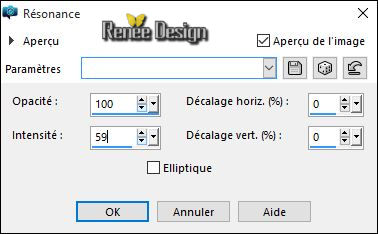
51. Effects- Reflection Effects- Feedback with the settings
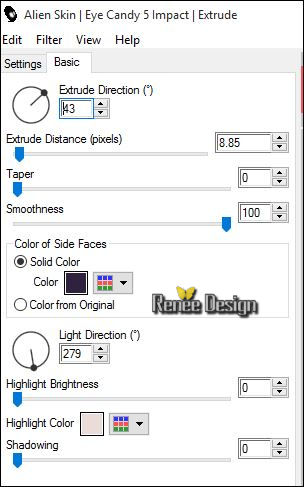
52.
Effects- Plugins - EyeCandy 5 Impact
–Extrude use settings below /-backgroundcolor
53. Layers- New Raster Layer
54.
Selections –load/save selection –load selection from disc and choose my selection: »
Anna_1.PspSelection »
55. Activate Flood Fill Tool and fill the selection with the foreground color #ffffff
Selections- Deselect All
56.
Set the layer opacity of this layer to 55%
57. Effects-3D Effects-Drop Shadow with these settings: 1/165/12 black
58. Activate the tube ‘’ ar_134 »
- Edit/ Copy-Edit - Paste as new layer on your working image
- With your move tool place it to the right place (see finished image)
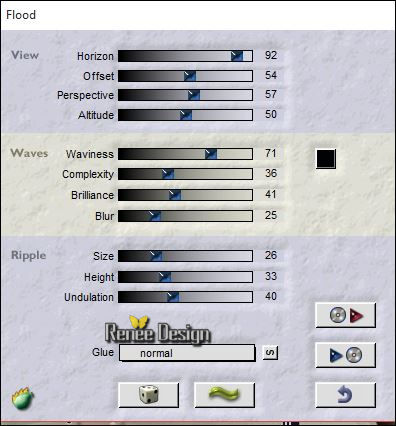
59.
Effects- Plugins – Flaming Pear
/Flood use settings below
(The filter settings "Horizon "depends where the tube is placed)
60. Activate Text Tool- Font ‘’Kingthings Pique n meex » »Size 72 pixels- write « Ana Memory »
61. Layers-New Raster Layer
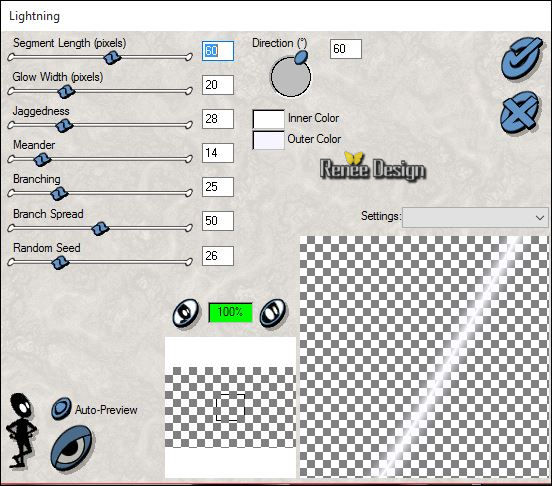
62. Effects- Plugins – Xenofex 1.1 –Lighting
you get this message .jpg) >>Click Ok -and the window opens and you can use the filter with these settings >>Click Ok -and the window opens and you can use the filter with these settings
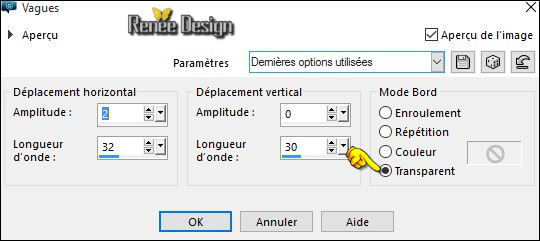
63. Effects- Distortion Effects- Wave with these settings
-
In the Layer-Palette: Double click on this Layer and set the Blend Mode to "Soft Light "
64. Activate the tube ‘’anna_deco3.png’’ ou ‘’envol de papilon »
-Edit/ Copy-Edit - Paste as new layer on your working image
- With your Move Tool (M) place it to the right place
65. Effects-3D Effects-Drop Shadow with these settings:
-4/10/100/12 black
66.
Set the layer opacity of this layer to 61%
67. Image - Add borders-Symmetric checked: 1 pixel -backgroundcolor
68.
Selections- Select All
69. Edit/Copy !!!!
70. Image - Add borders-Symmetric checked: 50 pixels -#ffffff
71.
Selections-Invert
72. Edit-Paste into selection (Image is still in your PSP memory)
73. Adjust- Blur- Radial Blur with these settings

74. Image
Mirror – Image Flip
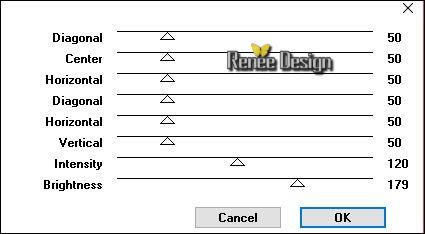
75. Effects- Plugins – Graphic plus - Cross Shadow use settings below
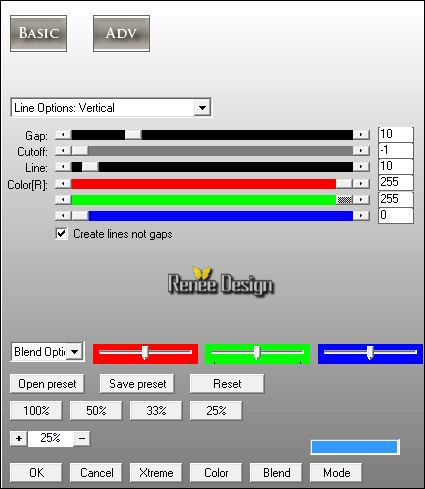
76.Effects- Plugins – AP[Lines]- Silverling use settings below
Attention: this filter at 18 psp and Windows 10 do not use. Then please use AP01.
77.
Promote selection tot Layer
78. Layers- Duplicate
79. Effects- User Defined Filter – Emboss 2 using the default settings
80. Layers- Merge- Merge Visible
81.
Selections-Invert
82. Effects-3D Effects-Drop Shadow with these settings
10/-10/60/12 black
- Repeat -Drop Shadow with these settings Vertical -10 and Horizontal 10
Selections- Deselect All
83. Activate the tube ‘’1Patries_BL92-poppy4-2 layers -9-7-09.psp’’’
- Edit/ Copy-Edit - Paste as new layer on your working image
- Activate your Move Tool (M) move to the bottom left side (see finished image) -Set the layer opacity of this layer to 73%
84. Image - Add borders-Symmetric checked: 1 pixel -backgroundcolor
85. Image
Resize to 950 pixels width
Save as JPEG
I hope you enjoyed this lesson
Renée
This lesson was written by Renée 21/03/2016
Edited and Update
2016
*
Any resemblance with an existing lesson is a coincidence
* Do not forget to thank the people who work with us and for us I have appointed the tubeurs and translators
Thanks Renée
*
| 
 Translations


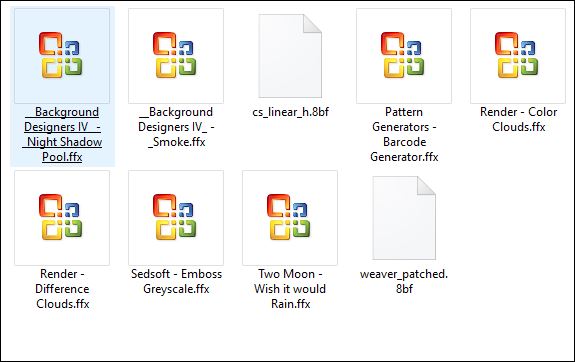


 When you see this logo the filter is imported in Unlimited

 All rights reserved