|
New
Translations here
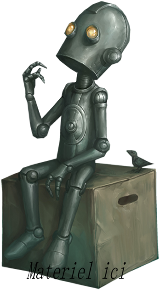
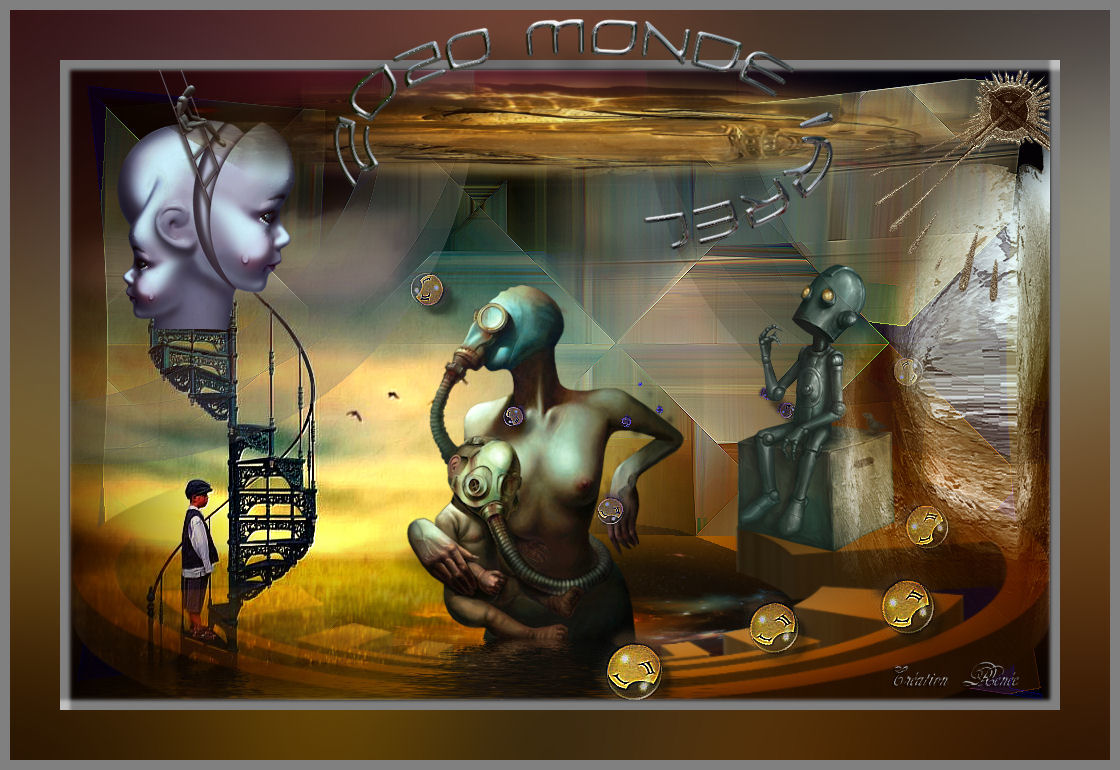
2020 Monde irréel
*
*
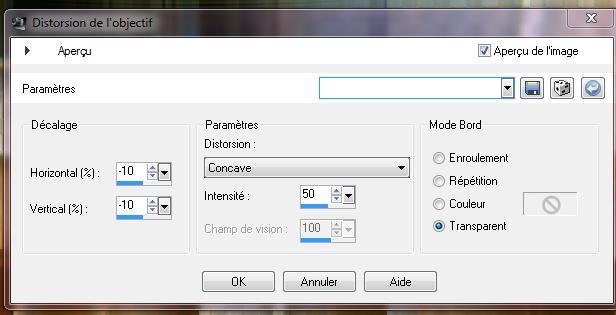
Let's start the lesson. 1. Open a new transparent image 980 x 630 pixels 2. Selections- Select All- 3. Open the tube « 326 -png » Edit/copy- Edit/ paste into selection 4. Selections- Deselect All 5. Effects- Plugins - Toadies /Glasswork colour 6. Effects- Plugins- Toadies /weaver 59/48/222 Repeat this filter with the same settings 7. Image -Flip 8. Effects- Distortions Effects- Lens Distortion with these settings
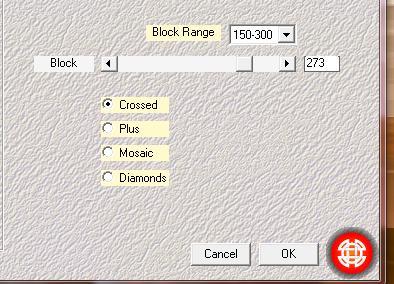
9. Effects- Plugins Medhi /Sorting tiles with these settings
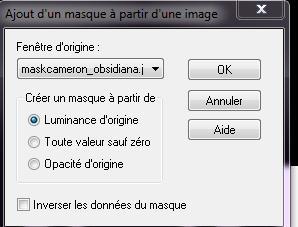
10. Effects- Edge Effects- Enhance 11. Layers- New Raster Layer 12. Layers- Arrange- Move Down 13. Selections- Select All-Open the tube « fondbase »Edit/copy- Edit/ paste into selection 14. Selections- Deselect All 15. Layers- Duplicate 16. Layers- Arrange- Bring to Top 17. Layers- New Mask layer from Image and choose Mask: ''maskcameron-obsidiania''
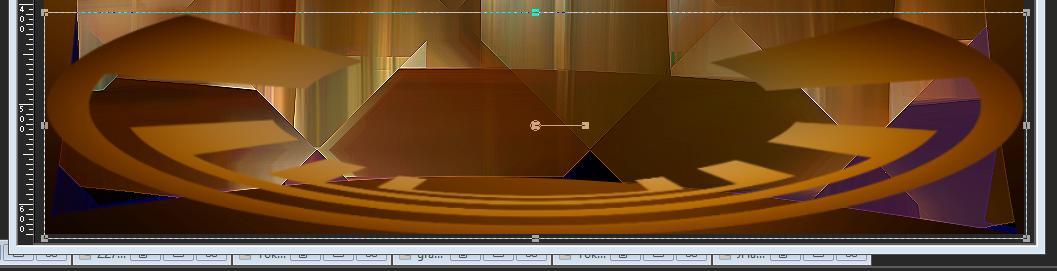
18. Layers- Merge- Merge Group 19. Effects- Distortions Effects-Polar Coordinates-Rectangular to Polar-Repeat checked 20. Activate the Pick Tool/Deformation tool (K) Mode Scale Pull the Top Node down to 400 and stretch on the both sides as shown in the example below
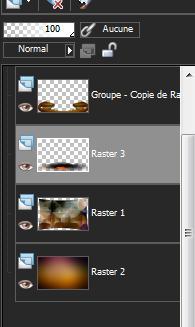
Effects- Plugins- EyeCandy 5 Impact /Extrude-tab Settings/User settings choose my preset: ''renee monde irreel'' 21. Layers- New Raster Layer 22. Selections –load/save selection –load selection from disc and choose: « monde irréel » Open the tube « terre de feu »Edit/copy- Edit/ paste into selection 23. Selections- Deselect All 24. Layers- Arrange- Move Down - Layer palette look like this now-You should have this result
25. Layer-Palette: Make raster 1 active 26. Layers- New Raster Layer/Selections –load/save selection –load selection from disc and choose: " renee irréel 2
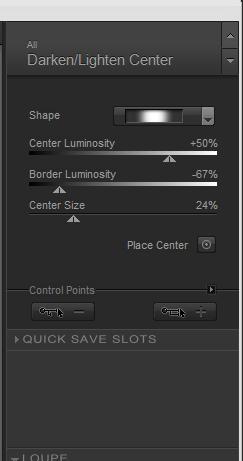
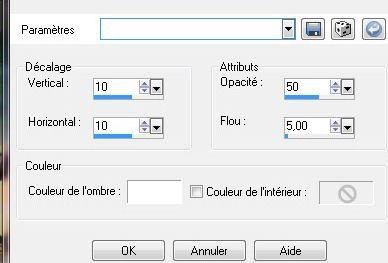
"/ 27. Selections- Deselect All 28. Activate the top of the layer-Palette 29. Open the tube « escalier sans issue »Edit/ Copy –Edit/ paste as new layer on your working image and move to the left 30. Effects- Plugins -FM Tile Tools /Saturation emboss using the default settings 31. Open the tube « yoka tube femme masque « /Edit/ Copy –Edit/ paste as new layer on your working image and move 32. Open the tube « bulle de metal de yoka (modified)»Edit/ Copy –Edit/ paste as new layer on your working image and move 33. Effects- 3 D Effects- Drop Shadow with these settings : 10/10/50/5 black 34. Open the tube « JHanna-294 » Image Resize to 50% Edit/ Copy –Edit/ paste as new layer on your working image and move to the left ( stairs) 35. Effects- Plugins- Color effex Pro.3 - Darken Lighten Center
36. Open the tube « Trizia tubed-cardboard-box «Image Resize to 55% Edit/ Copy –Edit/ paste as new layer on your working image and move 37. Layers- New Raster Layer 38. Selections –load/save selection –load selection from disc and choose: "renee monde irreel3" 39. Open the tube « gouffre renee « Edit/copy- Edit/ paste into selection 40. Double click on this Layer and set the Blend Mode to "Hard Light " 41. Selections- Deselect All 42. Layers- New Raster Layer 43. Selections –load/save selection –load selection from disc and choose: "renee monde irreel4" 44. Open the tube « 2011 monde irreel "Edit/copy- Edit/ paste into selection 45. Selections- Deselect All 46. Open the tube « horloge renee « . Edit/ Copy –Edit/ paste as new layer on your working image -With the move tool, move it in the upper right corner 47.Open the tube "demi lune «" . Edit/ Copy –Edit/ paste as new layer on your working image -With the move tool, move it in the upper left corner -- Double click on this Layer and set the Blend Mode to "Exclusion" 48. Layers- Duplicate /Image Mirror /--Double click on this Layer and set the Blend Mode to "Difference " -Set the layer opacity of this layer to 49 49. In the Layer-Palette- Make raster 10 active (renee horloge ) 50. Layers- Arrange- Bring to Top 51. Is all in place ?? 52. Layers- Merge- Merge Visible 53. Edit/Copy !! 54. Effects- Plugins - Nick Software Color effex Pro.3 / Darken Lighten Center
55. Image - Add borders-Symmetric checked:10 pixels black 56. Image - Add borders-Symmetric checked:50 pixels bright color 57. With the magic wand -select the border of 50 pixels 58. Edit-Paste into selection (Image is still in your PSP memory) 59. Adjust-Blur- Gaussian Blur : Radius: 100 60. Selections Invert 61. Effects-3D Effects-Cutout with these settings
62. Repeat: Effects-3D Effects-Cutout with these settings H and V -10 63. Selections- Deselect All 64. Activate the tube of the text -Edit/copy- Edit/ paste as new layer on your working image and move. Ore write your own text. 65. Image - Add borders-Symmetric checked:10 pixels #808080
Save as JPG I hope you enjoyed this lesson This lesson was written by Renée 18 Mars 2010
Reminder to write in a circle ! -Layers- New Raster Layer- Preset shape tool/look for the oval,Draw an oval Close your background color
-Go with the cursor to the line of your oval=>until you see the Text symbol +A) -Layers- New Raster Layer /Type your text in the window -Go to layers: click on the + sign and close the layer with, (with the oval) ( Delete).
I am part of Tutorial Writers Inc. My tutorials are regularly recordedt ReneeGraphisme__All rights reserved
|
 Translations